
TT panel Docker one-click deployment security CMS tutorial
Baota installation
Description: Docker deployment is applicable to Baota panel version 9.2.0 and above (versions released after September 5, 2024)
The following Docker installation tutorial for AnQi CMS is based on the Baota panel version 9.5.0 demonstration.
If your server has not installed Baota, please install it according to these steps. If it is already installed, you can skip it.If you are not installed with version 9.2.0 or higher, you can try upgrading to version 9.5.0 or higher first.
Download address of Baota:https://www.bt.cn/new/download.html
Visit the Baota download address, select [Linux Panel Installation Script], choose [Universal Installation Script (recommended)], copy the command, log in to the server, paste and execute the installation.
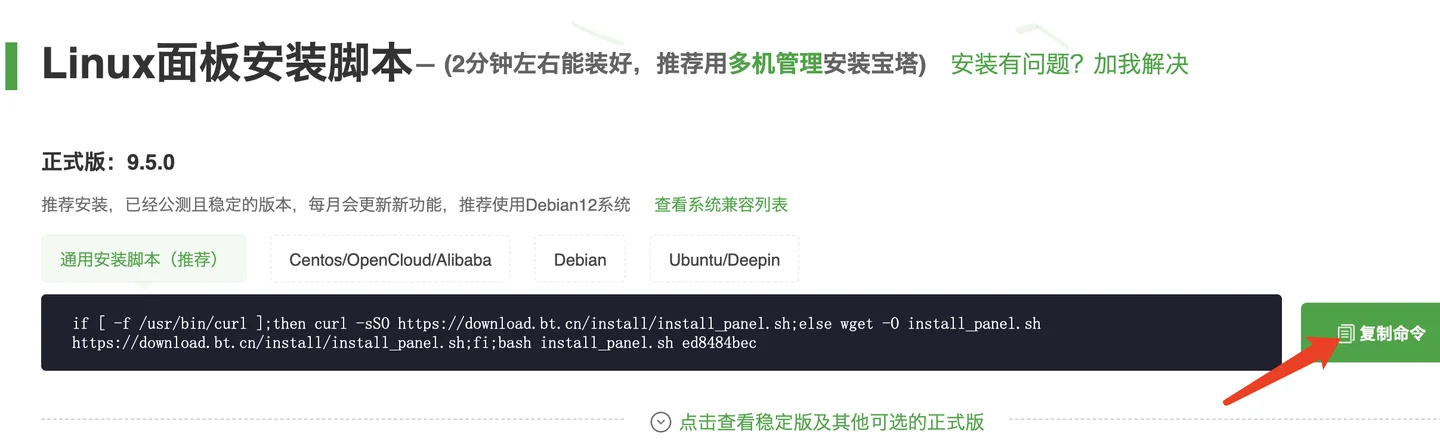
In addition to command installation, you can also choose to use Baota's online installation. If you encounter problems during installation, you can find customer service above the Baota download address and request customer assistance.
Install AnQi CMS application using Docker
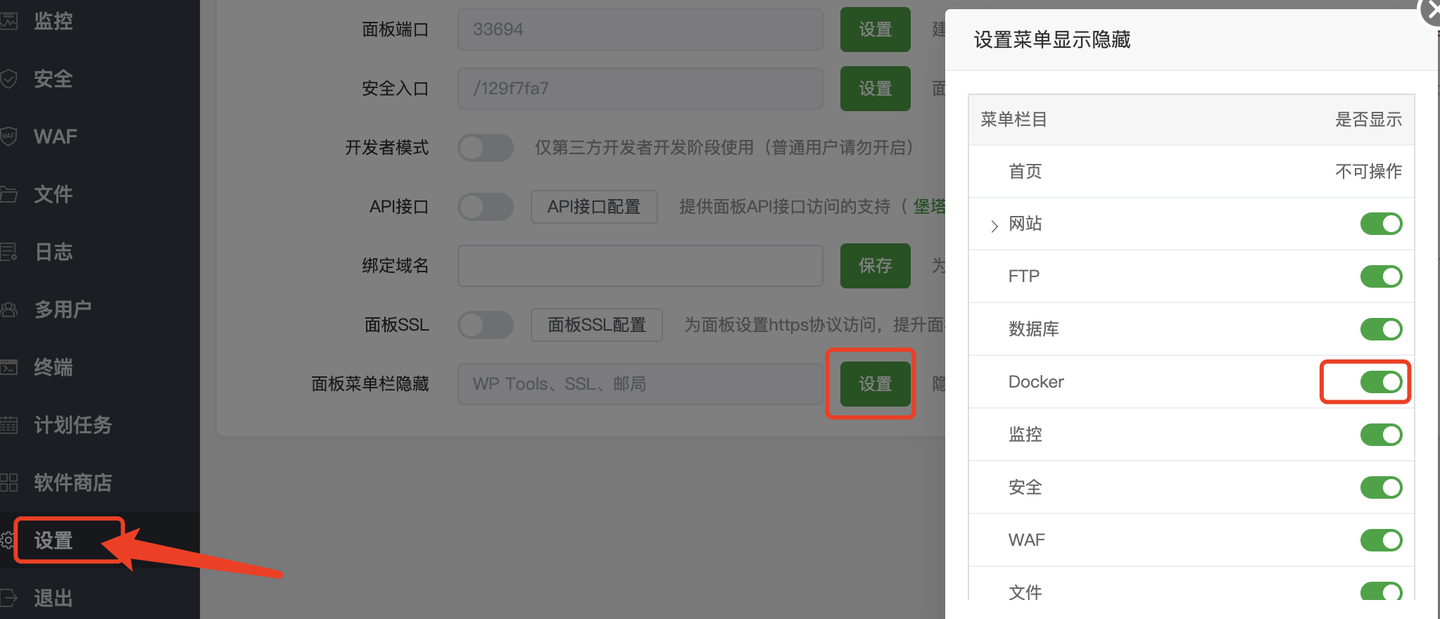
Docker is an open-source application container engine (Location: Left menu -> Docker, if not found, go to: Panel settings -> Panel menu hidden -> Turn on Docker display)
About Baota panel Docker usage, if you have any questions, you can visithttps://www.bt.cn/bbs/thread-137717-1-1.htmlSeek help.
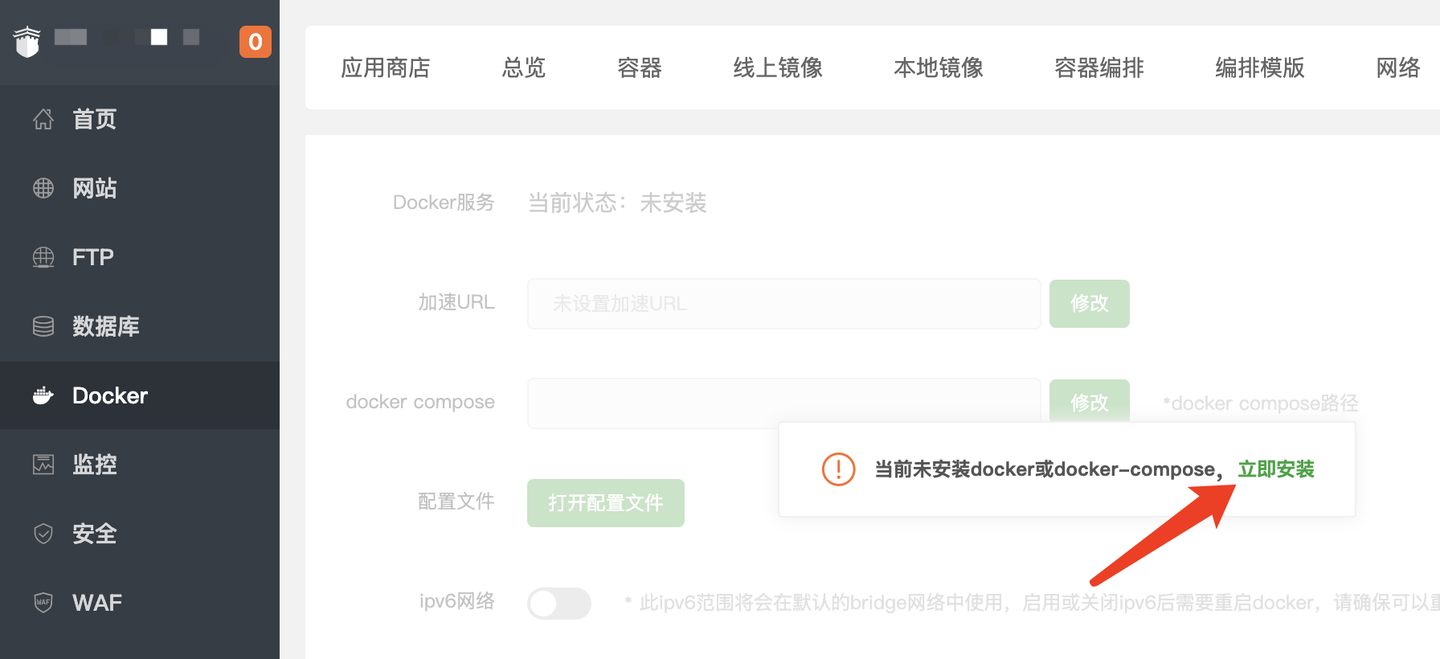
When you first enter, it will ask you to install Docker first, click [Install Now] to install.
After installation, dependency installation is required.
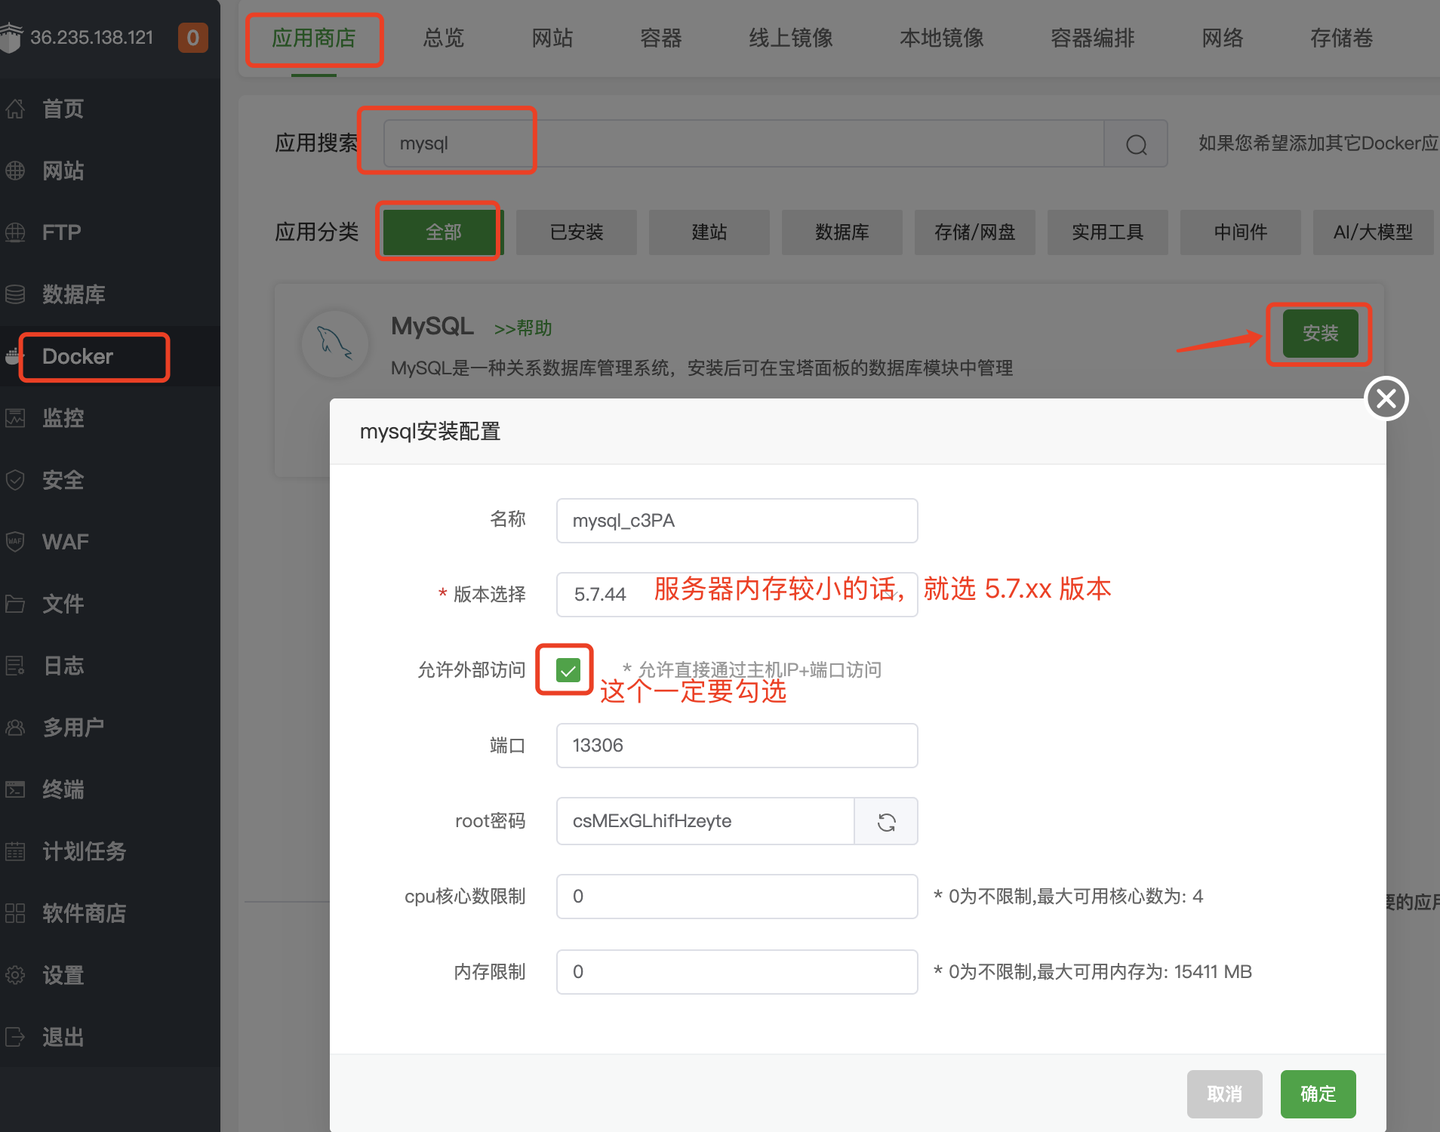
Before installing AnQi CMS, you need to install Docker version of MySQL first, search for mysql in Docker's app store, and click to install.
If the server memory is less than 2G, please select version 5.6. The default is version 5.7. Check the box to allow external access (it is checked by default).
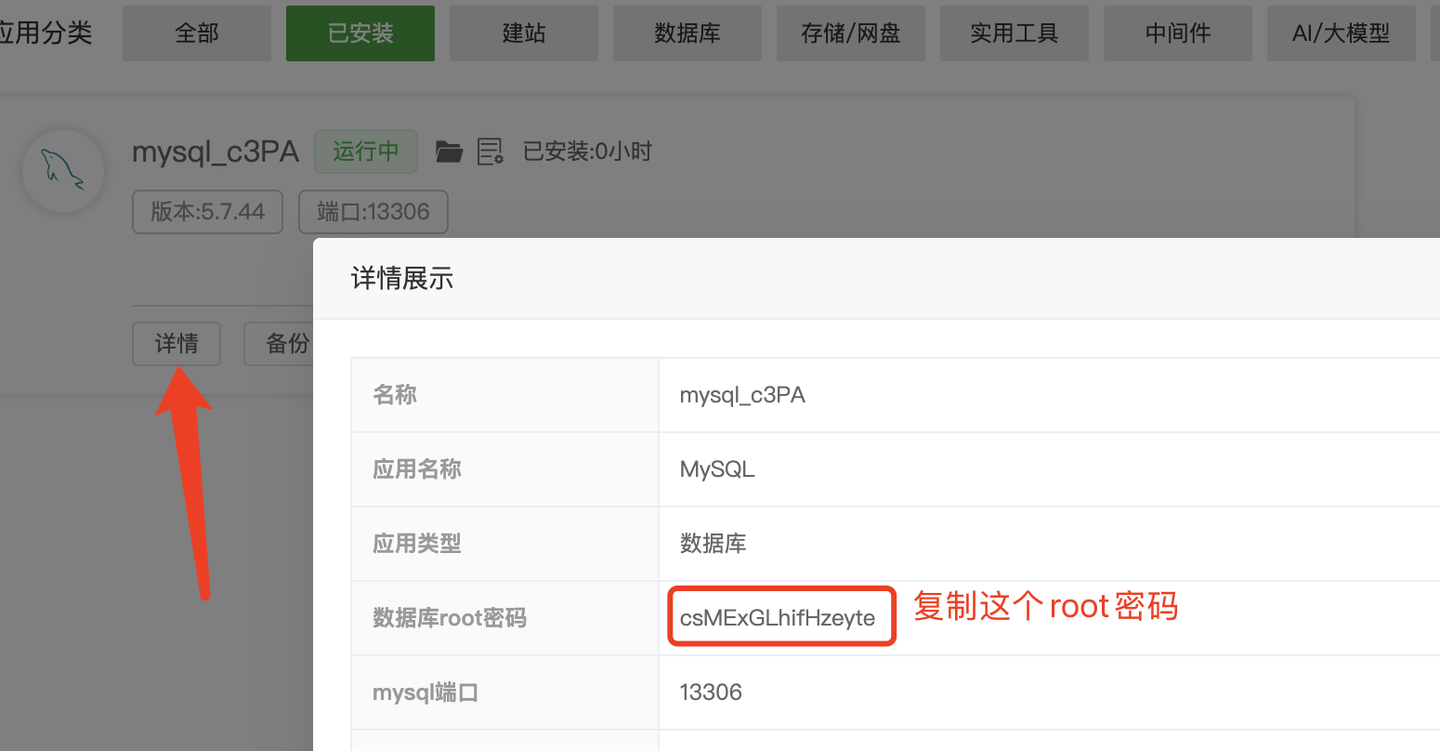
After installation, click the [Details] link, view mysql details, copy the root password, this password will be needed when installing Anq CMS later.
Search for anqicms in the app store,
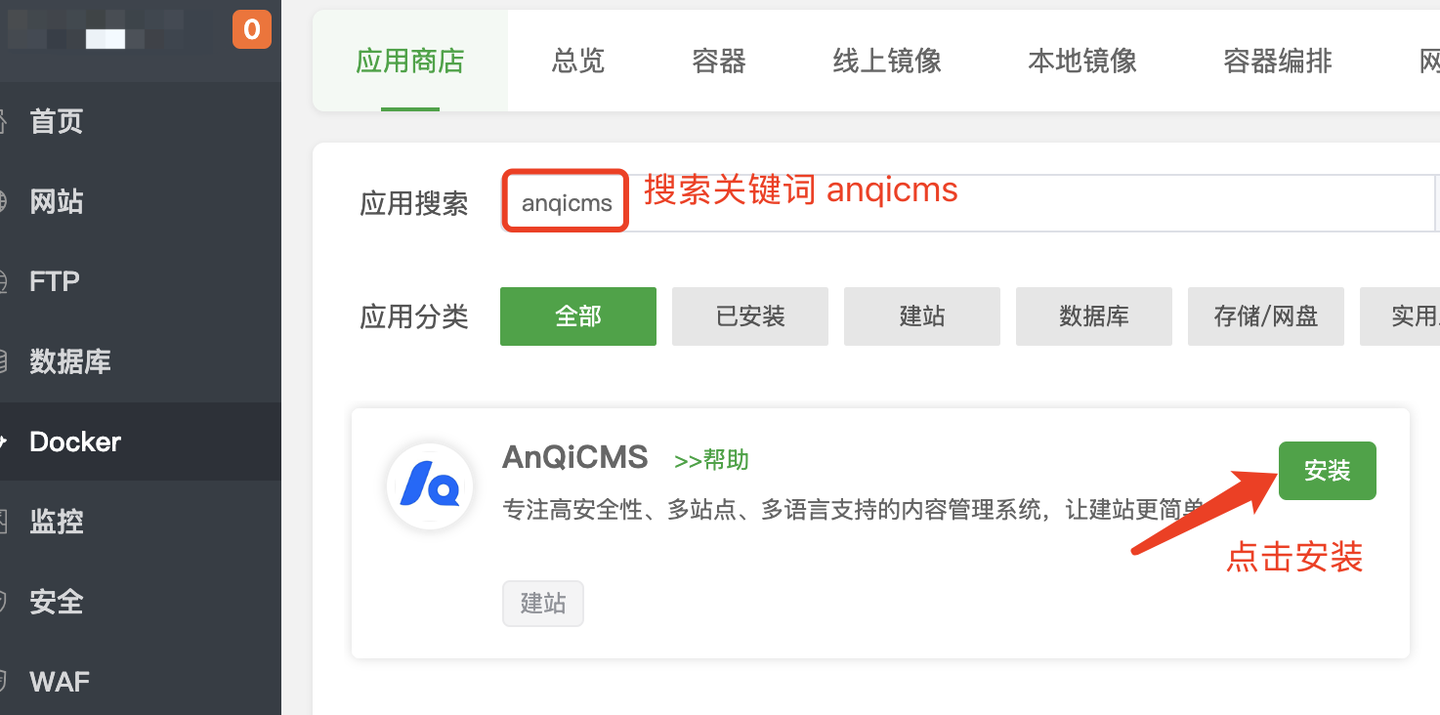
In the search results, click the [Install] button to enter the installation interface. Fill in your information on the installation interface:
- Website domain (such as: www.anqicms.com)
- Database name (The default is anqicms, if you need to install multiple anqicms, you need to change it to another database name)
- Database password (The root password that was copied after we installed MySQL and viewed the details)
- Port (default is 8001, if you have installed multiple anqicms, you need to change it to a different port, such as 8002, 8003, etc.)
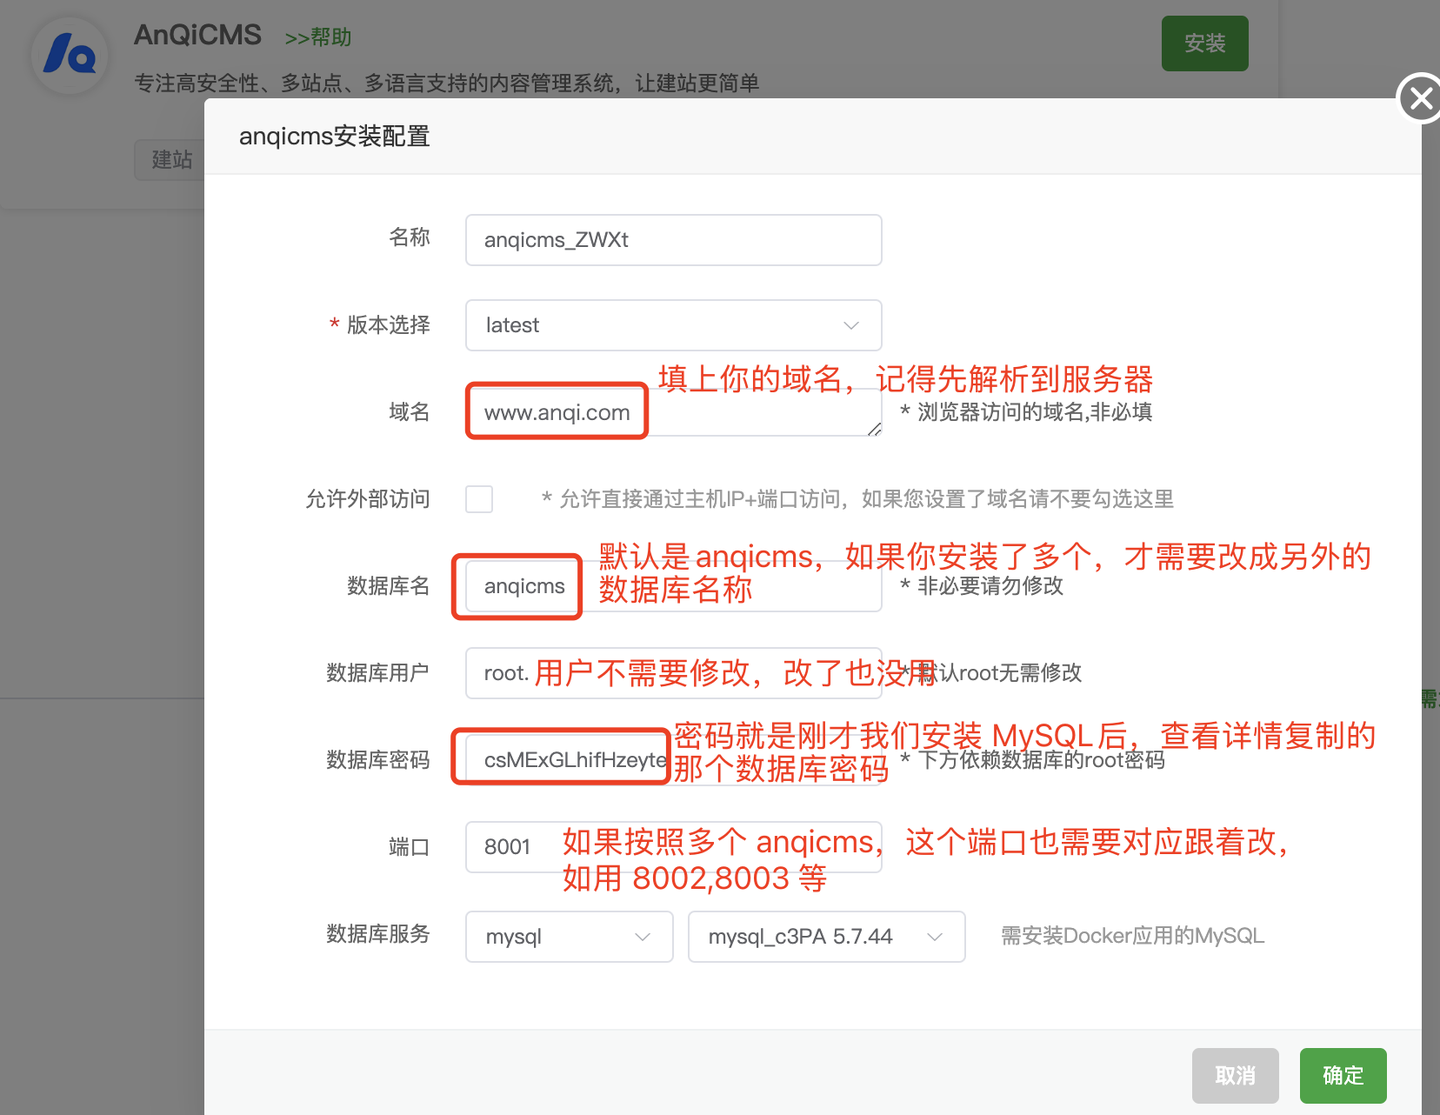
Click [OK] to install. After clicking OK, the installation will not be completed immediately, please be patient and wait for 1-5 minutes until the installation is complete.
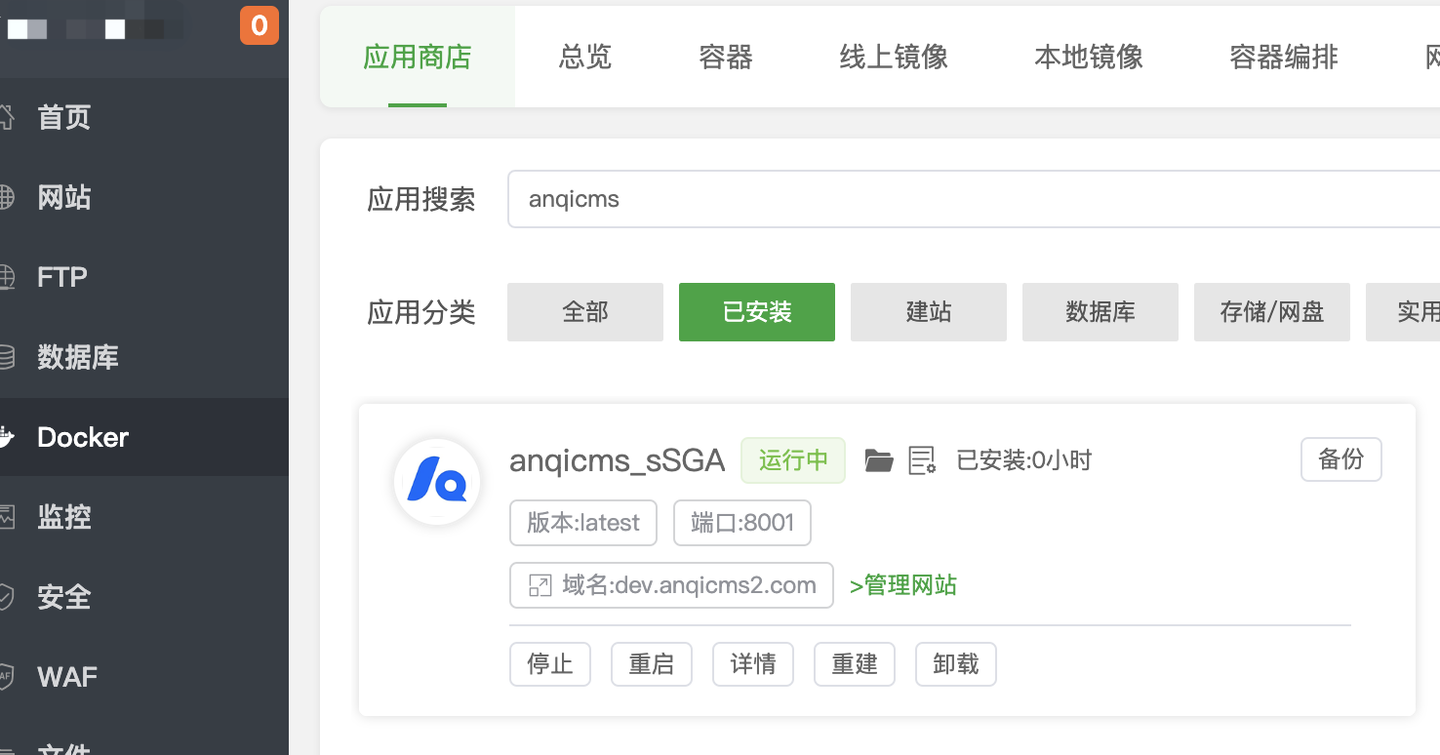
Docker installation and configuration are completed as shown in the figure below:
Start using the website
The default website has been installed and the default account and password have been set.
Default username: admin Default password: 123456
Back-end access address: your domain/system/
If your website ishttp://dev.anqicms.com/ The backend access path is: http://dev.anqicms.com/system/
Access the domain you just entered in the browser+/system/, such as:http://dev.anqicms.com/system/Open the website management interface, change the default account password, and start using it.