
How to use the multilingual site feature tutorial one: Independent multilingual site architecture
Starting from AnQiCMS version 3.4.8, it supports more powerful multilingual site features.
AnQiCMS's multilingual function supports two ways of implementation, one is to use an independent multi-site architecture (suitable for large/highly customized needs), and the other is a single-site translation plugin architecture (suitable for small/medium-sized/rapid iteration).
Next, I will guide you through the multilingual features of AnQiCMS:
Method 1: Independent multi-site architecture (suitable for large/customized needs)
This method is more flexible, but it also requires higher requirements for site operators, more configuration and code development work is needed, and the synchronization and translation of articles also need to be handled.
Operation steps
First step: Enable multi-language site feature
- Log in to the AnQiCMS backend management interface.
- Log in to the Anqi CMS official website account. > Note: If you are not logged in to the Anqi CMS official website, you will not be able to use the HTML page translation feature.

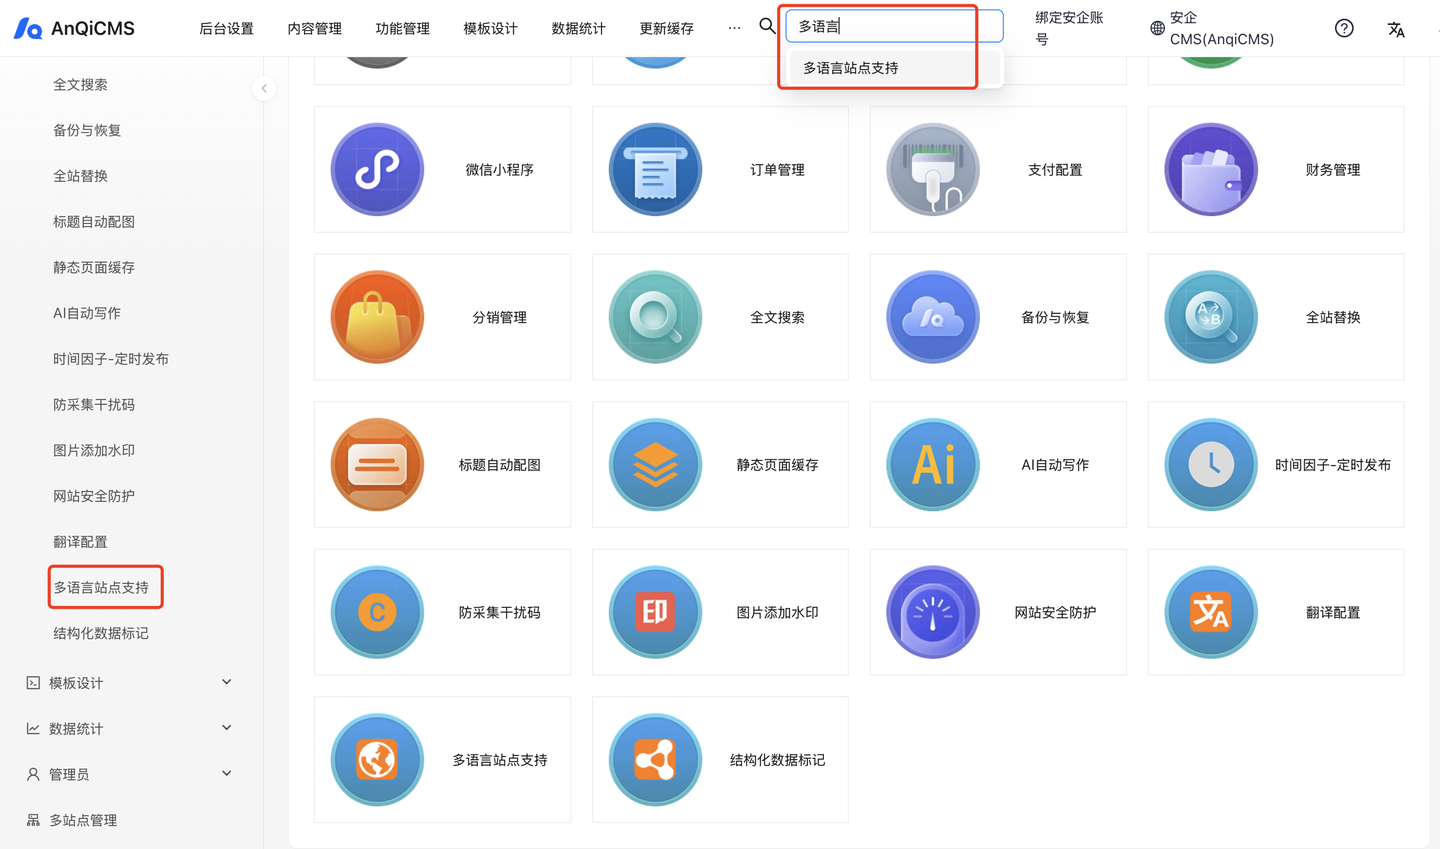
Enter [Function Management], search "Multilingual Site Support".
Click to enter the Multilingual Site Support feature interface.
Then, configure in the configuration interface:
- Do you want to enable multilingual site support -> Yes
- Site storage processing method -> Each language has its own independent site storage
- Site display mode -> Independent domain | Independent directory
- Main site language -> Chinese
- Is automatic translation enabled -> Yes
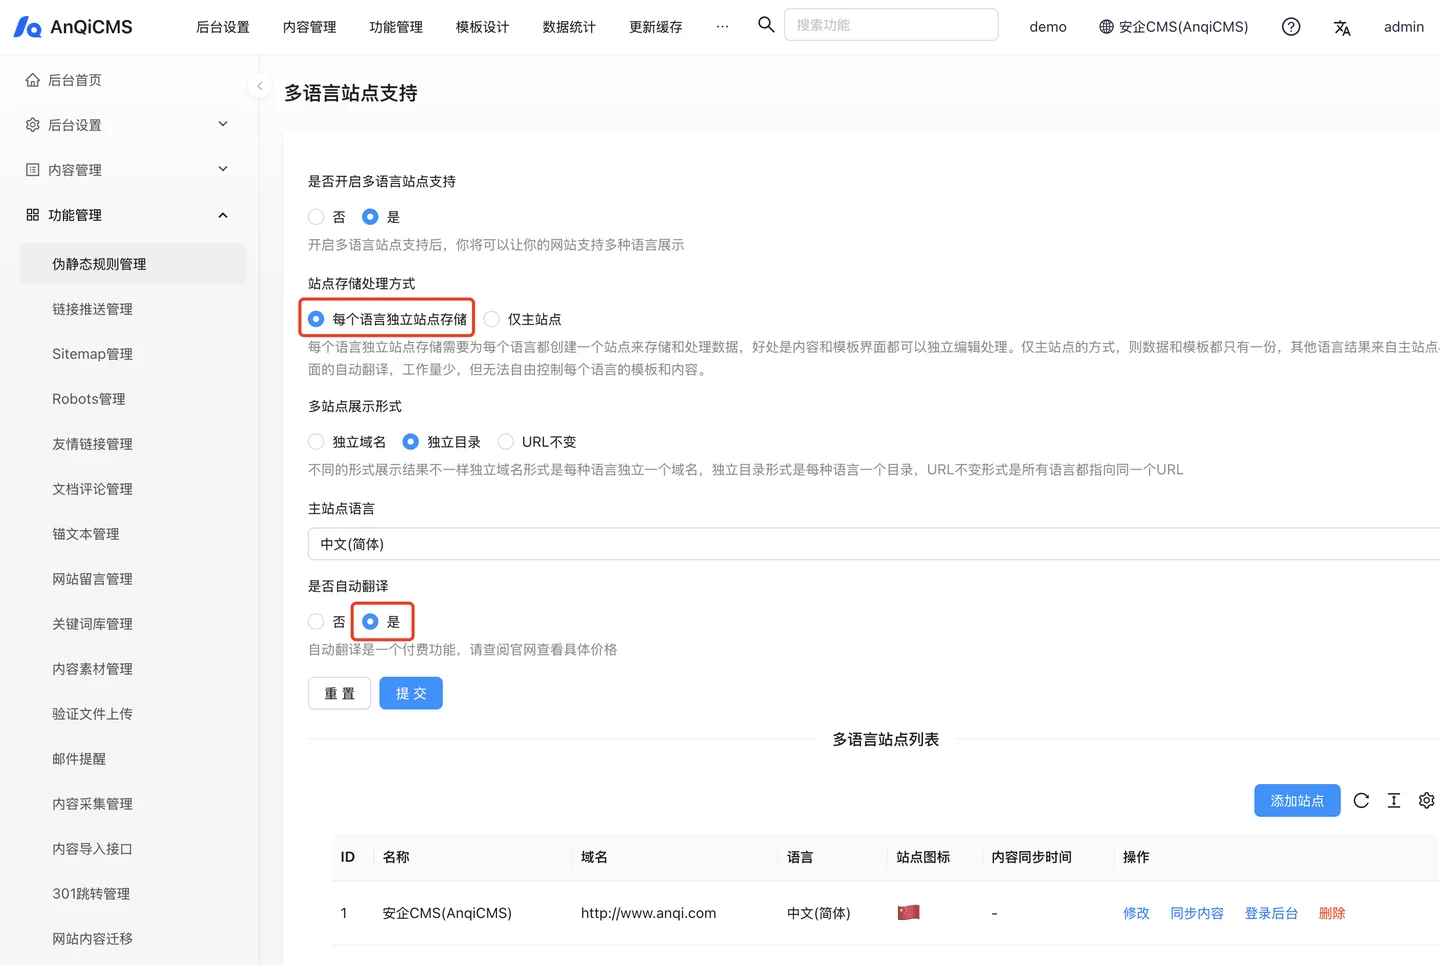 Click the [Submit] button to save the configuration and proceed to the next step.
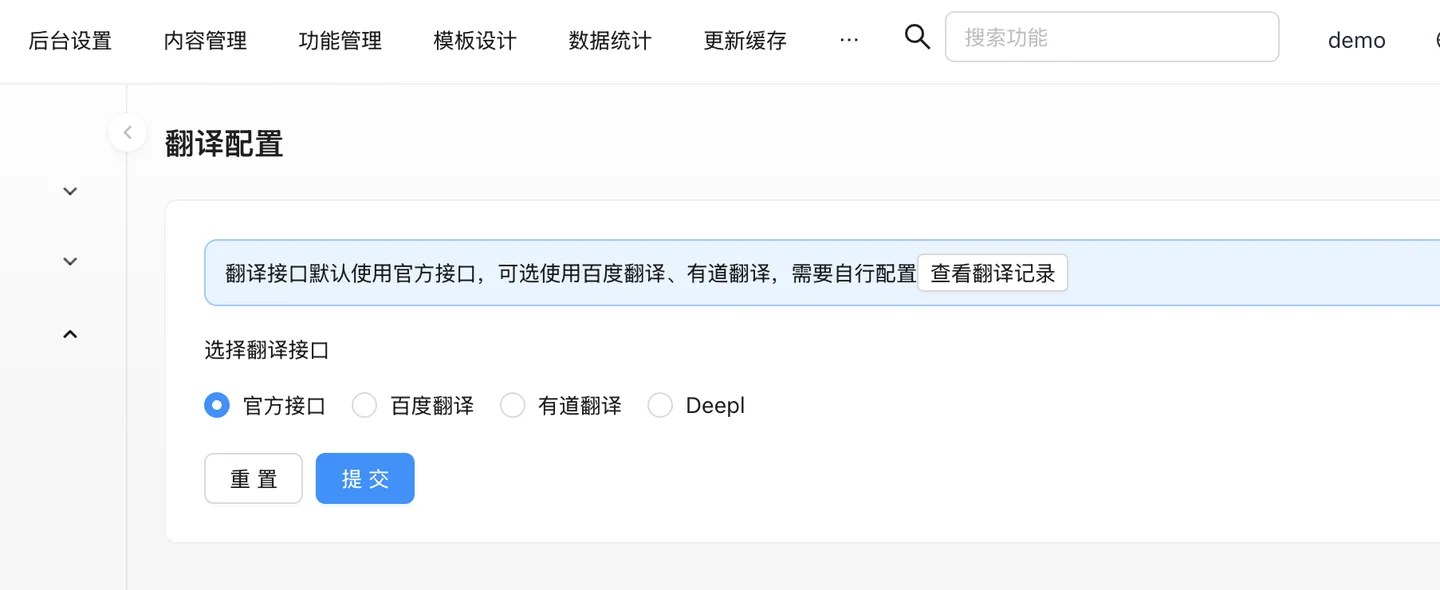
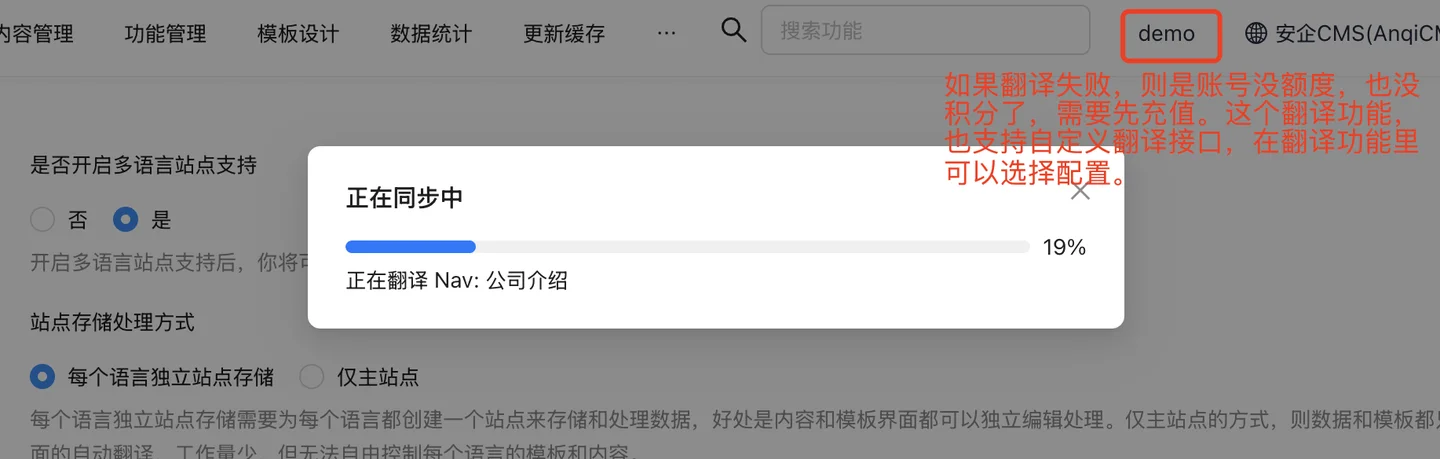
Note: If the automatic translation feature is enabled, the default will be to use the Anqi official translation interface.You can also configure a custom translation interface. Search for [Translation Configuration] in the features, and select the appropriate translation interface configuration in the translation configuration.
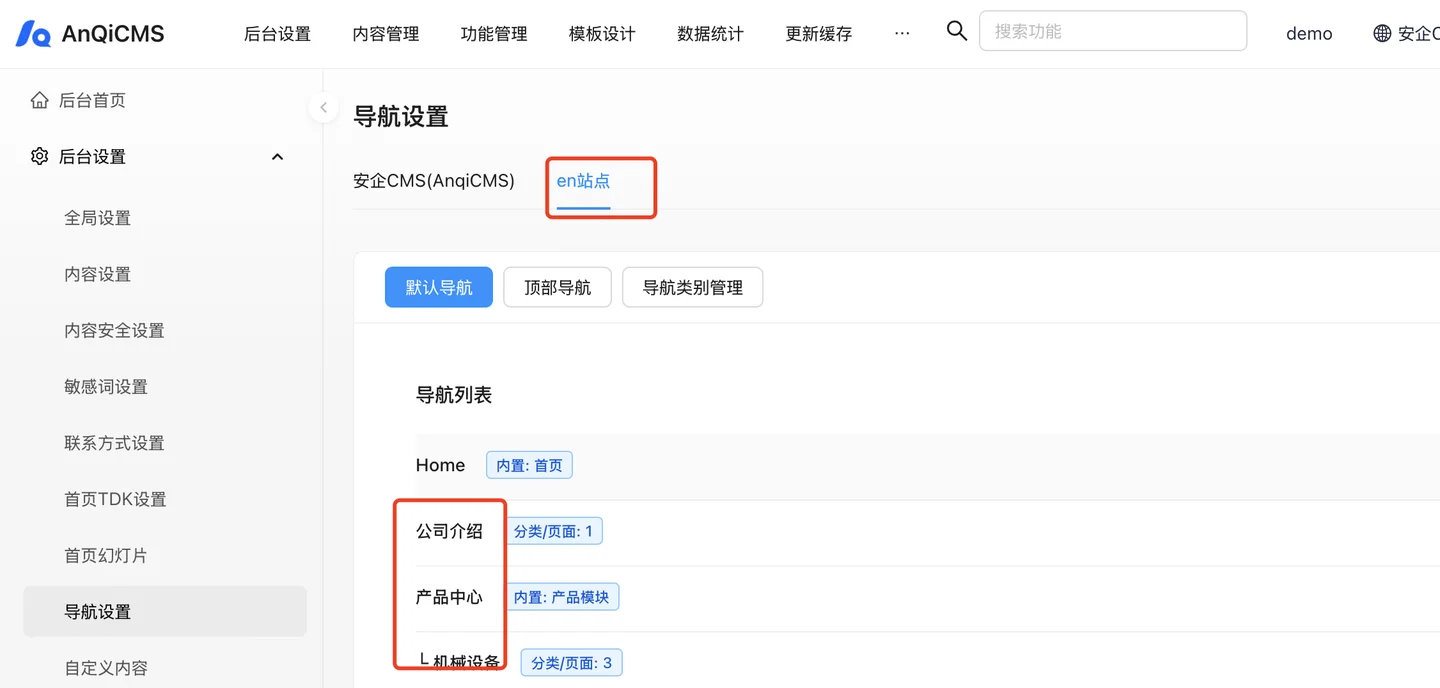
Step two: Create multilingual child sites
- In the multilingual site list, click the [Add Site] button to add a multilingual site.
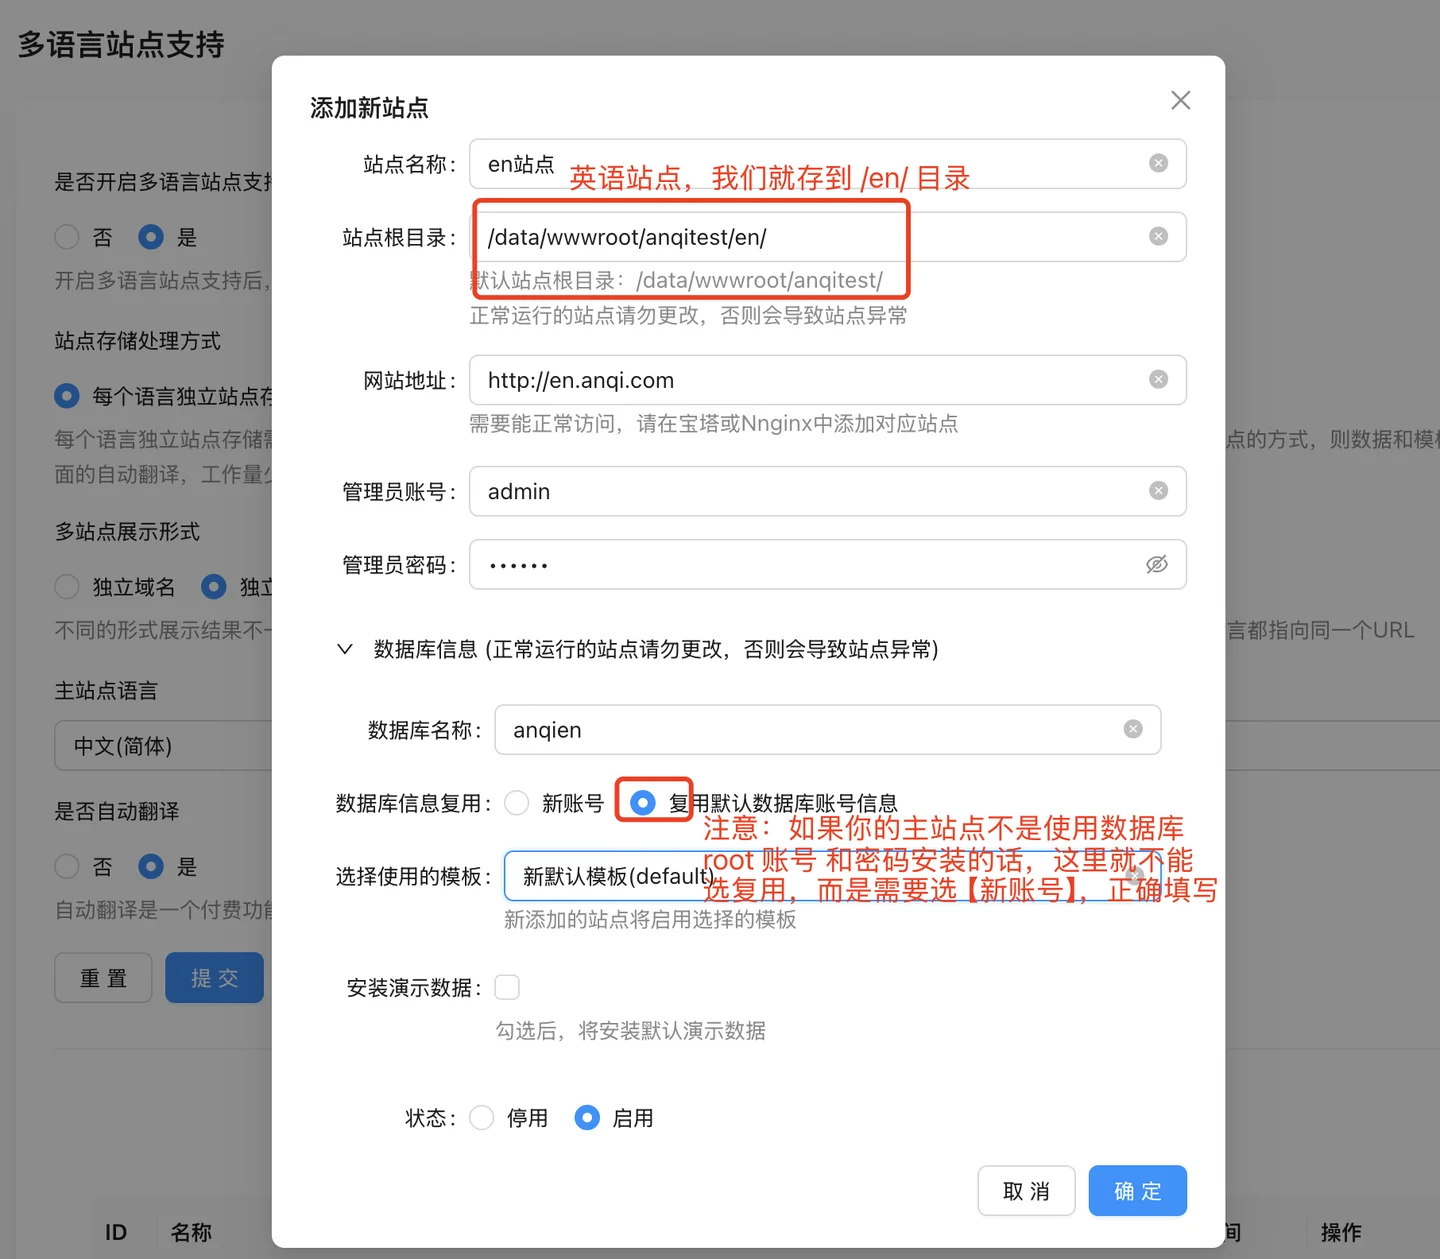
When adding for the first time, the sub-site does not exist, so you need to add a site first. As shown in the figure:
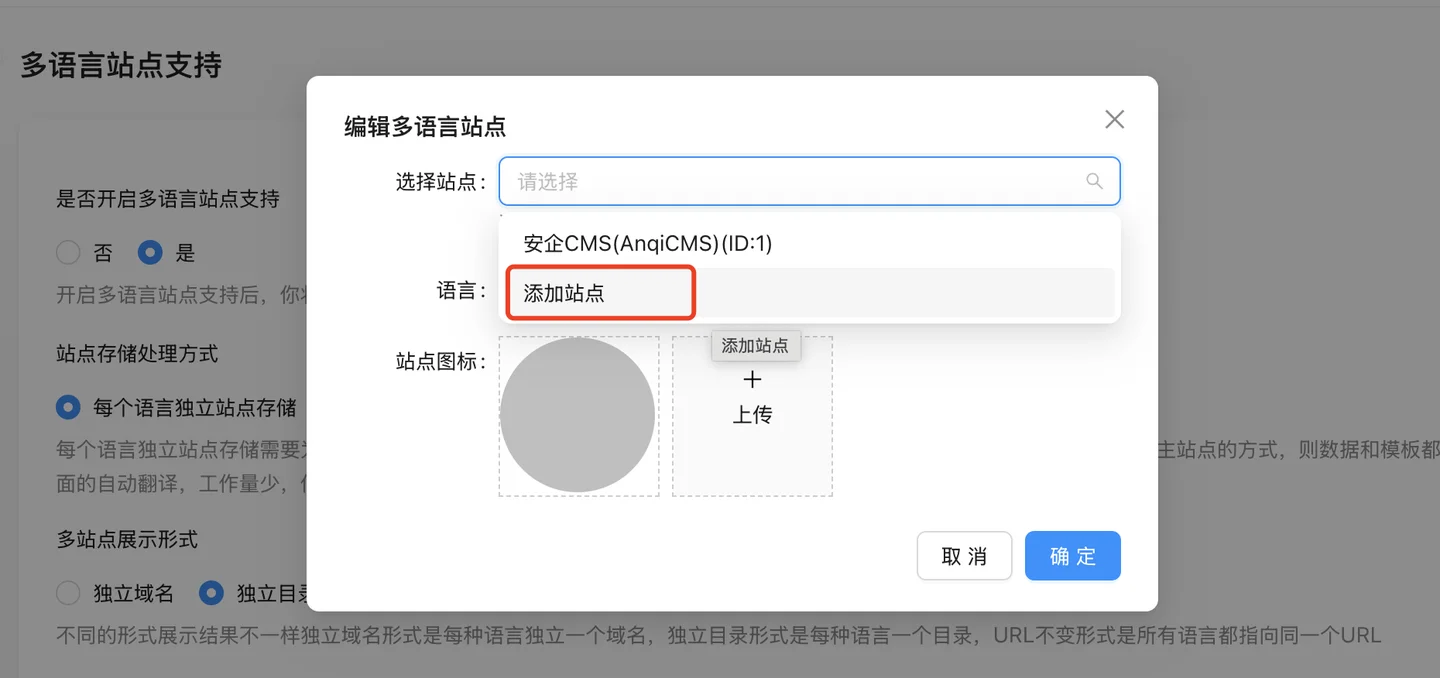
Note: During the process of adding a site, attention should be paid to the following issues: the site directory, name it according to the corresponding language.Database reuse issue, if your main site is not installed using the database root account and password, then you cannot select the option to reuse the default database account information, but you need to select the option to create a new account and fill in the correct database account information.
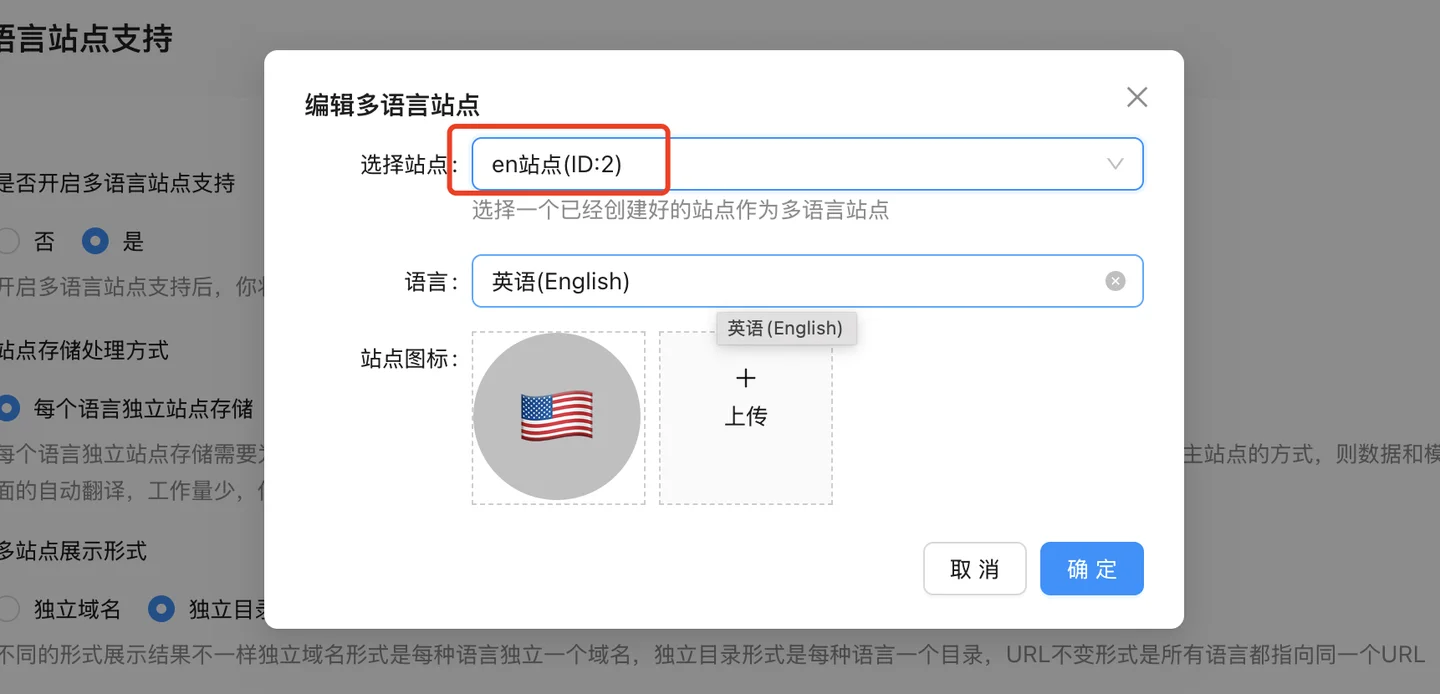
- After creation, return to the multilingual site addition interface, select the site, select the newly created site, and select the corresponding language, as shown in the figure:
The third step: content synchronization processing
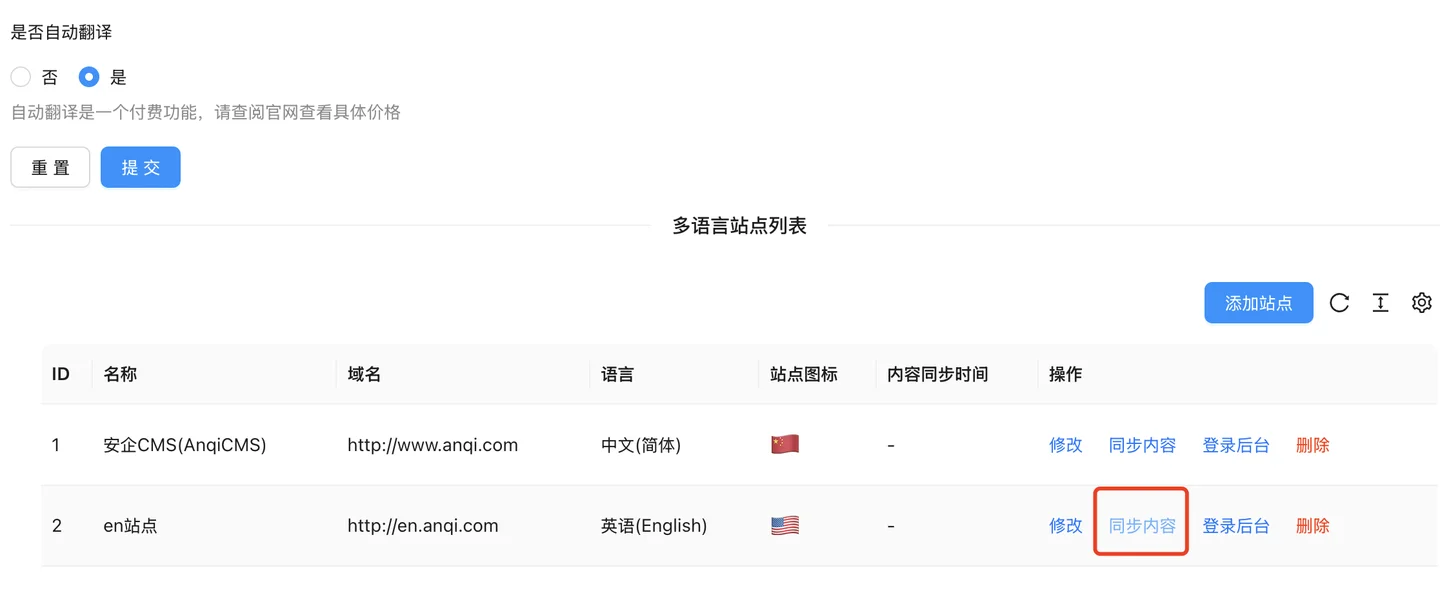
- After the first creation of many language child sites, the child sites have not yet synchronized the content, and manual synchronization needs to be triggered.In the list of multilingual sites, you can see the synchronization button, click the [Synchronize Content] button to manually synchronize the content (full synchronization or incremental synchronization), the first time is full synchronization.
 > During the synchronization process, if automatic translation is selected above, it will synchronize and translate at the same time in this process, so if the content is more, the synchronization process will take longer.
- After synchronization is complete, there may still be some content that has not been successfully synchronized. Therefore, you need to switch to the corresponding language site, check the content, and manually translate it:
Step 4: Template Translation and Multilingual Switching
Templates support multilingual tags, usage:
{% tr 变量名称 %}. Use translation tags to enable multilingual support in templates. The method to enable multilingual functionality in templates is as follows: Create a locales directory under the template directory, then create a folder named after the current language code, such as zh-CN or zh-TW, en, etc.Create a yml file in the folder, for example, default.yml.The directory structure is as follows:./locales ├── en │ └── default.yml ├── ja │ └── default.yml ├── nl │ └── default.yml └── zh-CN └── default.ymlChinese
locales/zh-CN/default.ymlFile content as follows:"yourLocation": "您的位置"English
locales/en/default.ymlFile content as follows:"yourLocation": "Your Location"Call the method: {% tr "yourLocation" %}, after the template is parsed, it will display the content in different languages accordingly, such as displaying Chinese as
您的位置and English asYour location.Add multi-language switch code in the template:
  {%- languages languages %}
<div class="languages">
  {%- for item in languages %}
  <a href="{{item.Link}}" class="{% if item.IsCurrent %}active{% endif %}" data-pjax="false">
     <div class="language-item">
           {%- if item.LanguageIcon %}
           <img class="language-icon" src="{{item.LanguageIcon}}" />
           {%- else %}
           <span class="language-icon">{{item.LanguageEmoji}}</span>
           {% endif %}
           <span>{{item.LanguageName}}</span>
     </div>
  </a>
  {% endfor %}
</div>
{%- endLanguages %}
Step 4: SEO configuration
- Add in the HTML header
<html lang="en">Label, of course, different languages use different lang, such as Chinese, it would belang="zh-CN"If it is a multilingual template, you can set lang by calling the method, like this:<html lang="{% system with name='Language' %}">. - Use
hreflangAssociate with pages of different language versions. In the head section, the harflang:{%- languages websites %} {%- for item in websites %} <link rel="alternate" href="{{item.Link}}" hreflang="{{item.Language}}"> {%- endfor %} {%- endLanguages %}
Front-end effect
After the above configuration and template modification, the front-end can see the effect as shown in the figure, a multi-language switch menu appeared at the upper right corner: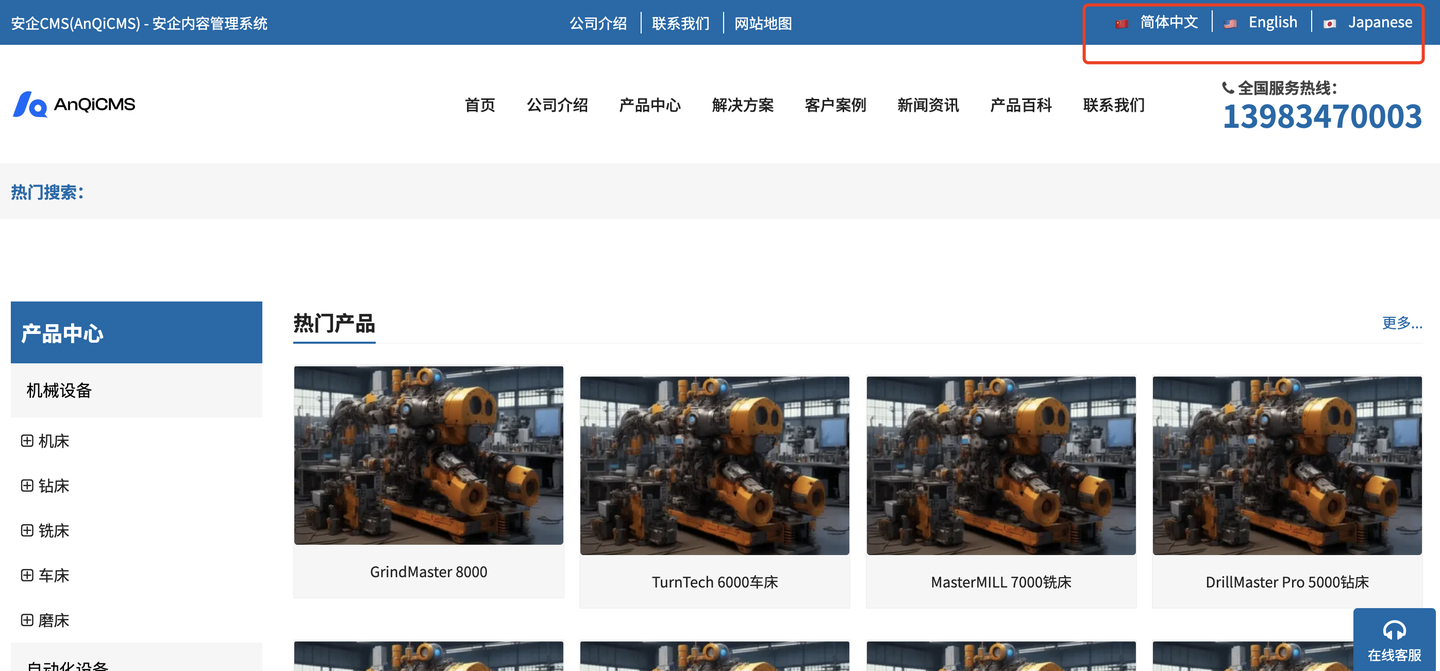
We try to switch to English, and we can see that the page has automatically translated: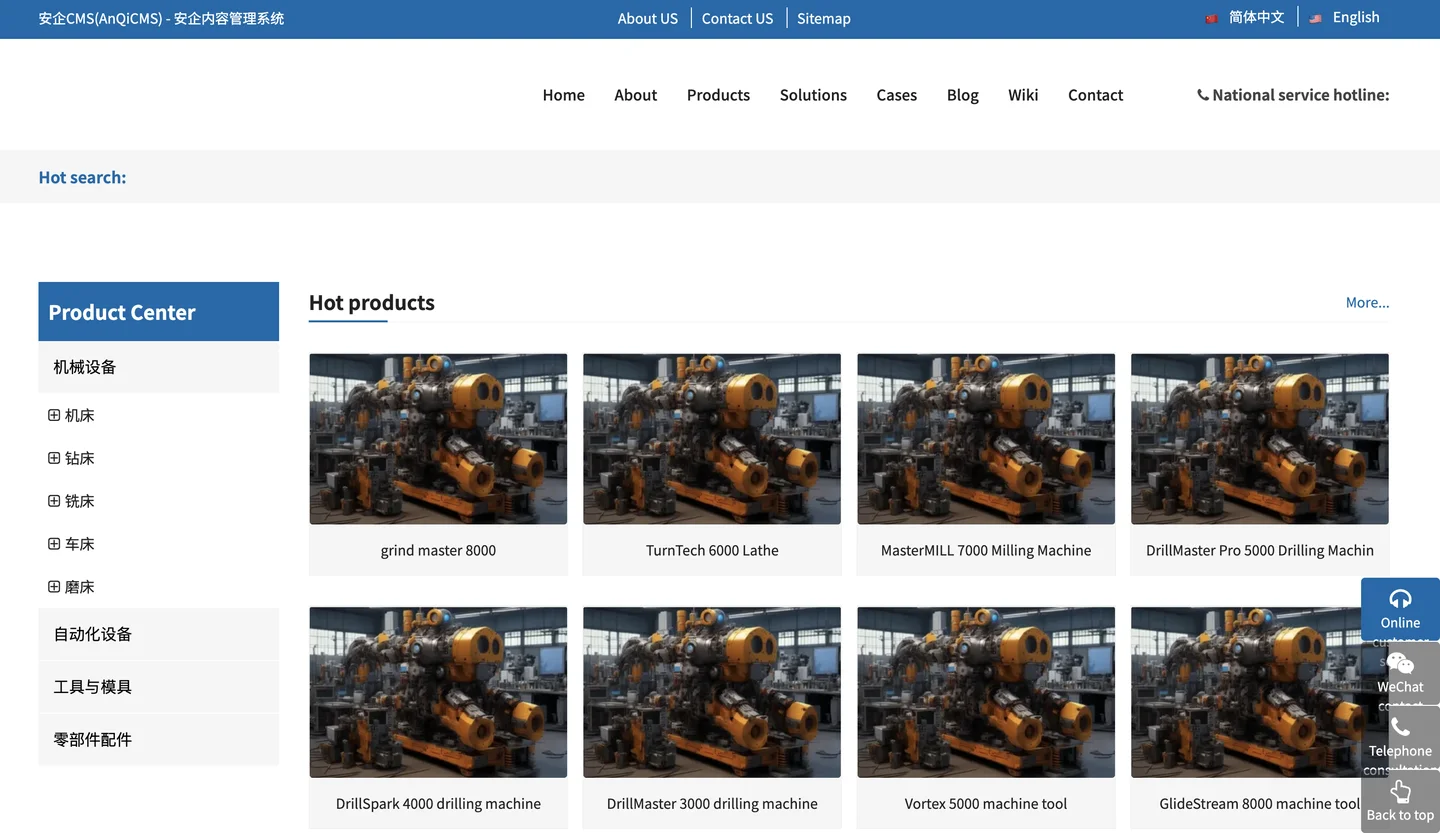
The multi-language feature is configured up to this point. Welcome to use and test it extensively. If any problems are found, please feedback promptly, and we will solve them as soon as possible.