
How to use the multilingual site feature tutorial two: Single site translation plugin architecture
Starting from AnQiCMS version 3.4.8, it supports more powerful multilingual site features.
AnQiCMS's multilingual function supports two ways of implementation, one is to use an independent multi-site architecture (suitable for large/highly customized needs), and the other is a single-site translation plugin architecture (suitable for small/medium-sized/rapid iteration).
Next, I will guide you through the multilingual features of AnQiCMS:
▶ Method 2: Single-site translation plugin architecture (suitable for small and medium-sized / agile iteration)
Operation steps
First step: Enable multi-language site feature
- Log in to the AnQiCMS backend management interface.
- Log in to the Anqi CMS official website account. > Note: If you are not logged in to the Anqi CMS official website, you will not be able to use the HTML page translation feature.

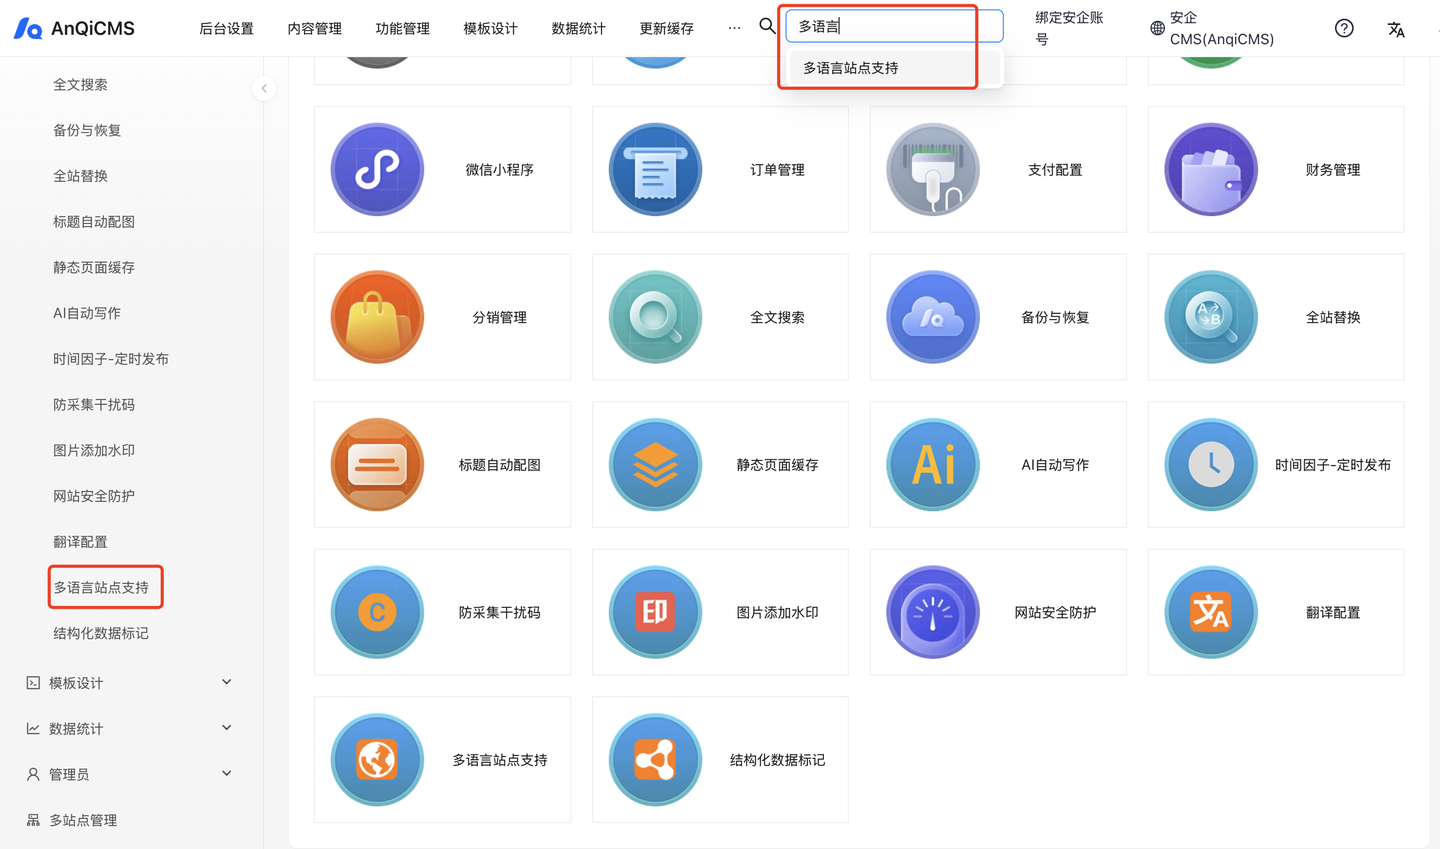
- Enter [Function Management], search "Multilingual Site Support".
- Click to enter the Multilingual Site Support feature interface.
Step 2: Configure Multilingual Site Function
- Then, configure in the configuration interface:
- Do you want to enable multilingual site support -> Yes
- Site storage processing method -> Only the main site
- Site display mode -> Independent domain | Independent directory
- Main site language -> Chinese
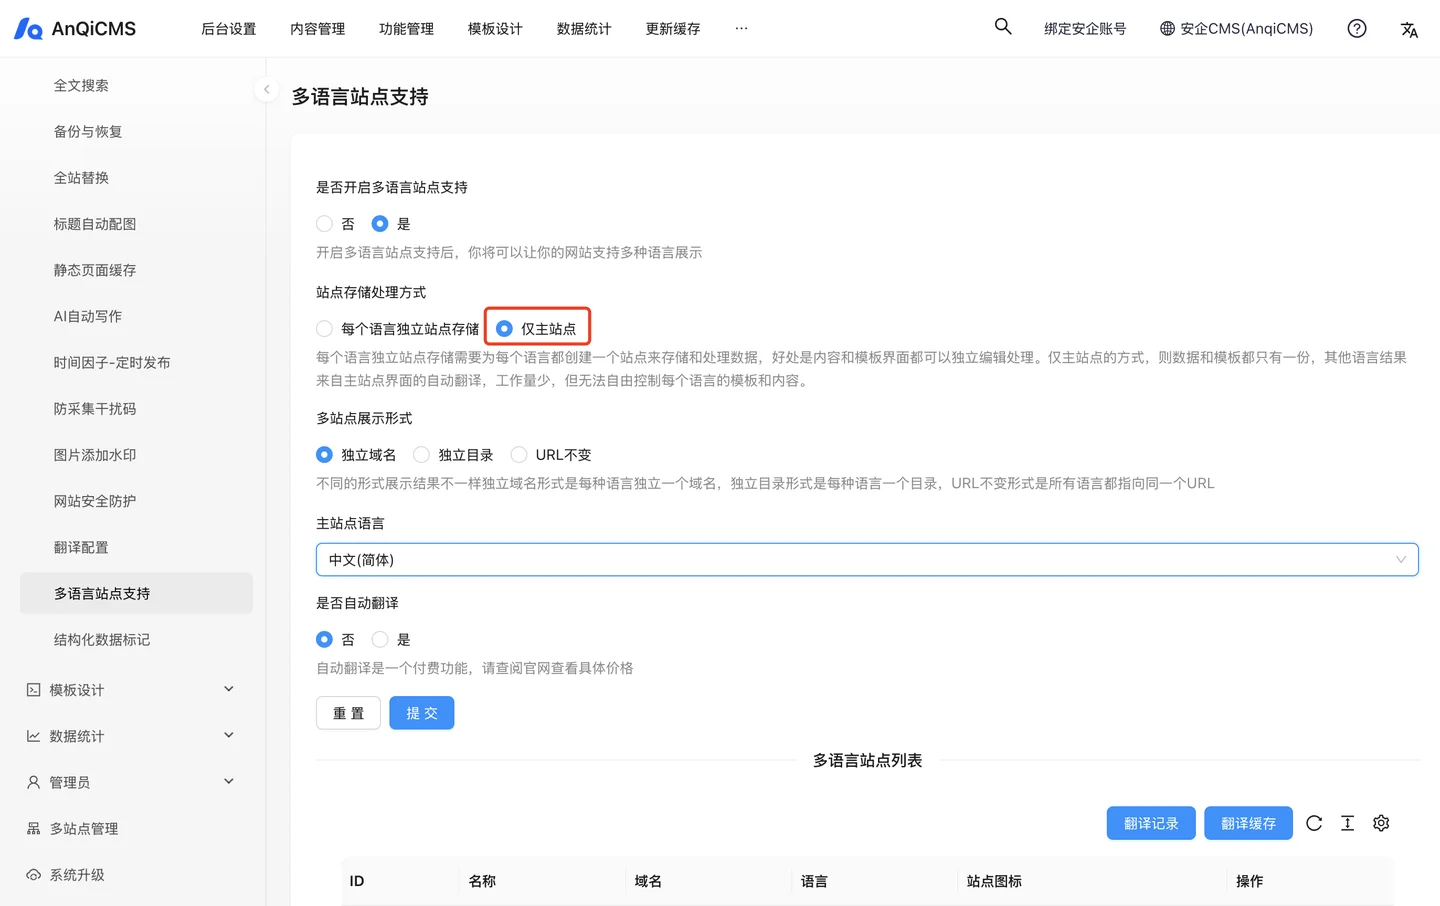 Click the [Submit] button to save the configuration and proceed to the next step.
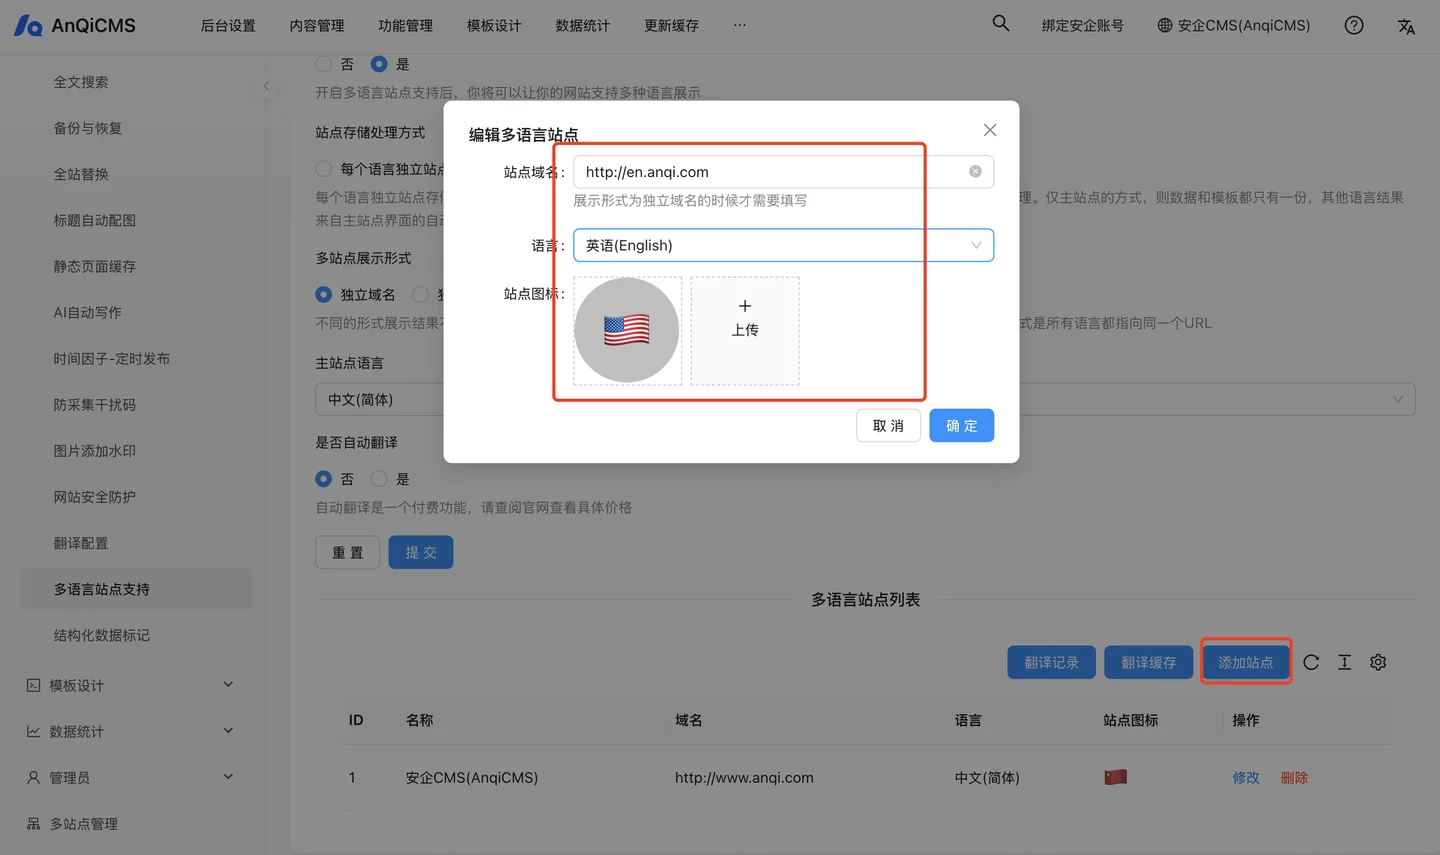
- In the multilingual site list, click the [Add Site] button to add a multilingual site. > Note: Site domain must be filled in only when choosing the independent domain name form, when choosing the form of independent directory and URL unchanged, no need to fill in the site domain.
 The effect after adding:
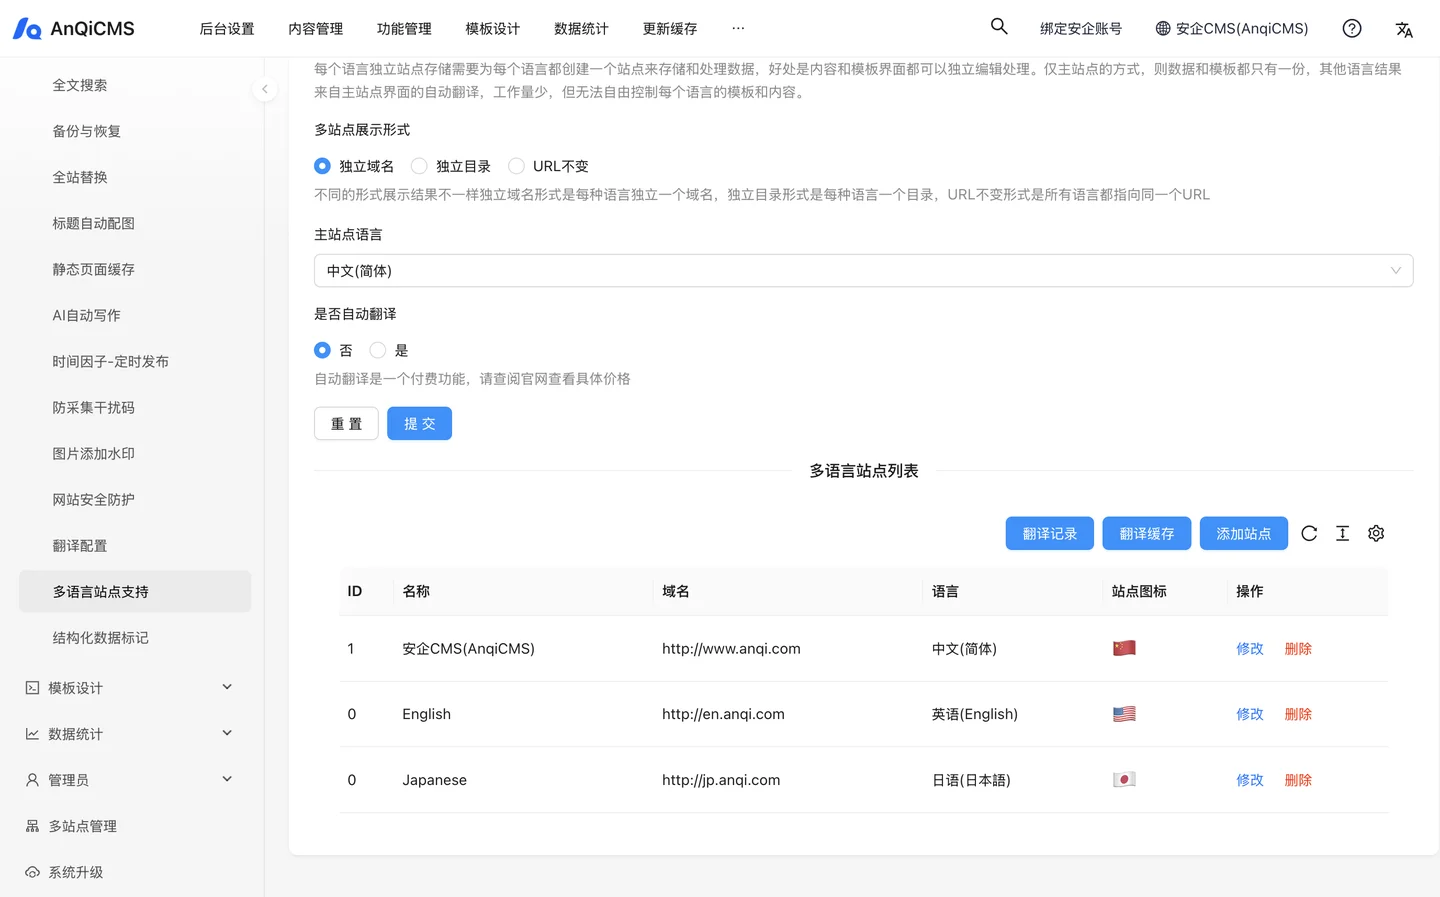
Step 3: Mark the content to be translated
Edit the template file, mainly
base.htmlIn the head section, add the harflang and languages toggle tags.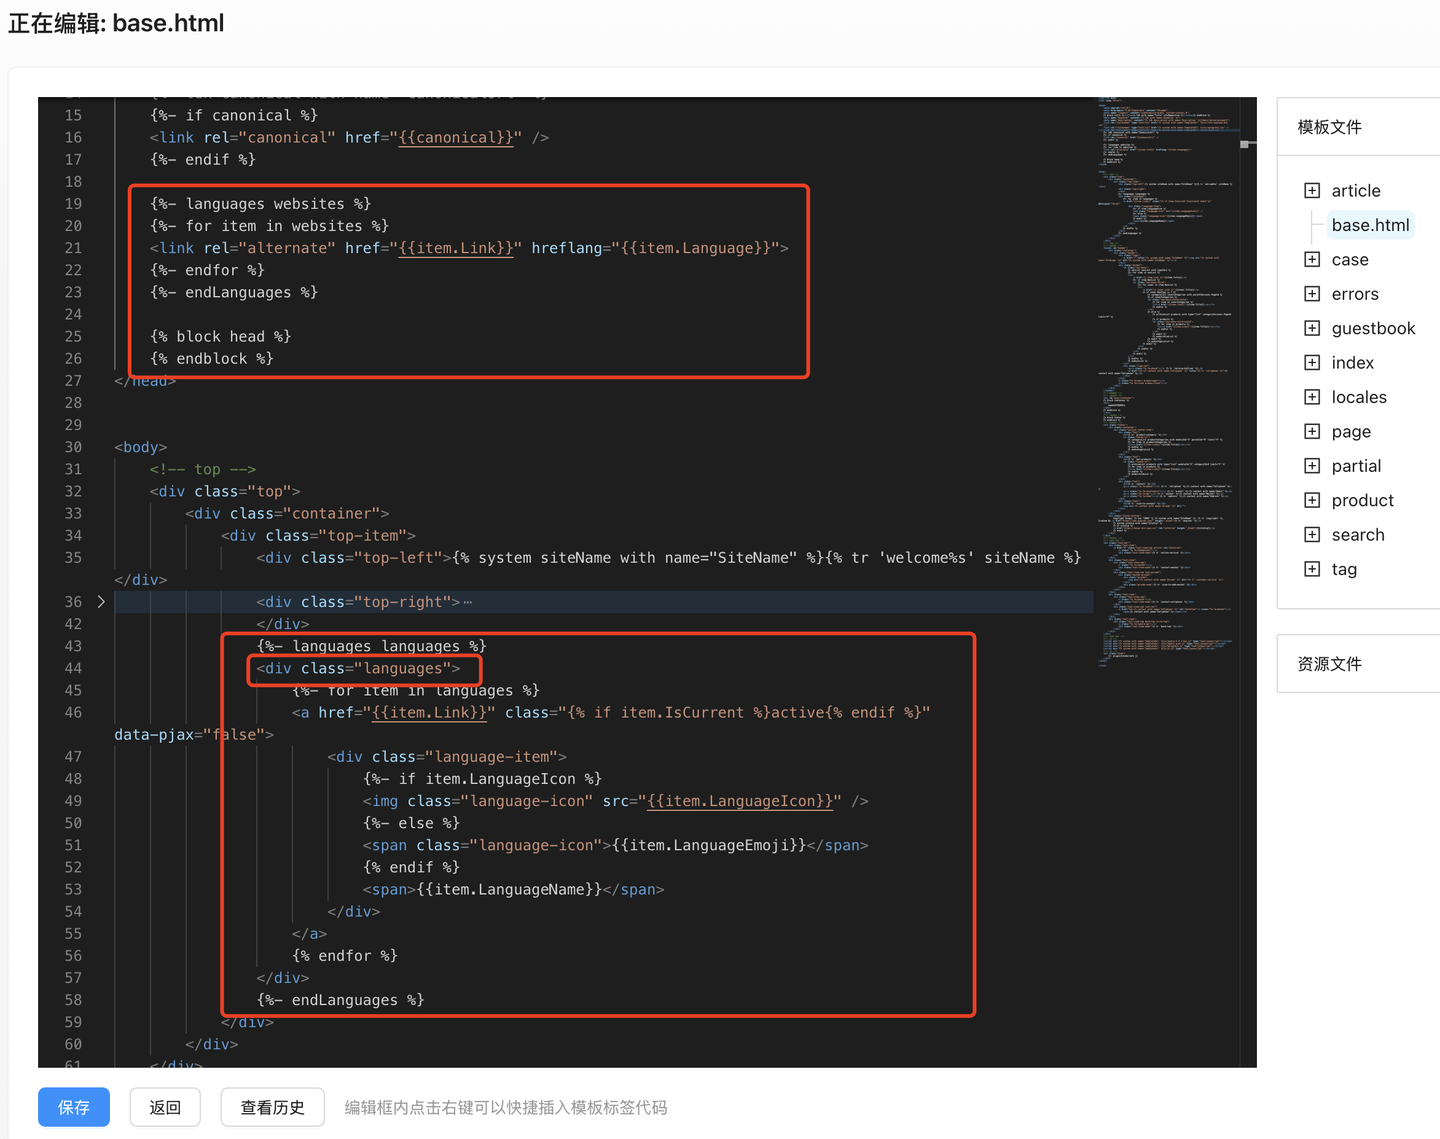
Example code: Harflang in the head section:
{%- languages websites %}
{%- for item in websites %}
<link rel="alternate" href="{{item.Link}}" hreflang="{{item.Language}}">
{%- endfor %}
{%- endLanguages %}
Language switching in the header section:
Note: Always use the code for language switching,
<div class="languages">....</div>The tag needs to be a div, it also needs to have class=“languages”, otherwise the link replacement will fail.
   {%- languages languages %}
   <div class="languages">
      {%- for item in languages %}
      <a href="{{item.Link}}" class="{% if item.IsCurrent %}active{% endif %}" data-pjax="false">
         <div class="language-item">
               {%- if item.LanguageIcon %}
               <img class="language-icon" src="{{item.LanguageIcon}}" />
               {%- else %}
               <span class="language-icon">{{item.LanguageEmoji}}</span>
               {% endif %}
               <span>{{item.LanguageName}}</span>
         </div>
      </a>
      {% endfor %}
   </div>
   {%- endLanguages %}
- Add some explicitly non-translatable label text
ignore-translate="true"Property.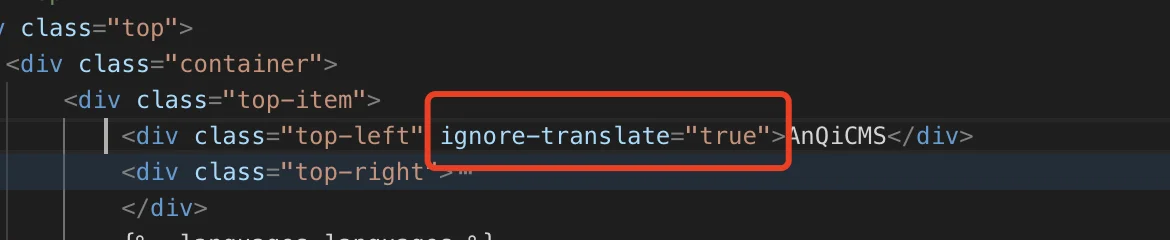
Front-end effect
After the above configuration and template modification, the front-end can see the effect as shown in the figure, a multi-language switch menu appeared at the upper right corner: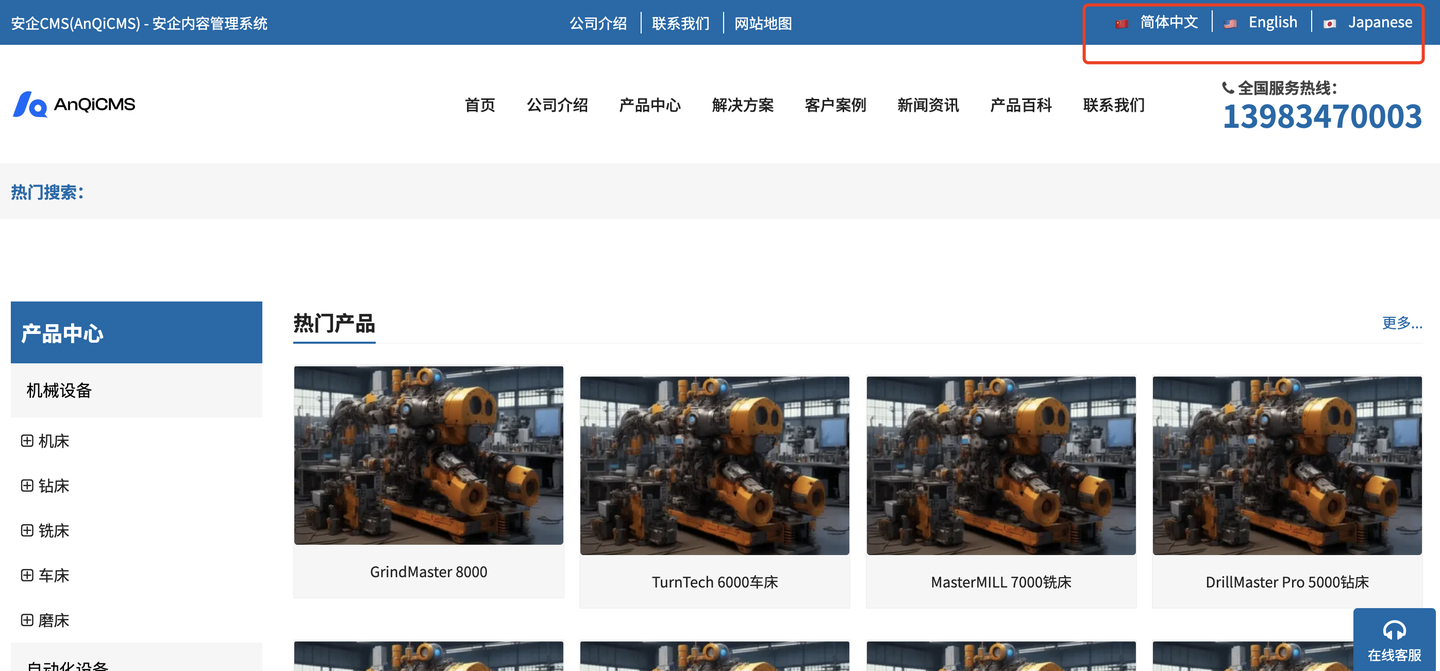
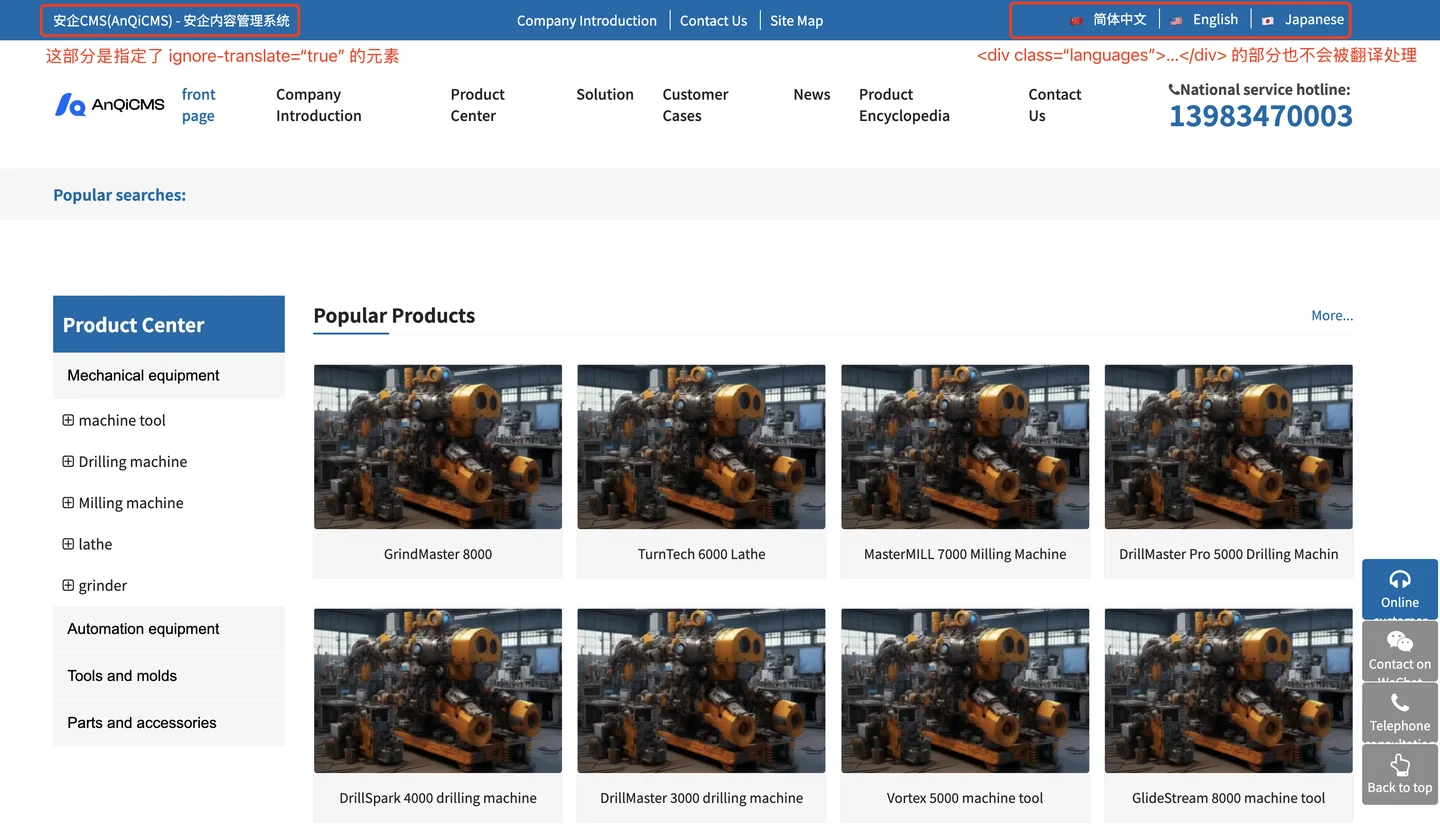
We try to switch to English, and we can see that the page has automatically translated:
Note, when switching language for the first time, due to no cache, a translation API request is needed, so the page takes a few seconds to open, which is a normal phenomenon.After the first time it is opened, the subsequent opening speed is faster, and subsequent openings only need to read page content from the cache.
Note, after switching to English, we can see that some parts have not been translated yet, which are set to:
ignore-translate="true"attributes and<div class="languages">....</div>The part of the label content.
The multi-language feature is configured up to this point. Welcome to use and test it extensively. If any problems are found, please feedback promptly, and we will solve them as soon as possible.