
Customer groups
📅 November 21, 2026
👁️ 0
Customer groups
Customer segmentation is used to define membership levels, the same function as 'User Group VIP'.
Entry Path
Top menu of the backend → 'Customer' → 'Customer Group'. Actual address:/system/customer/grouprequires administrative privileges(canAdmin)
Function description
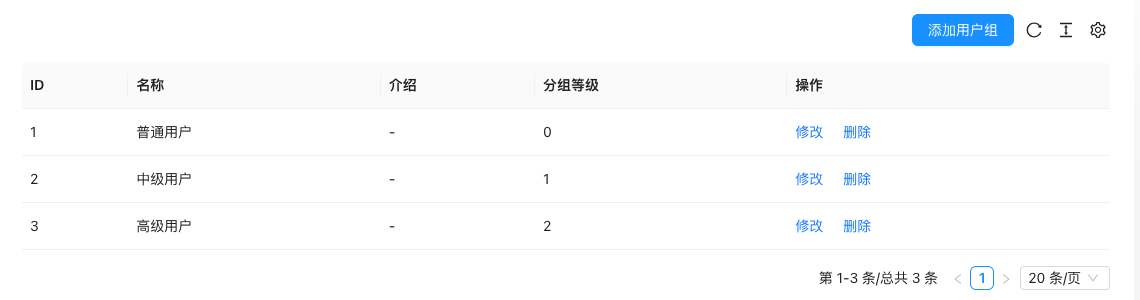
Page displays user group ID, name, introduction, and group level, supports adding, modifying, and deleting. Built-in three groups: ordinary users, intermediate users, and senior users.
Screenshot of the interface
Setting item description
| Setting items | function | Value / Default | How to select / Fill in suggestions | Impact / Note |
|---|---|---|---|---|
| ID | Group number | — | Generated by system or fill according to platform requirements | ID changes will affect related data |
| name | Group name | — | Fill in a name that is easy to identify and consistent with the display on the front end | Name changes will affect display and calling, pay attention to synchronization |
| Introduction | Level description | — | Brief description, avoid being vague | Whether to display is determined by the template |
| Group Level | Level values, the higher the better | — | Fill in according to the page prompt and business requirements | Configure according to the actual performance in front |
Operation steps
- Enter 'Customer → Customer Group'.
- Click 'Add User Group' to create a level.
- Set name, introduction, and level values.
- Assign users to groups in the customer list.
Applicable scenarios and suggestions
- Combine groups with discount activities to achieve member exclusive prices.
- Leave gaps in level values for easy insertion of new levels later.
Points to note
- Before deleting the group, confirm that there are no users in the group.
- Creating a group does not automatically assign rights, and needs to be combined with template and promotion configuration.