Add site In "Site Management", add an Anqi CMS site, and select "Anqi CMS" in the pop-up interface for selecting site types.Enter the website name, such as: My Security Site; Enter the website address, such as: http://www.mycms.com ;Enter the communication Token, which can be obtained from the security site background -> Function Management -> Content Import Interface function.Select the publish site Go to the Txt article publishing interface, click the Add Site button on the left, select the site to publish
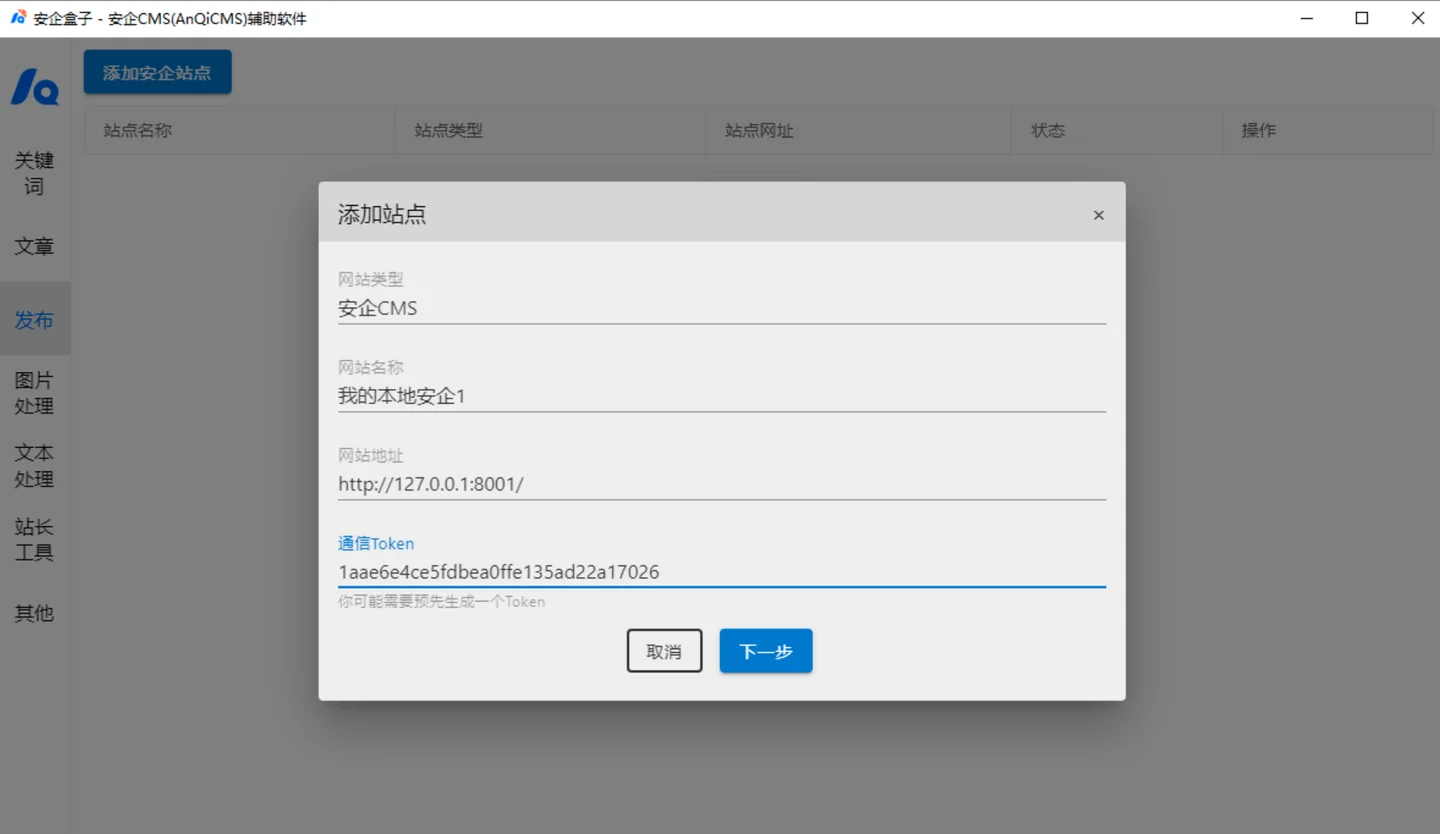
In the 'Site Management', add AnQi CMS site, and select 'AnQi CMS' in the pop-up interface for selecting site type.
Enter the website name, such as: My Secure Site; Enter the website address, such as:http://www.mycms.com;
Enter the communication Token, obtain the Token from the Anqi site background -> Function Management -> Content Import Interface function.

Come to the Txt article publishing interface, click the Add Site button on the left, select the site to be published, and then select the category to be published in the pop-up category selection window.Click OK to complete the selection.
Manage the selected sites here, you can also manage the selected sites, such as adding more sites, adding published categories, and deleting the operation to be published.
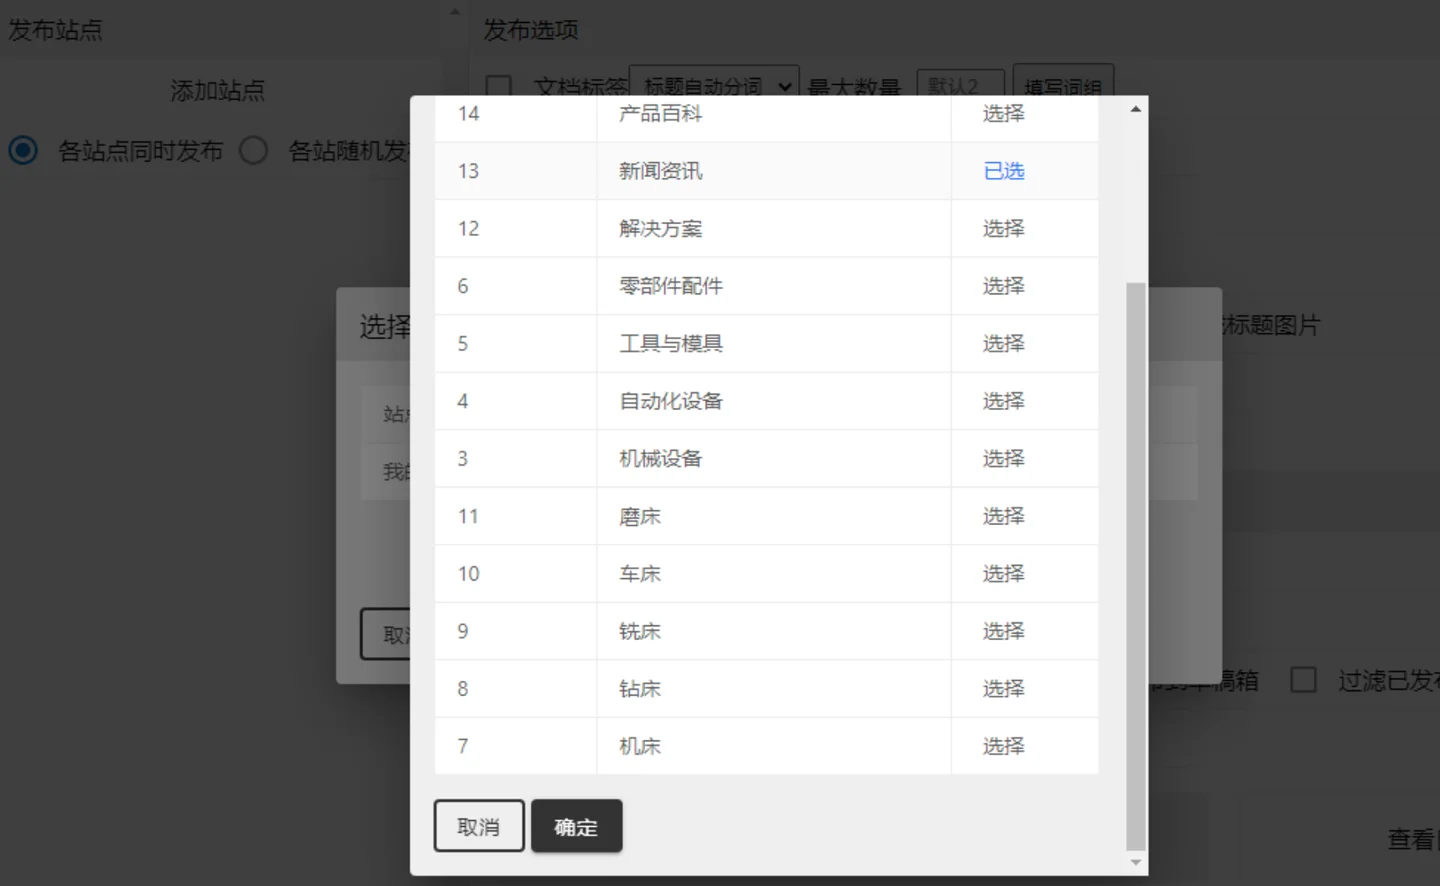
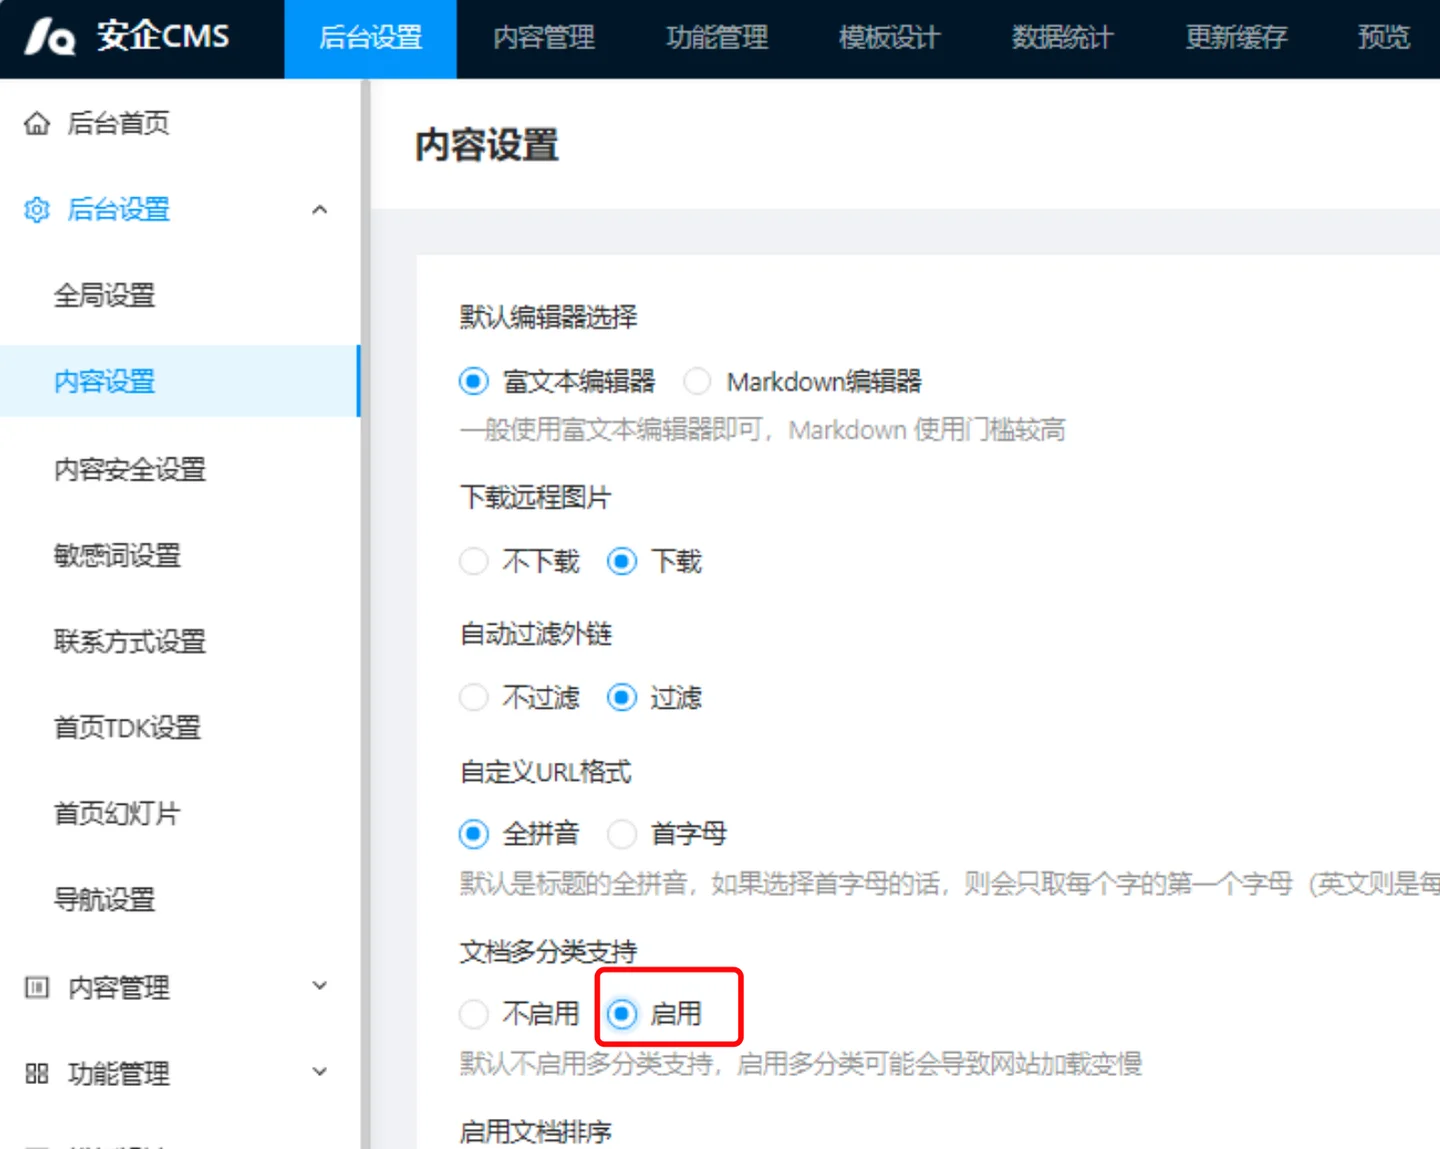
If you add multiple categories here, the software will publish the article to multiple categories at the same time, provided that your Anqicms website has enabled the multi-category mode. If it is not enabled, even if multiple categories are selected, only the first category will be published successfully.How to enable multi-category support for AnQi CMS documents: Settings -> Content Settings -> Document Multi-Categorization Support -> Enable.
If you add multiple sites here, there are two ways to choose from to publish.1 is published simultaneously on all sites, which means that every article will be published on every site.2 is randomly published across sites, which means that each article will only be published on one site.Choose according to your actual needs.
The publish options all require that the first option be checked before the settings take effect. If it is not checked, the settings will be automatically ignored.
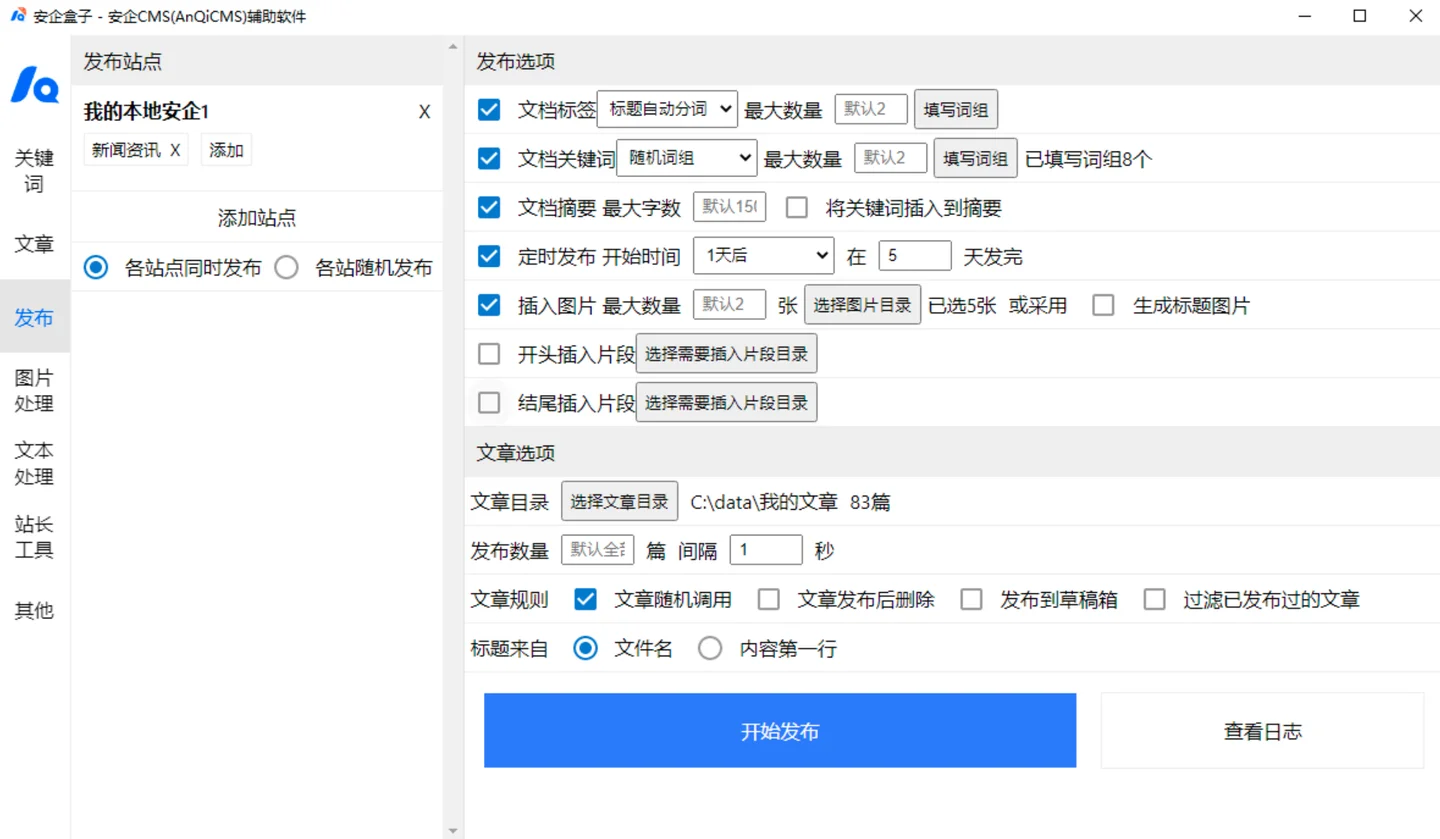
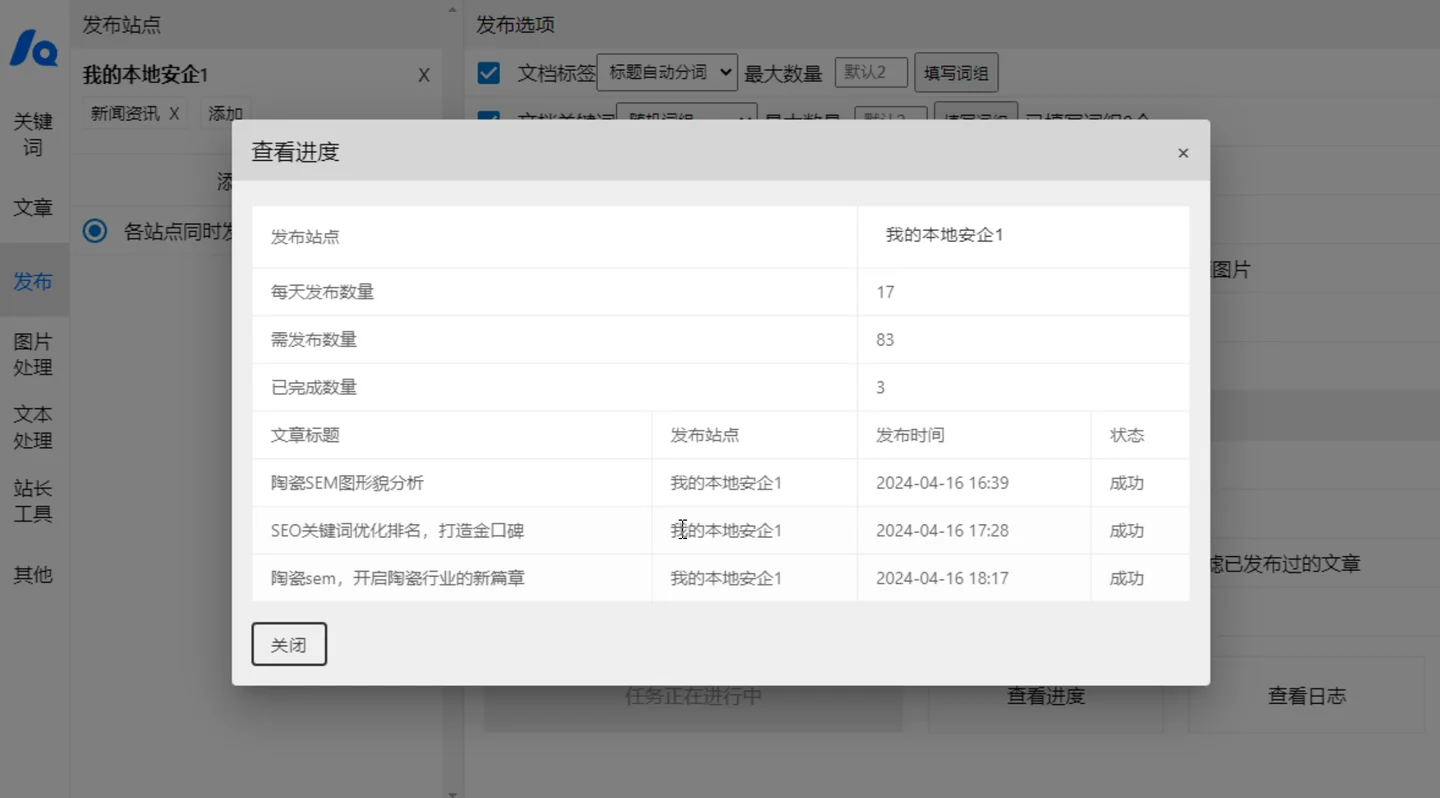
When you click the publish button, it enters the publishing process, the publish button turns gray, and a view progress button appears next to it. Clicking view progress allows you to see the current status of the task.
Although there are not many websites still using website message and form collection features, a small number of users are still using them.Have you ever thought about how to automatically send new messages or new form submissions from users to our QQ email when the website receives them?To be honest, many people cannot log in to the website backend frequently, but QQ and WeChat are always online, and they can receive email notifications in time when new emails arrive.If you can send website messages and form information to the email in time, you won't miss any customer information.

When using the Anqi CMS backend, you may occasionally encounter the embarrassing situation of forgetting your password.But rest assured, Anqi CMS provides a convenient password reset feature, simply follow the steps below to reset the backend administrator password.1. Reset password by clicking the [Forgot Password] button First, find the [Forgot Password] button on the login page of the background, and click to enter the password reset process.Please note that before resetting your password, you need to verify ownership of the website.Only users who own the website can successfully reset the back-end administrator password.2. Website Ownership Verification Method
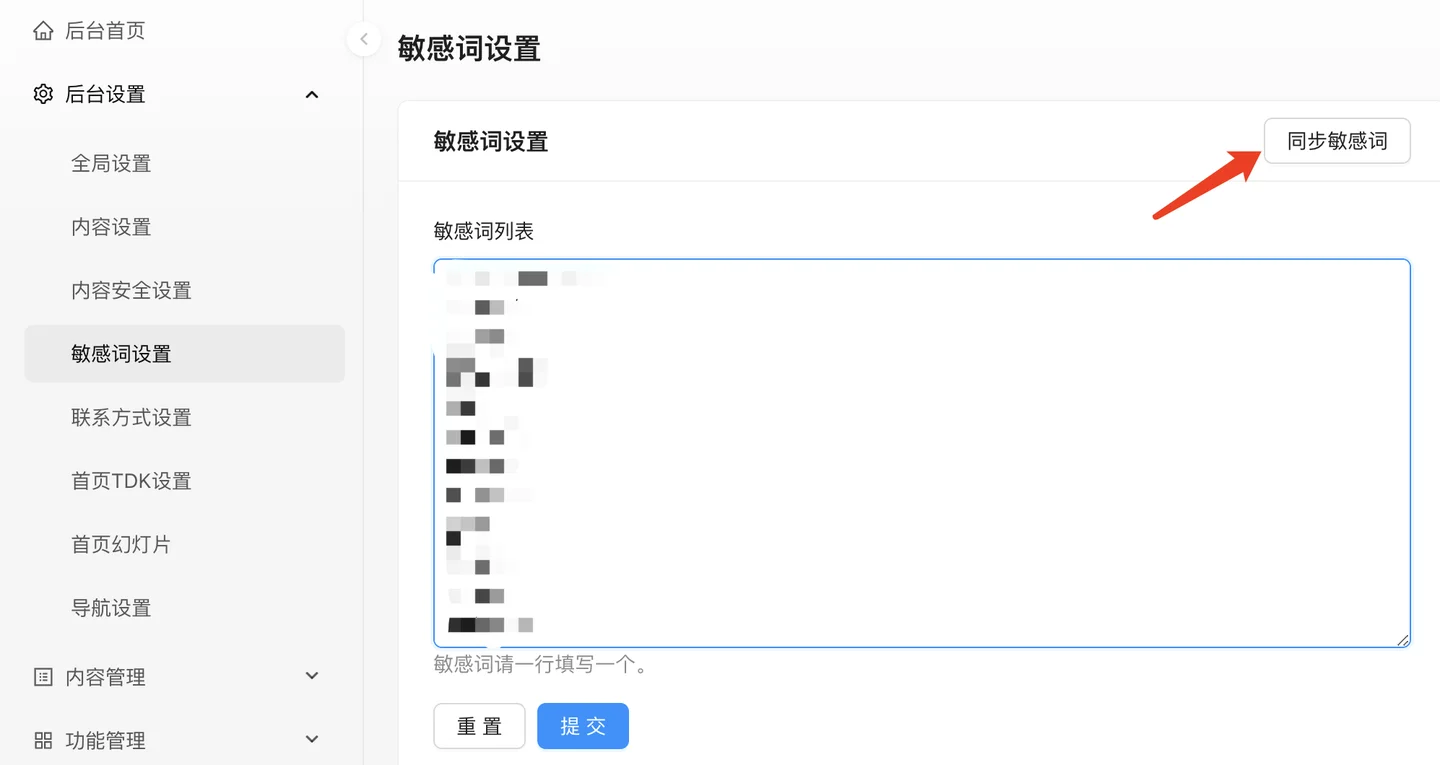
Sensitivity word filtering is a technology implemented in websites, applications, or platforms to carry out content review, used to prevent users from posting content that contains inappropriate, illegal, or content that does not comply with policies.We often need to worry about certain users' posts containing sensitive words during the actual operation of our website, these words often lead to our website being reported by users, even being banned by server operators, investigated by relevant departments, and fined.To prevent this situation from happening, we need to filter sensitive words.Implementation of sensitive word filtering involves multiple steps, including technical implementation and strategy formulation
