Although there are not many websites still using website message and form collection features, a small number of users are still using them.Have you ever thought about how to automatically send new messages or new form submissions from users to our QQ email when the website receives them?To be honest, many people cannot log in to the website backend frequently, but QQ and WeChat are always online, and they can receive email notifications in time when new emails arrive.If you can send website messages and form information to the email in time, you won't miss any customer information.
Although there are not many websites still using website message and form collection features, a small number of users are still using them.Have you ever thought about how to automatically send new messages or new form submissions from users to our QQ email when the website receives them?To be honest, many people cannot log in to the website backend frequently, but QQ and WeChat are always online, and they can receive email notifications in time when new emails arrive.If you can send website messages and form information to the email in time, you won't miss any customer information.
The following takes the automatic sending of website message comments to QQ email configured by Anqi CMS as an example.
Enable smtp and set the authorization code in the account settings of QQ mail
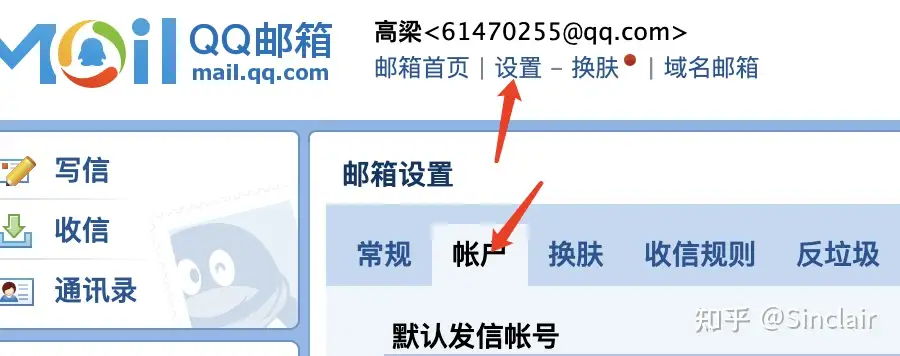
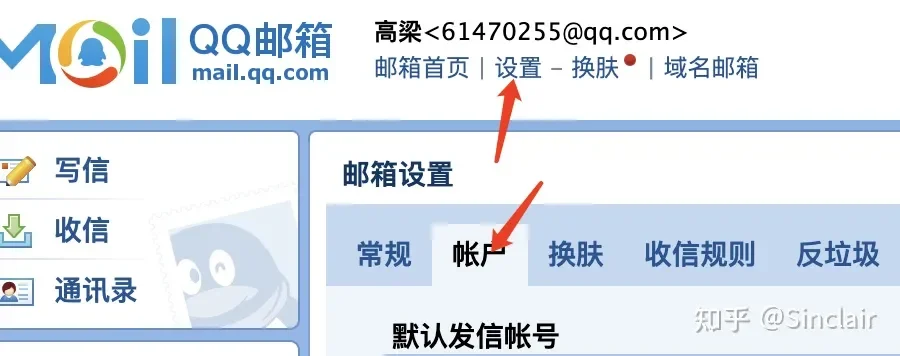
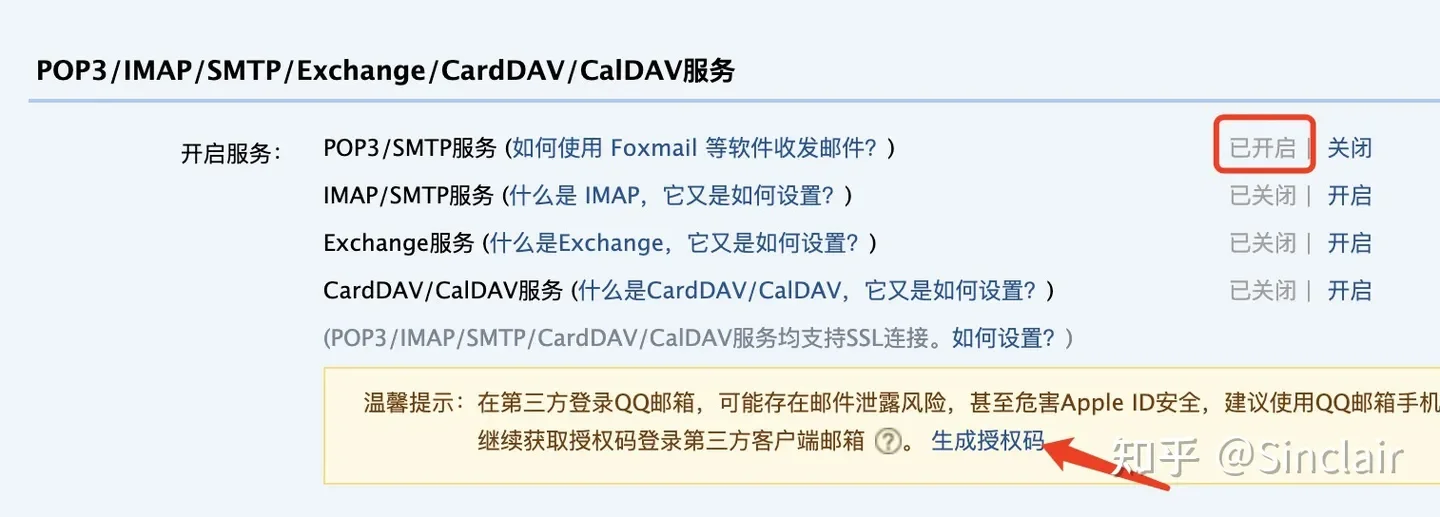
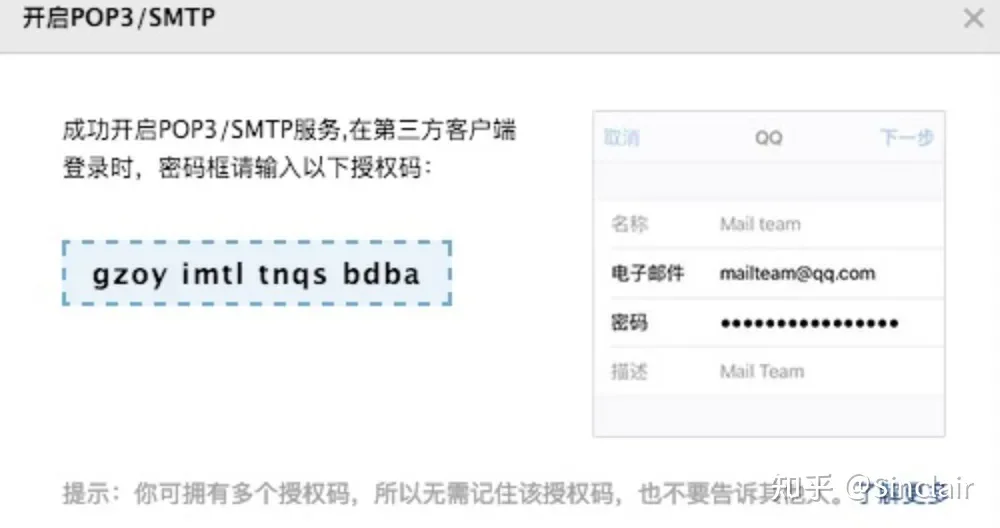
Log in to our QQ email, click on the Settings -> Account below the account, scroll down to the POP3/IMAP/SMTP/Exchange/CardDAV/CalDAV service tab, select Enable POP3/SMTP service, and click on the Generate Authorization Code link below to generate an authorization code for email configuration.The authorization code consists of 16 characters, and after it is generated, save it for future use.When generating the authorization code, you may be required to verify the email password, just follow the normal operation.
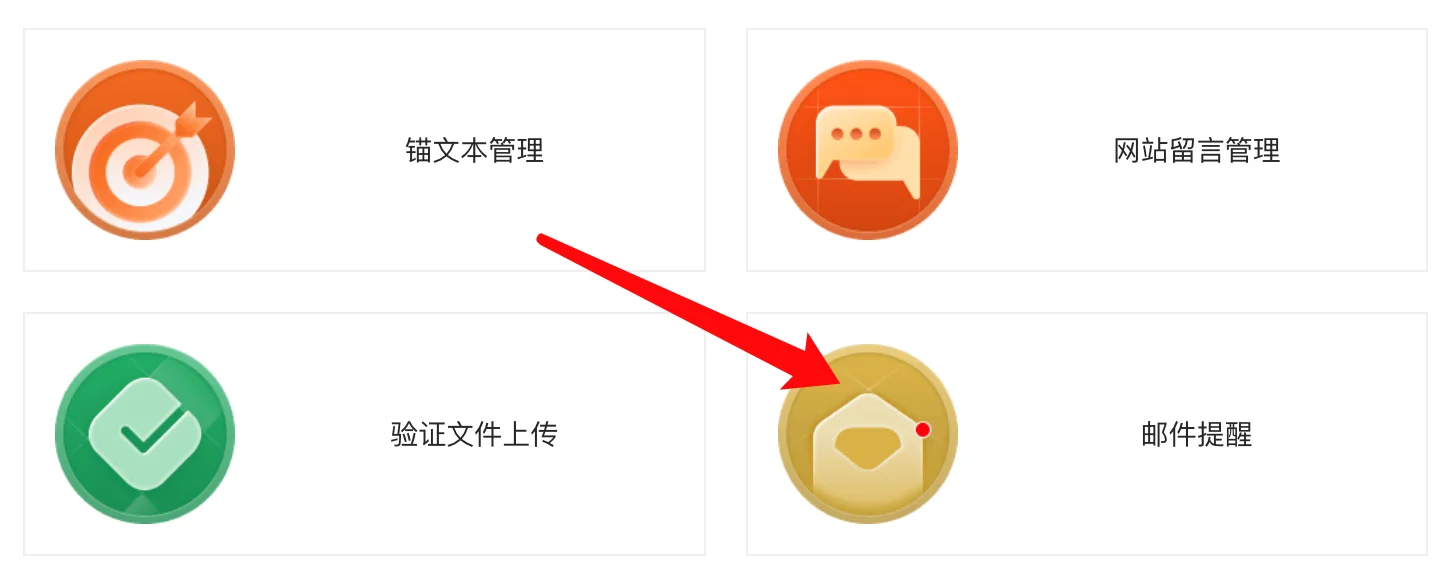
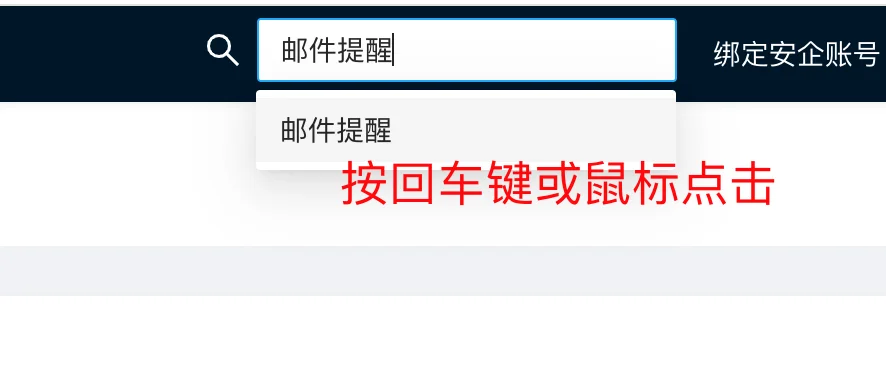
Find the [Email Reminder] feature in the Anqi CMS backend, or search for Email Reminder in the search box to directly access the Email Reminder feature


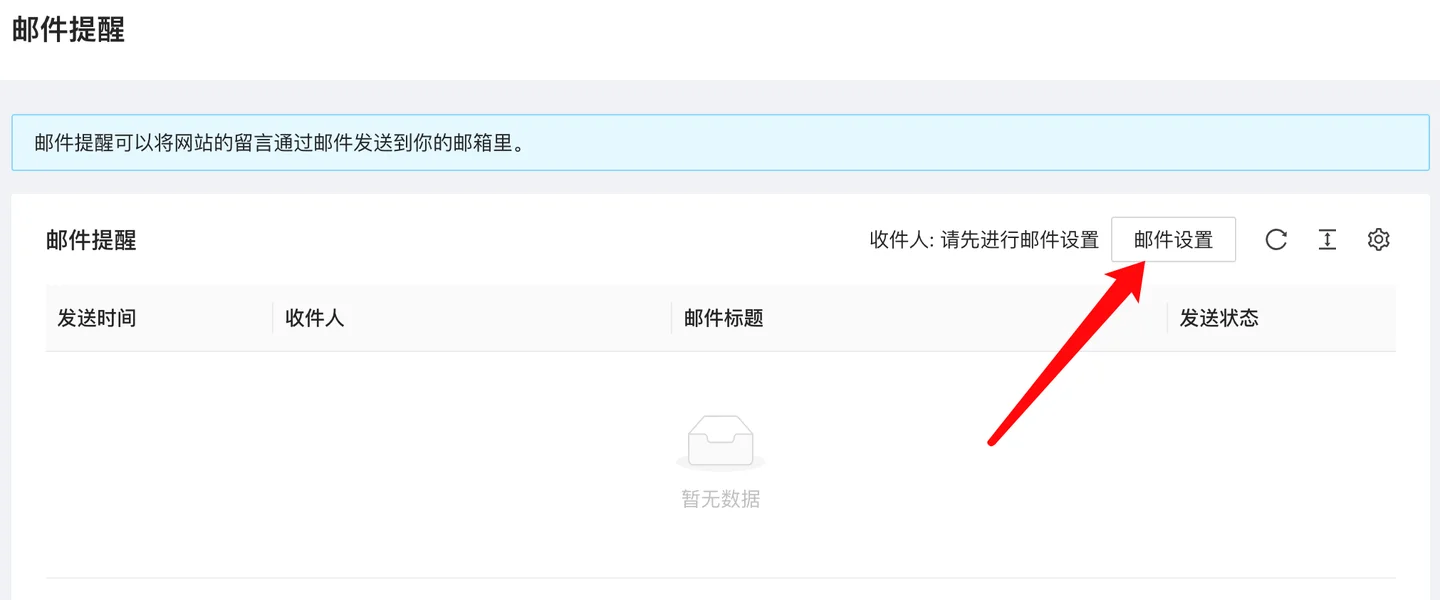
Click the [Email Settings] button to enter the email settings interface

Fill in the QQ configuration of the SMTP server, as shown in the figure. By default, SSL/TLS does not need to be used to send messages, and if the test send is not normal, you can try switching to SSL/TLS, with port 465 for SSL and port 587 for TLS, the default port is 25.
The SMTP account is your email account, SMTP passwordNoteIt is not your QQ password, but the authorization code configured in the above steps.The default recipient email address does not need to be configured, it will automatically send to yourself.You can also configure multiple recipient email addresses, in which case they can be sent to different people, such as customer service, operations, etc.

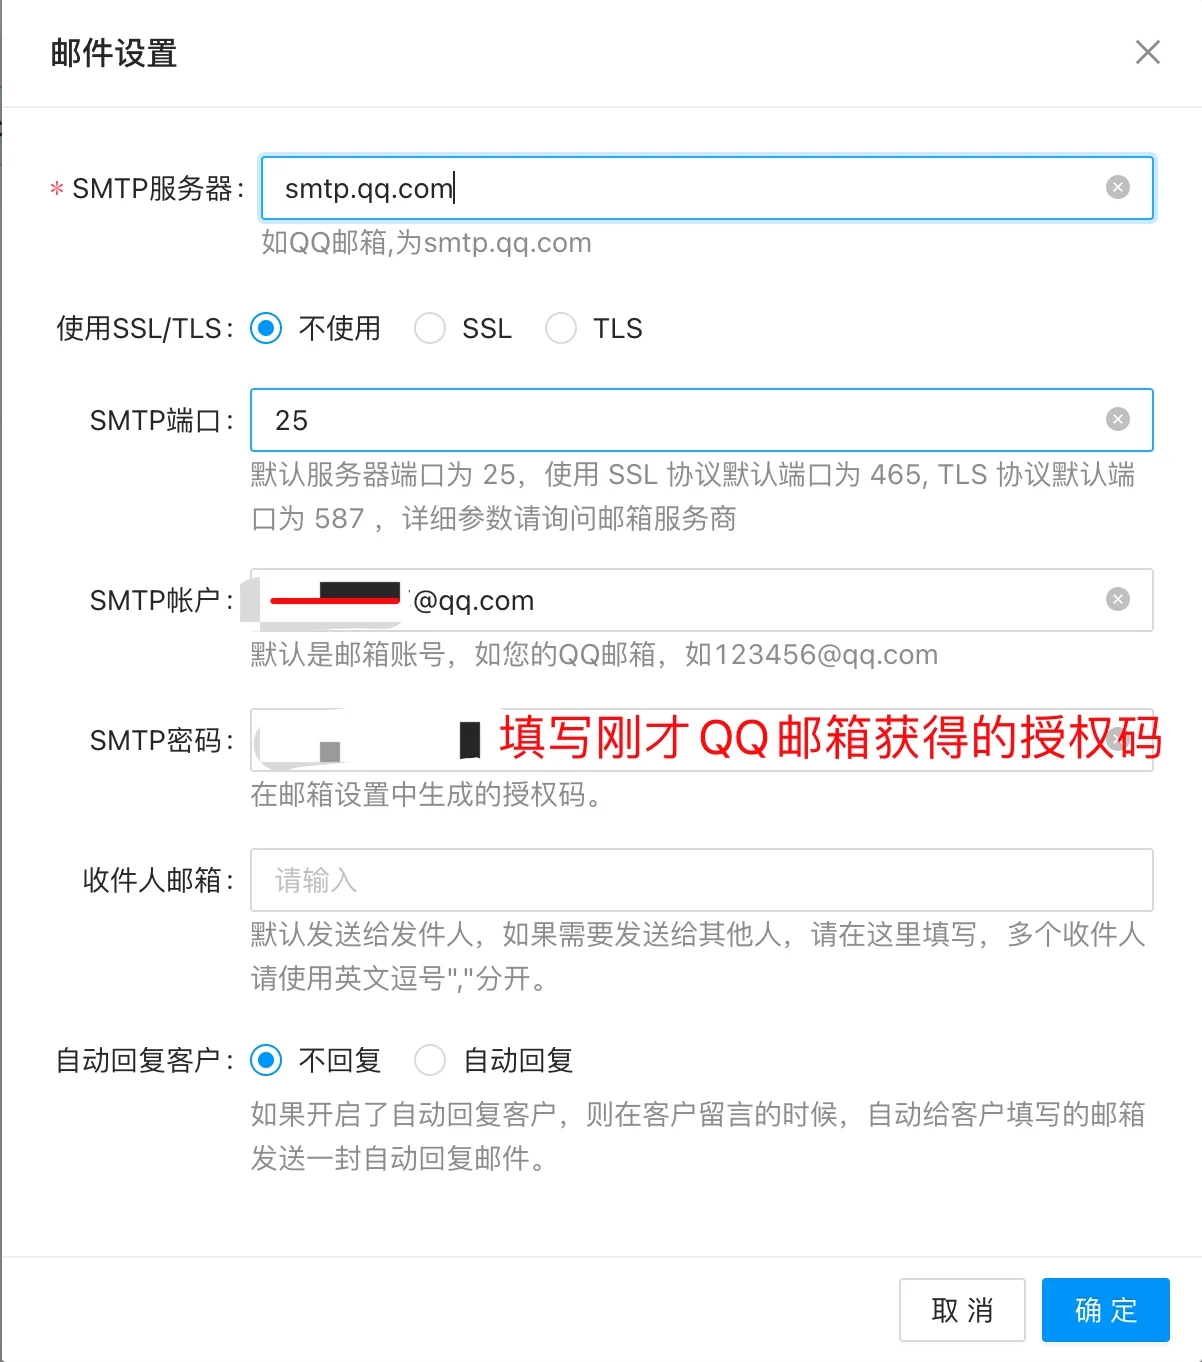
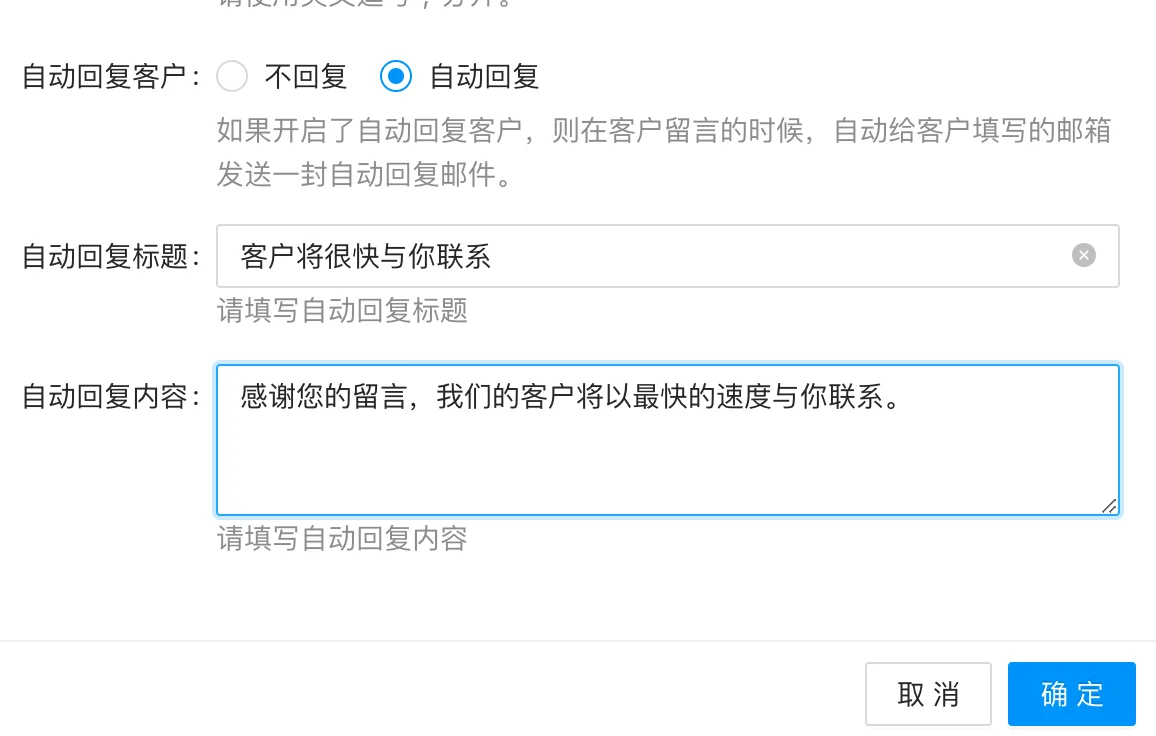
It also supports sending a reply to the customer who left a message, if the customer filled in his email.

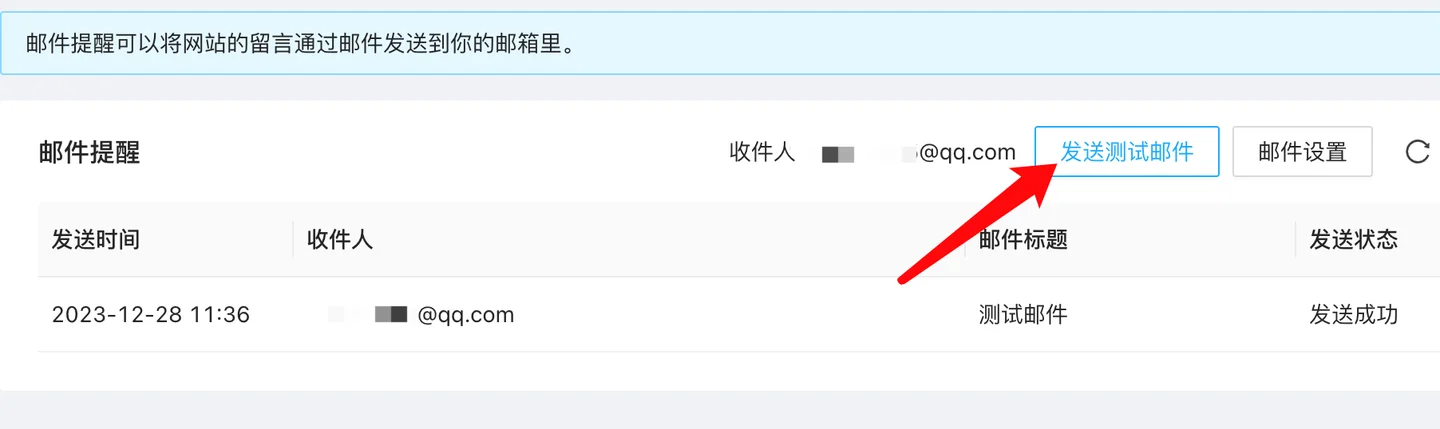
After the setup is complete, go back to the interface, click [Send Test Email], and check if the configuration is normal.

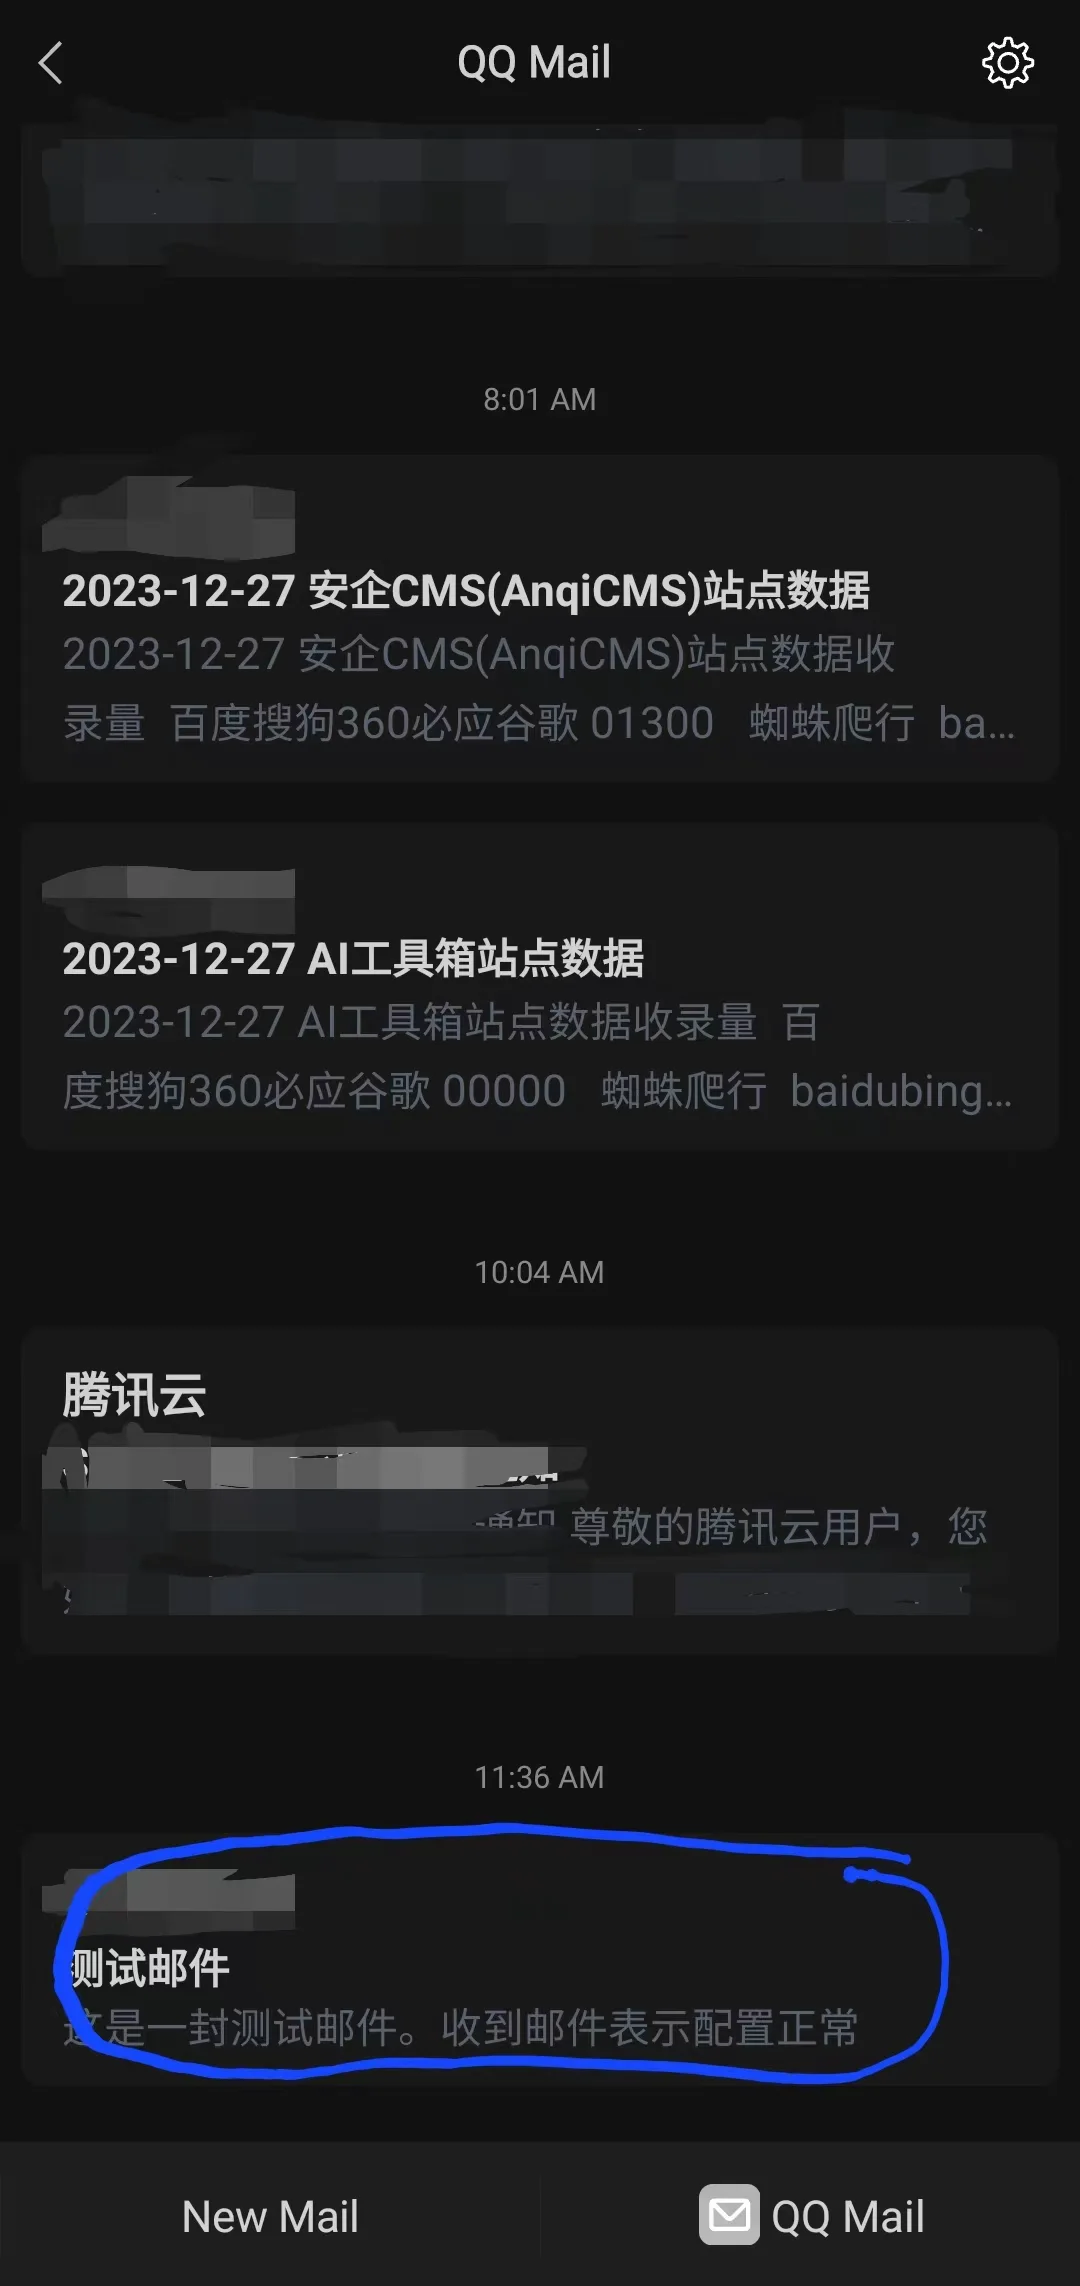
If everything is normal, you will receive a test email to your email address, as shown in the following figure:

Until now, the automatic sending of website messages to the specified email address is configured, just sit back and wait for someone to leave a message, and you no longer have to worry about missing message information.

When using the Anqi CMS backend, you may occasionally encounter the embarrassing situation of forgetting your password.But rest assured, Anqi CMS provides a convenient password reset feature, simply follow the steps below to reset the backend administrator password.1. Reset password by clicking the [Forgot Password] button First, find the [Forgot Password] button on the login page of the background, and click to enter the password reset process.Please note that before resetting your password, you need to verify ownership of the website.Only users who own the website can successfully reset the back-end administrator password.2. Website Ownership Verification Method

An automatic title image for documents is a website SEO optimization feature for search engines that can automatically generate related images based on the document title.It can be used for website SEO optimization, making the article content vivid and illustrative.In addition, it automatically inserts illustrations for document content without images, while documents with images will not be illustrated.
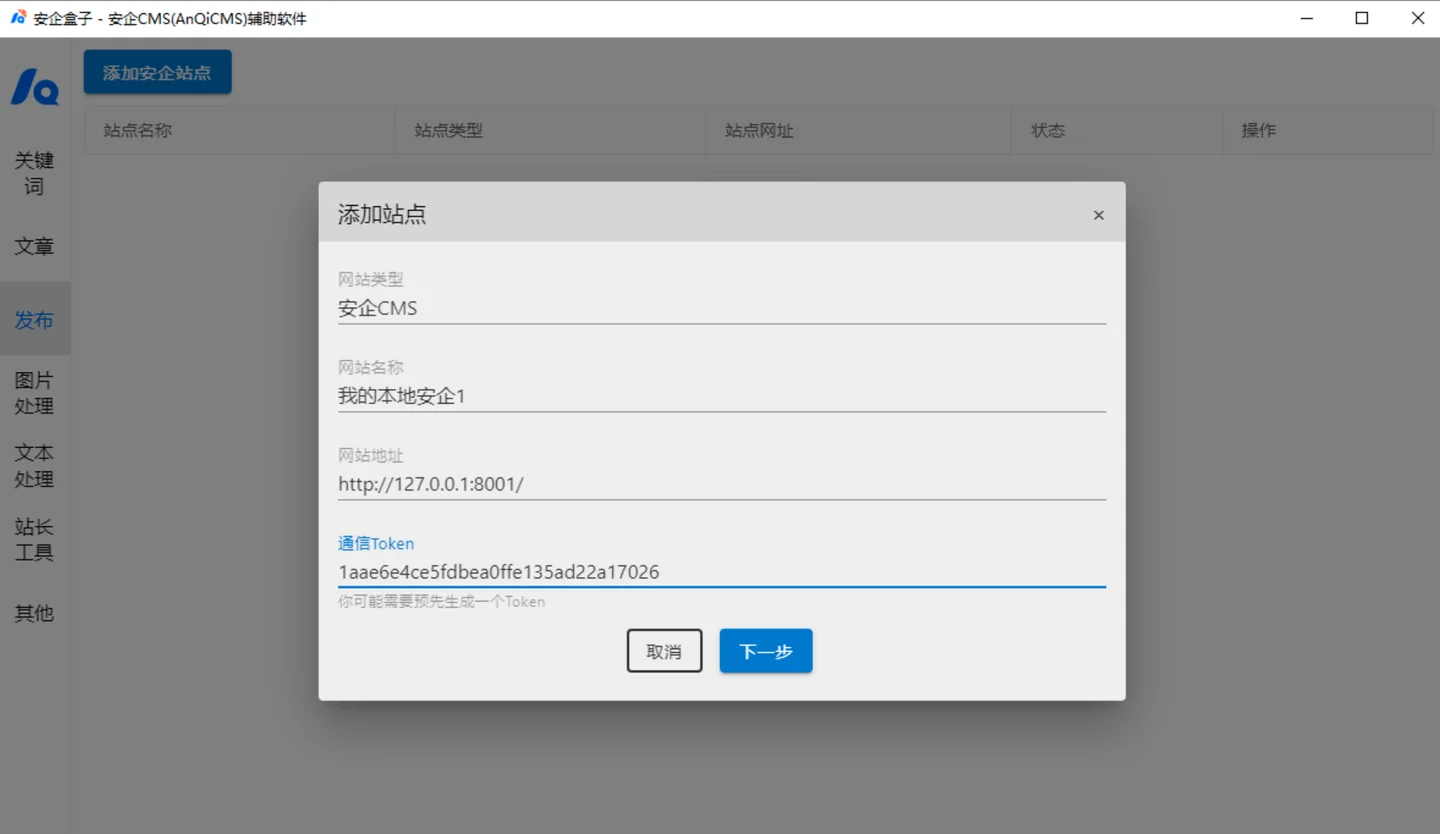
Add site Add an AnQi CMS site in the "Site Management", select "AnQi CMS" in the pop-up interface for selecting site type.Fill in the website name, such as: My Security Site; Fill in the website address, such as: http://www.mycms.com ;Enter the communication Token, Token from the security site backend ->Function management -> Get from content import interface function.Select the publishing site Go to the Txt article publishing interface Click the add site button on the left Select the site to be published
