Many systems require additional plugins and deployment of independent services for their MCP capabilities, while Anqicms has chosen a more radical approach: integrating the MCP Server directly into the system kernel.After upgrading to a version that supports MCP, no additional deployment is required, the website itself is a standard MCP server. Imagine the following scenario: in the morning, open the AI assistant and say 'Please organize last month's access data into a daily report and list the 10 articles with the lowest clicks under the 'SEO' category', and in a few seconds, the results are in front of you - and throughout this process, you haven't opened the website backend at all.This is not imagination, this is exactly AnQi CMS
Many systems require additional plugins and independent services to install MCP capabilities, but Anqi CMS has chosen a more thorough approach:Integrate the MCP Server directly into the system kernel.After upgrading to a version that supports MCP, there is no need for any additional deployment; the website itself is a standard MCP server.
Imagine such a scene: In the morning, open the AI assistant and say, "Help me sort last month's visit data into a daily report and list the 10 articles with the lowest click-through rate under the "SEO" category. After a few seconds, the results are in front of you - and you haven't opened the website backend from start to finish.
This is not imagination, this is the way the built-in MCP function of Anqicms brings the working method. This article will thoroughly explain the MCP capability of Anqicms: what it is, how it works, what tools are built-in, how to configure access, and what are the worth implementing use cases.
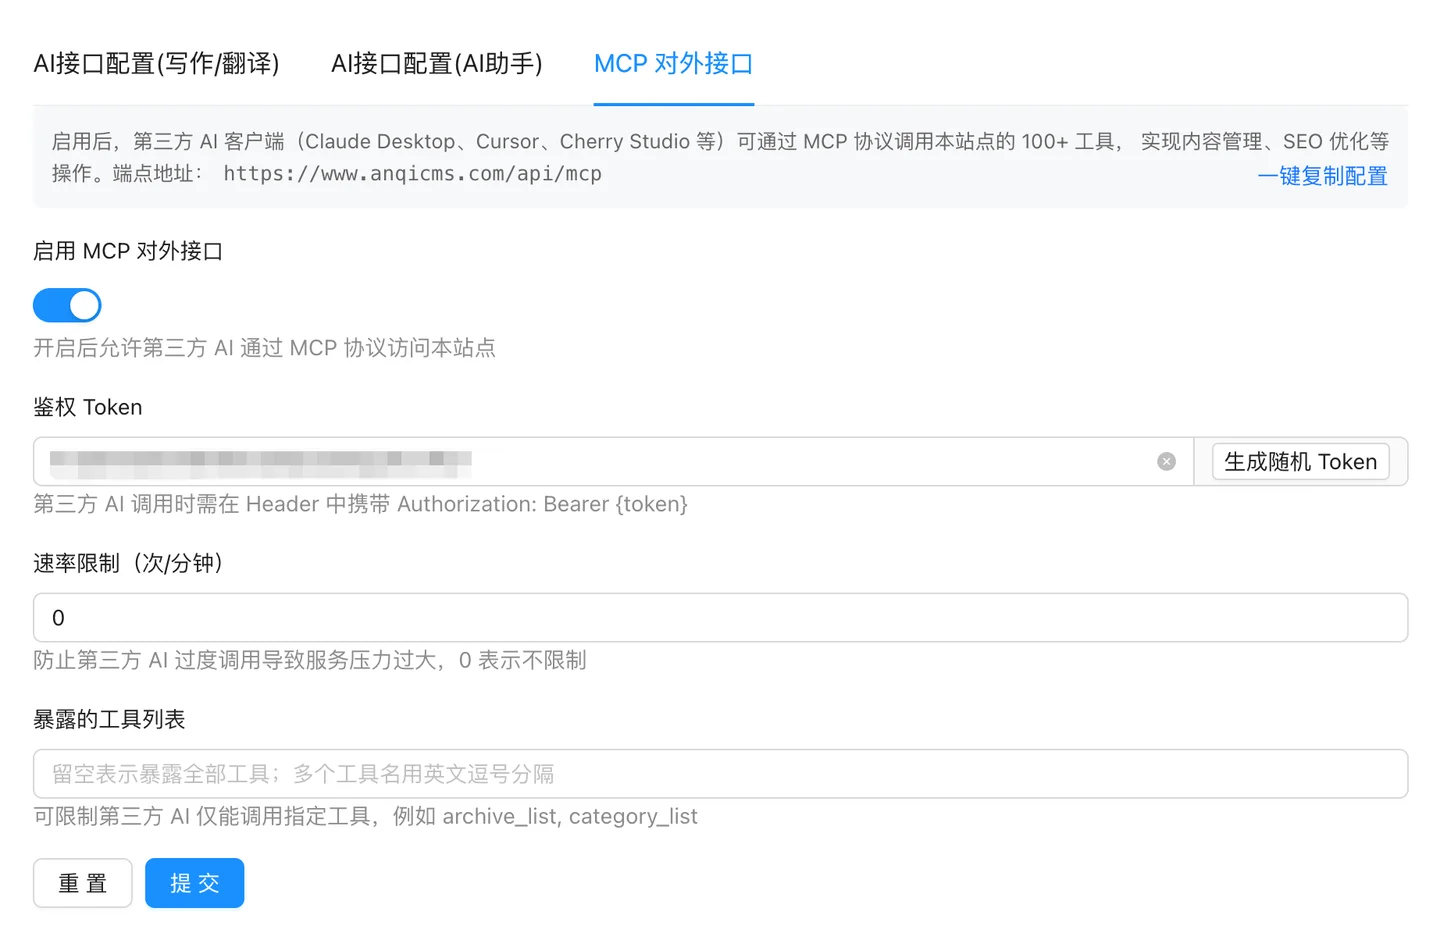
Log in to the AnQiCMS backend, go to 'Settings → Security Settings', and confirmAPI OpenEnabled.
Generate the MCP Token in the background under「Settings → AI Unified Configuration」. This Token is the access credential for the MCP endpoint, please keep it safe and do not leak it.
Click 'One-click copy configuration' in the configuration interface, copy the configuration information to the clipboard for subsequent access.
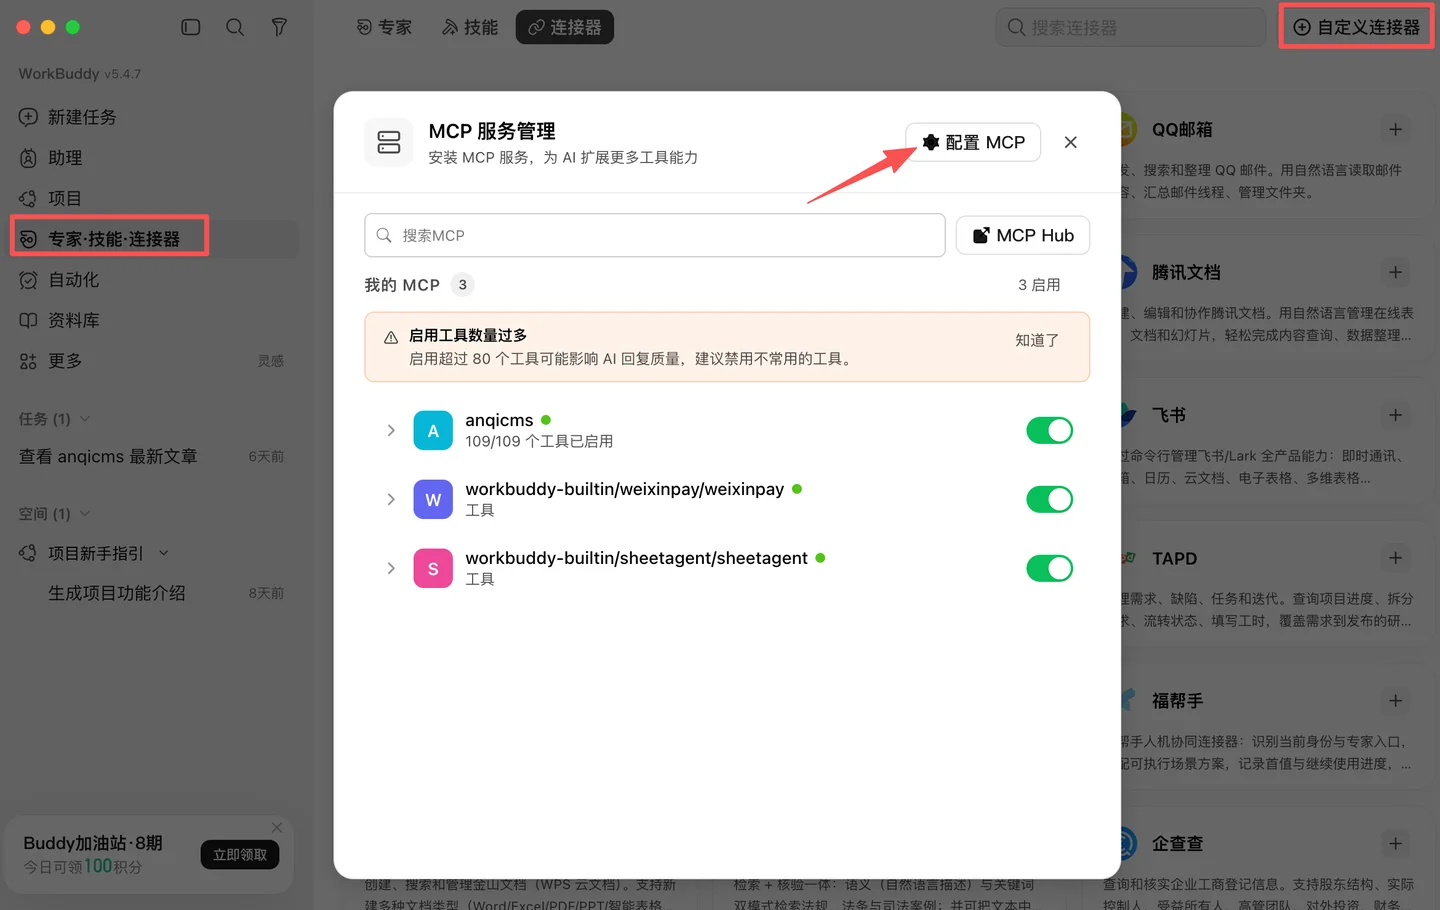
There are two ways to access, you can choose any one.
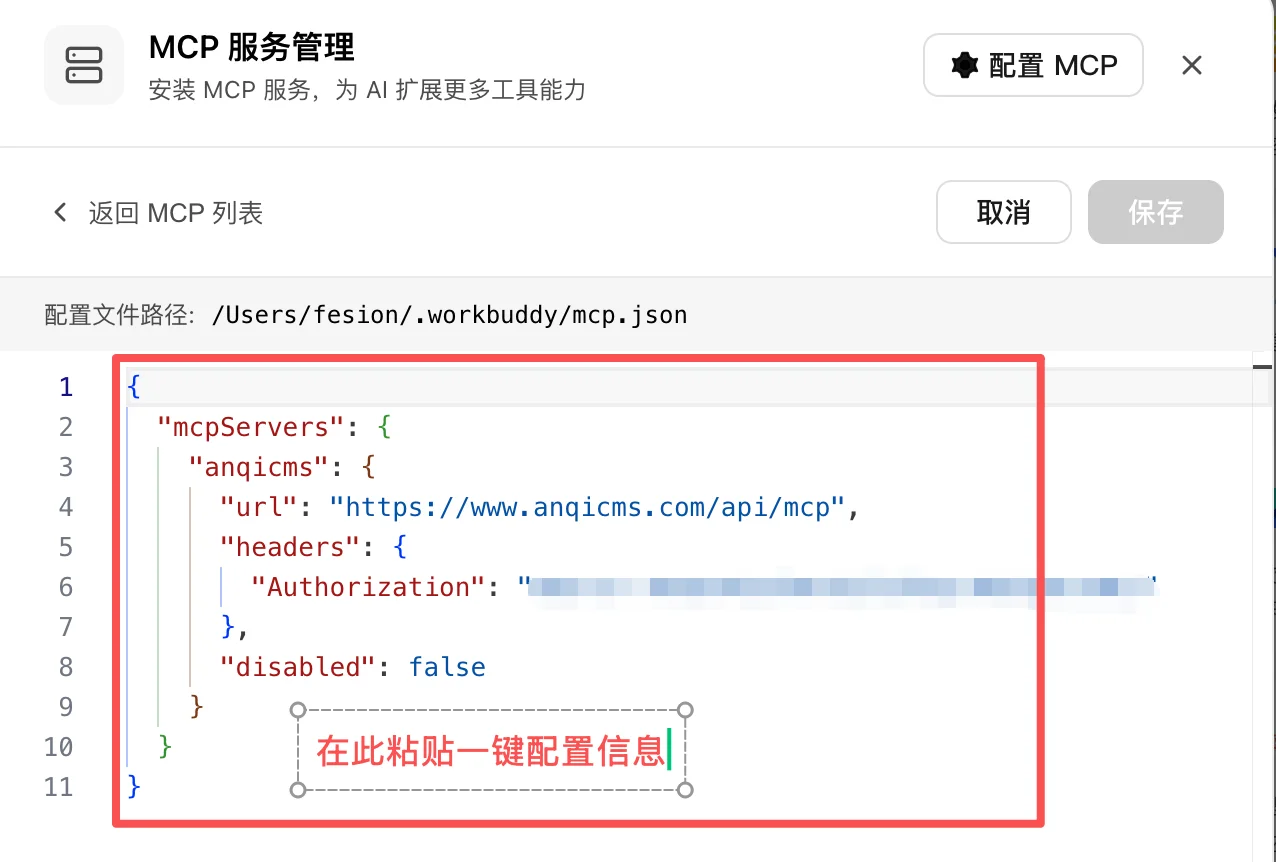
For example, paste the just copied configuration information in the MCP configuration:
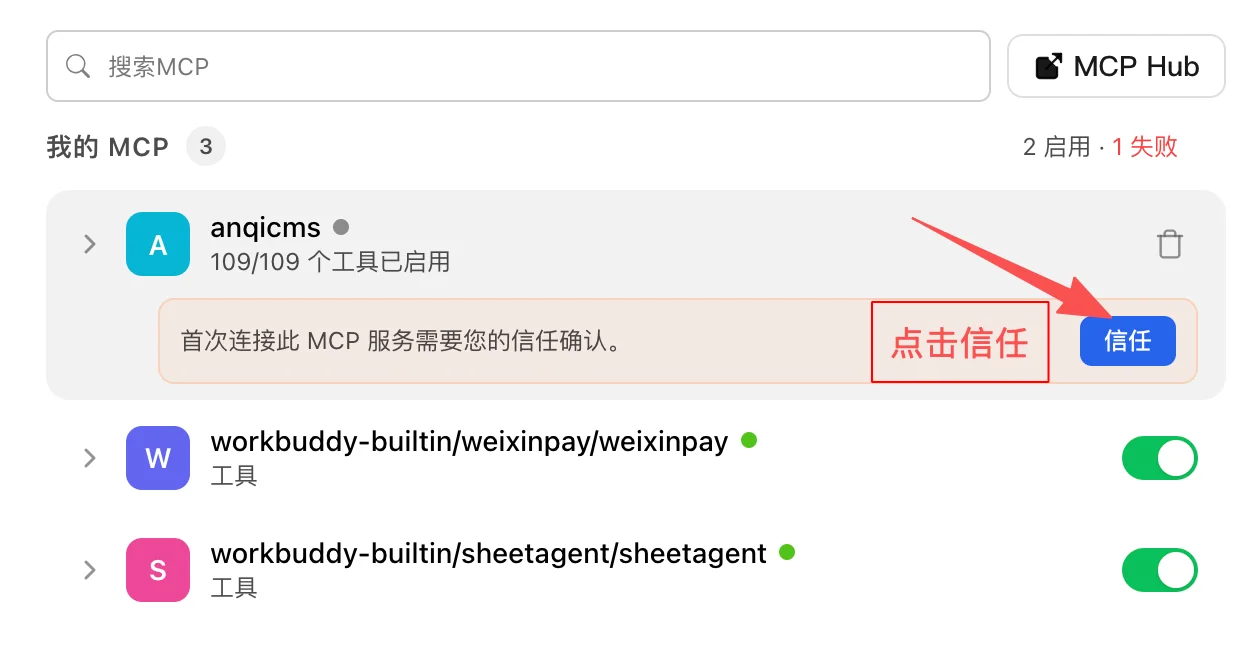
When you first connect to the MCP server, a trust confirmation prompt will appear. Click the 'Trust' button to complete authorization.
In the dialogue box of the AI tool, send the configuration information to the AI in natural language, and it will automatically complete the configuration.
For example, to have WorkBuddy write an article, enter the following command:
Please write an article introducing the MCP function of Anqicms CMS and publish it on my website. Category: Anqicms CMS User Guide, with images.
Switch to the dialog box, enter the command and send, wait for AI to automatically complete the output result.
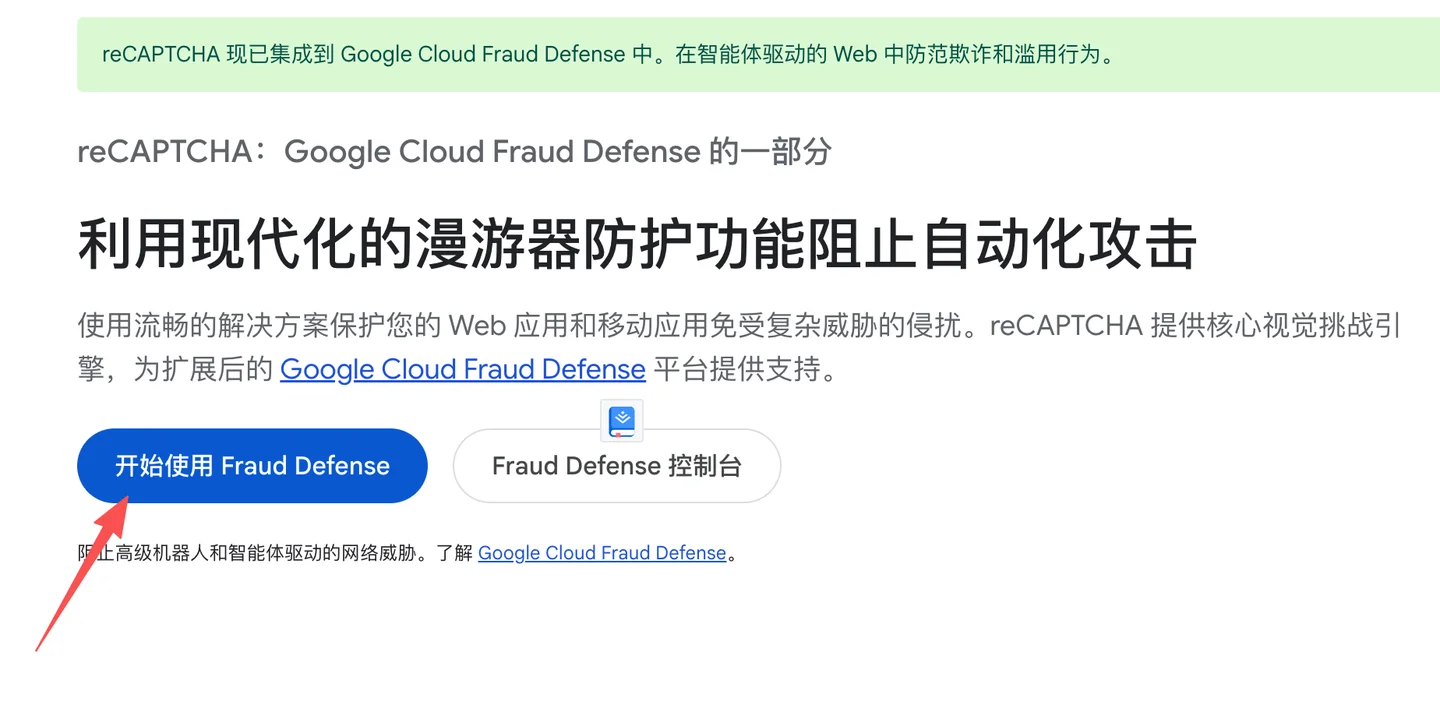
reCAPTCHA is a powerful robot-blocking tool that protects websites from network spam, abuse, and fraudulent activities. It determines whether an action is performed by a human or a robot by analyzing user behavior and other factors.If suspicious activity is detected, reCAPTCHA may take measures to prevent unauthorized access, such as displaying a verification challenge or completely blocking interaction.This helps to ensure that the website remains protected while minimizing interference with legitimate users. The following are three key features: Adaptive Risk Assessment: Analyzing various factors, assessing the risk of the user being a robot, and adjusting the response accordingly Advanced Robot Detection: Using advanced technology to distinguish between humans and robots to ensure accurate identification Continuous Learning
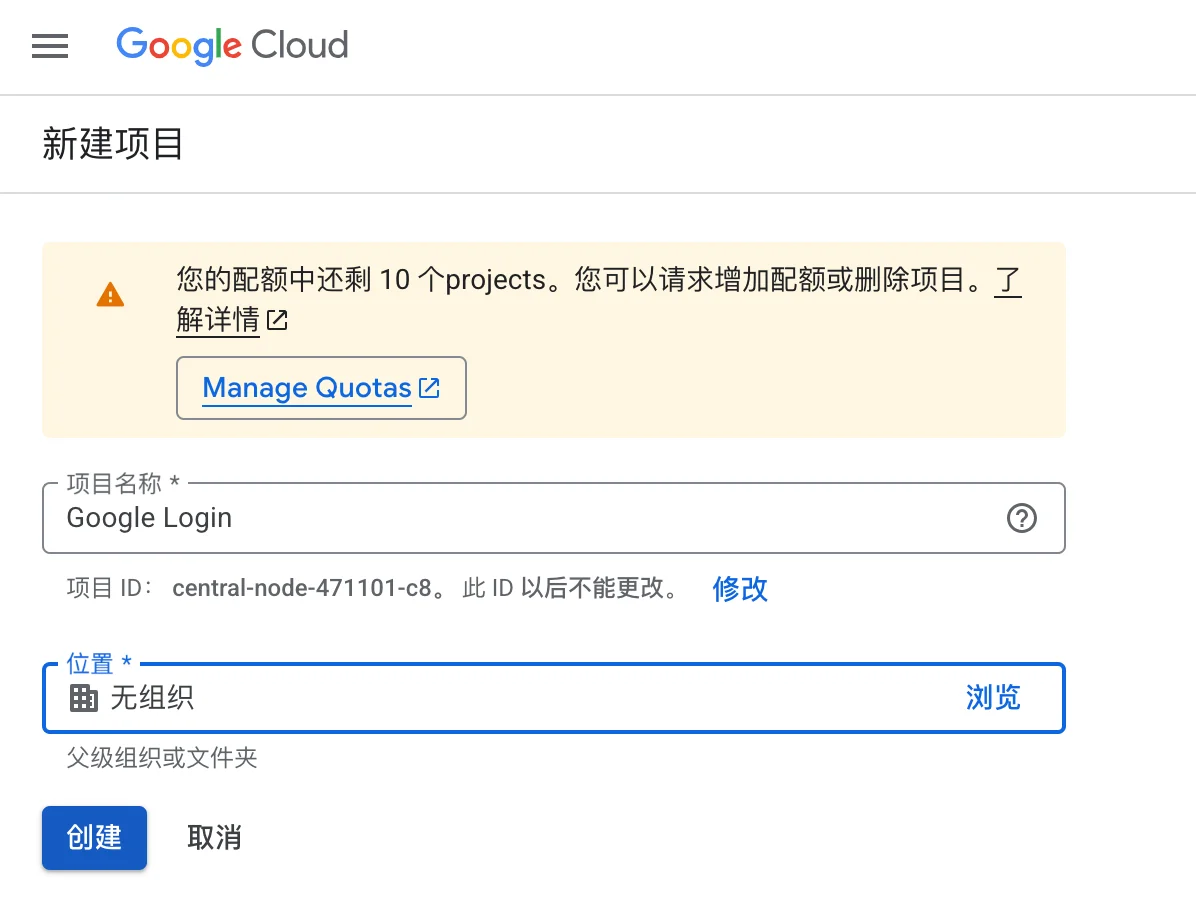
Prerequisites: You must have a Google account, visit https://console.cloud.google.com/ and log in, create a Google API project. If you already have a project, you can skip this step. Quick access address: https://console.cloud.google.com/projectcreate. Enter the project name on the interface that appears, fill in the English name, and then click the create button to complete the creation.

The AnQi CMS multi-site default (Go project) site migration tutorial Default (Go project) site migration Log in to the AnQi CMS backend, find the Backup and Restore feature in the Function Management, and create a new backup record.This is to back up the database data into a file.
