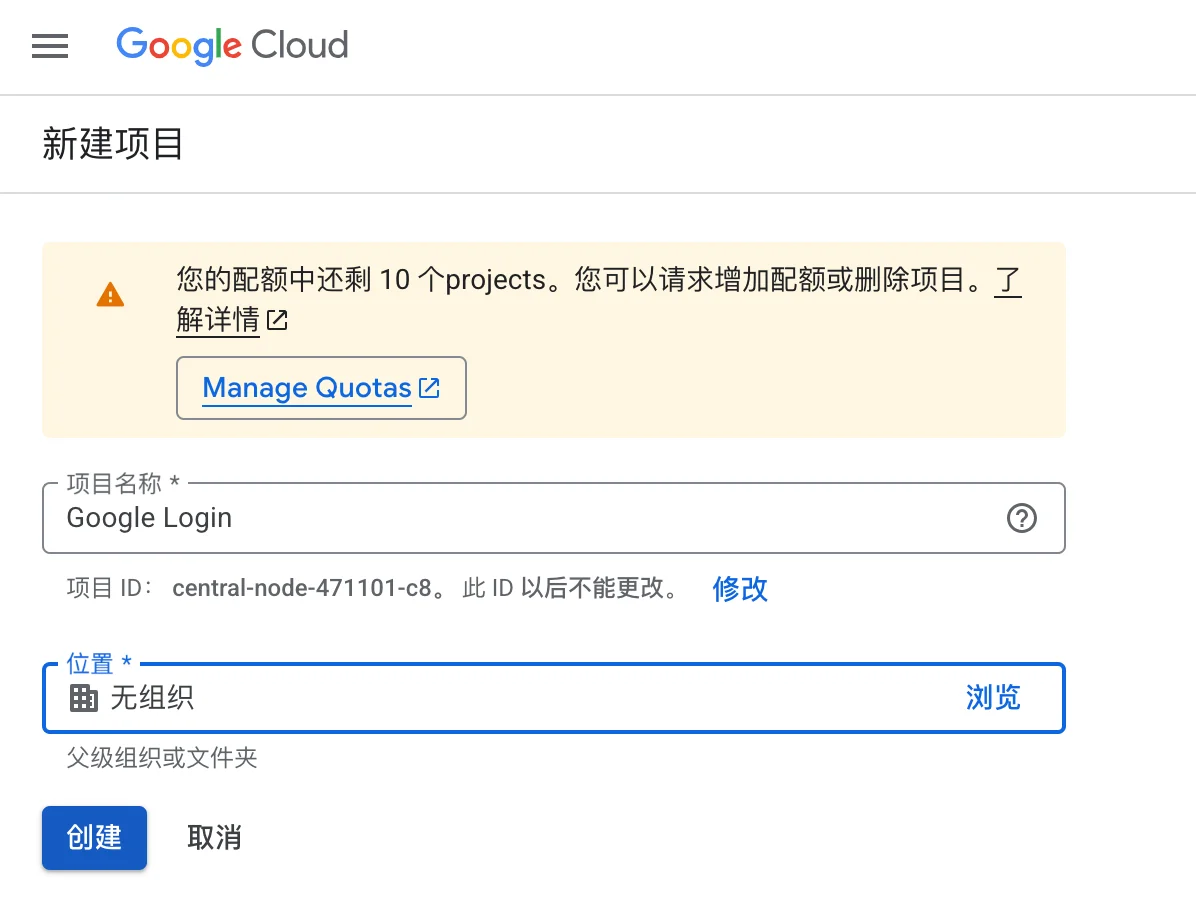
Prerequisites: You must have a Google account, visit https://console.cloud.google.com/ and log in, create a Google API project. If you already have a project, you can skip this step. Quick access address: https://console.cloud.google.com/projectcreate. Enter the project name on the interface that appears, fill in the English name, and then click the create button to complete the creation.
Prerequisites: You must have a Google account
Visit:https://console.cloud.google.com/Log in and complete
If there is an existing project, you can skip this step
Quick access address:https://console.cloud.google.com/projectcreate
Enter the project name on the interface that appears, fill in the English name, and then click the Create button to complete the creation.
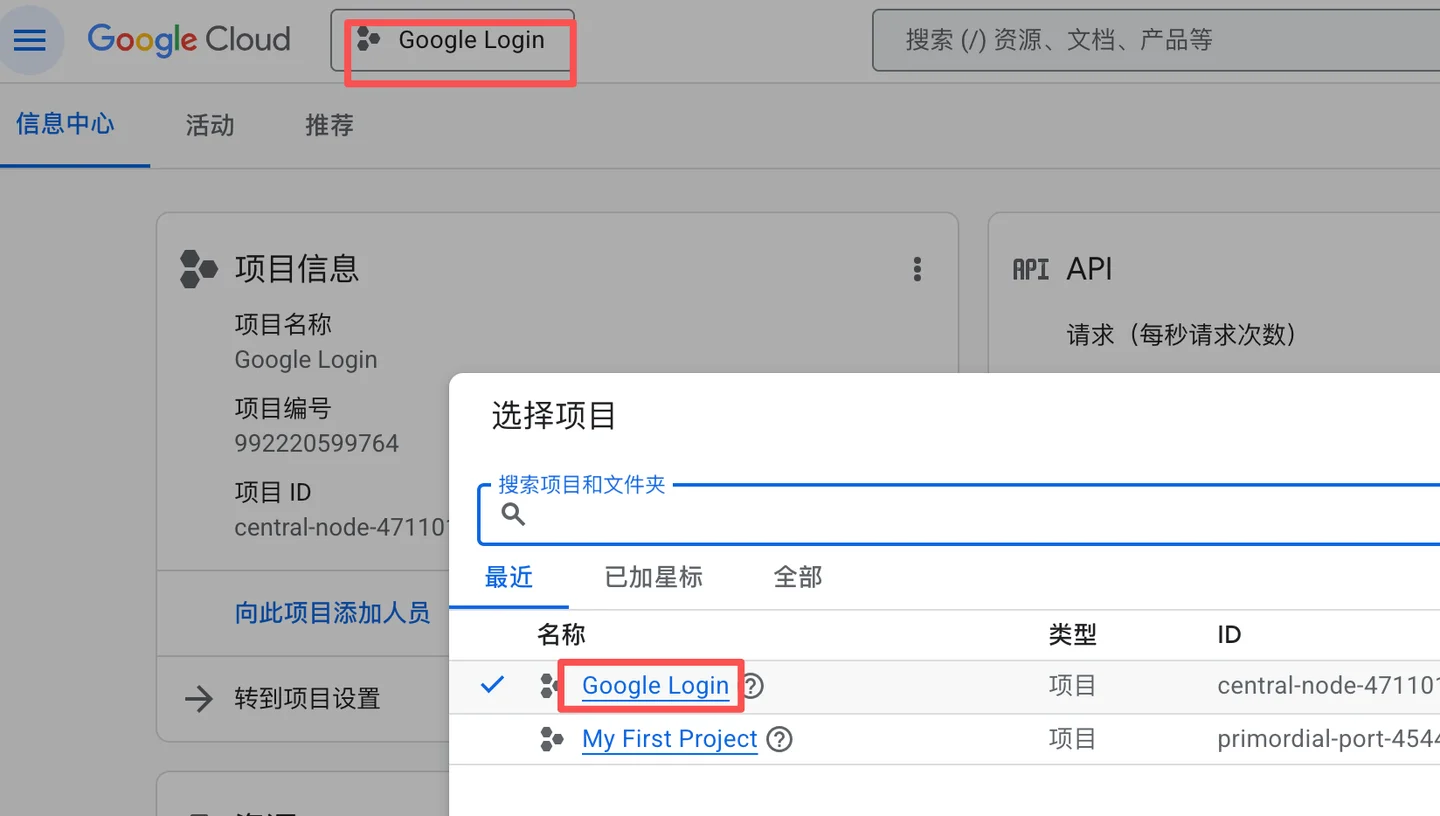
After creating, you will be directed to the project page. If you have multiple projects, it may not display the newly created project. You will need to click the top project name dropdown to select the newly created project.
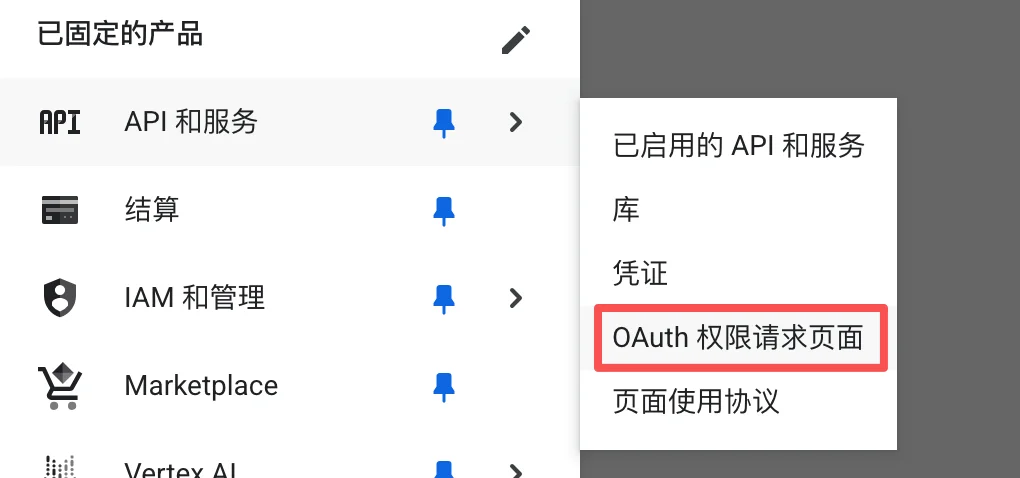
Select API and services in the left menu, then select the Oauth permission request page. Click the start button.
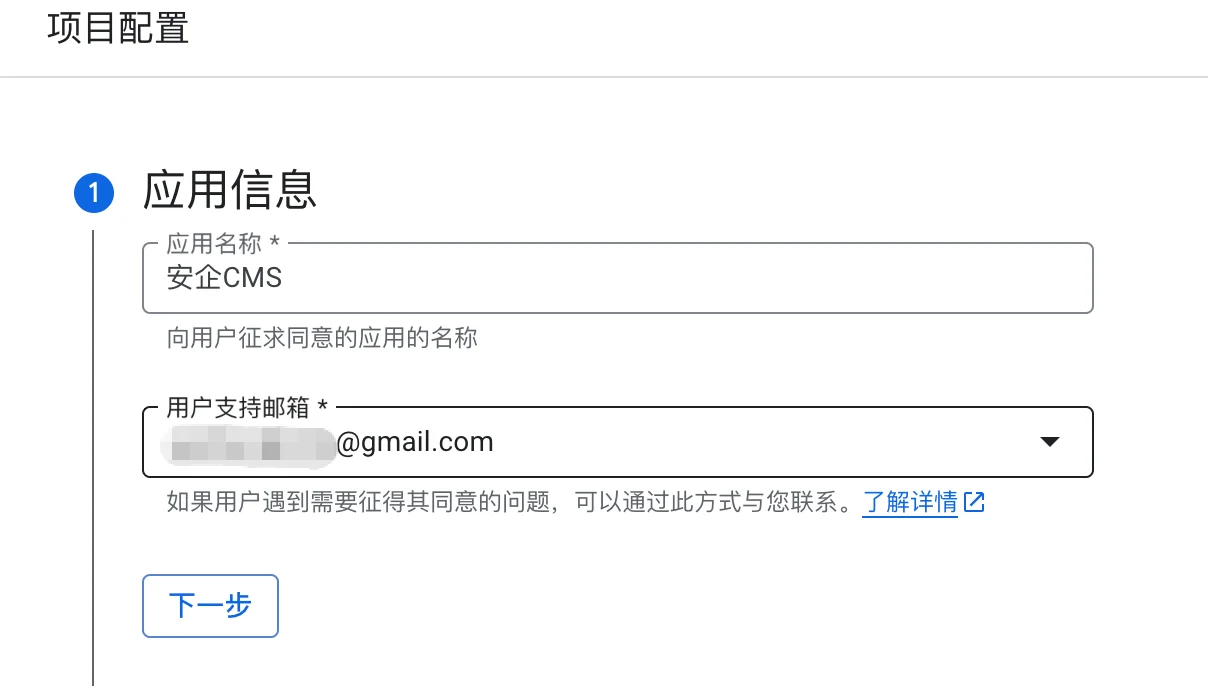
 In the interface that appears, enter the application name, select the user support email, and click next
 Next, select the audience group, select external
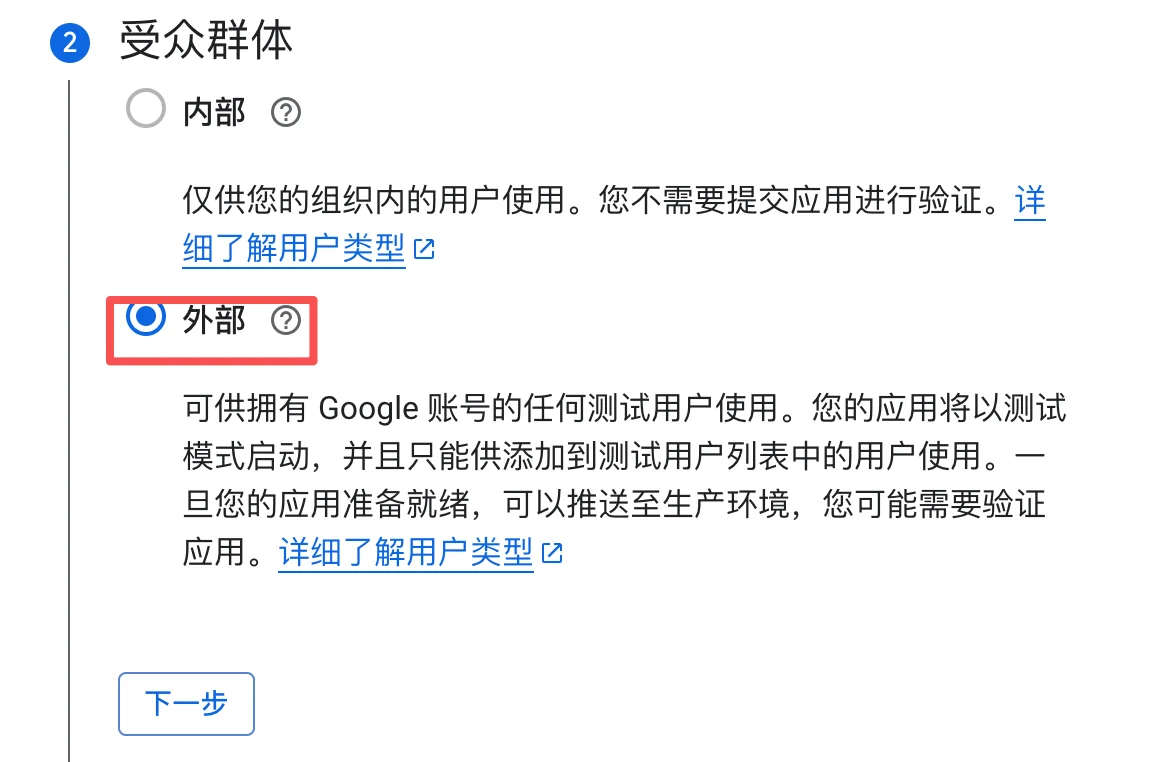 Please fill in the next steps as instructed. Finally, click create.
After creation, go to the Oauth overview page, click Create Oauth client. Select Web Application for the application type, and fill in the name as it is.
Enter your URL in the authorized JavaScript source, as shown in AnQi CMS fillinghttps://en.anqicms.com
Enter your URL in the authorized redirect URI + /login/google, as it is filled in for AnQi CMShttps://en.anqicms.com/login/google
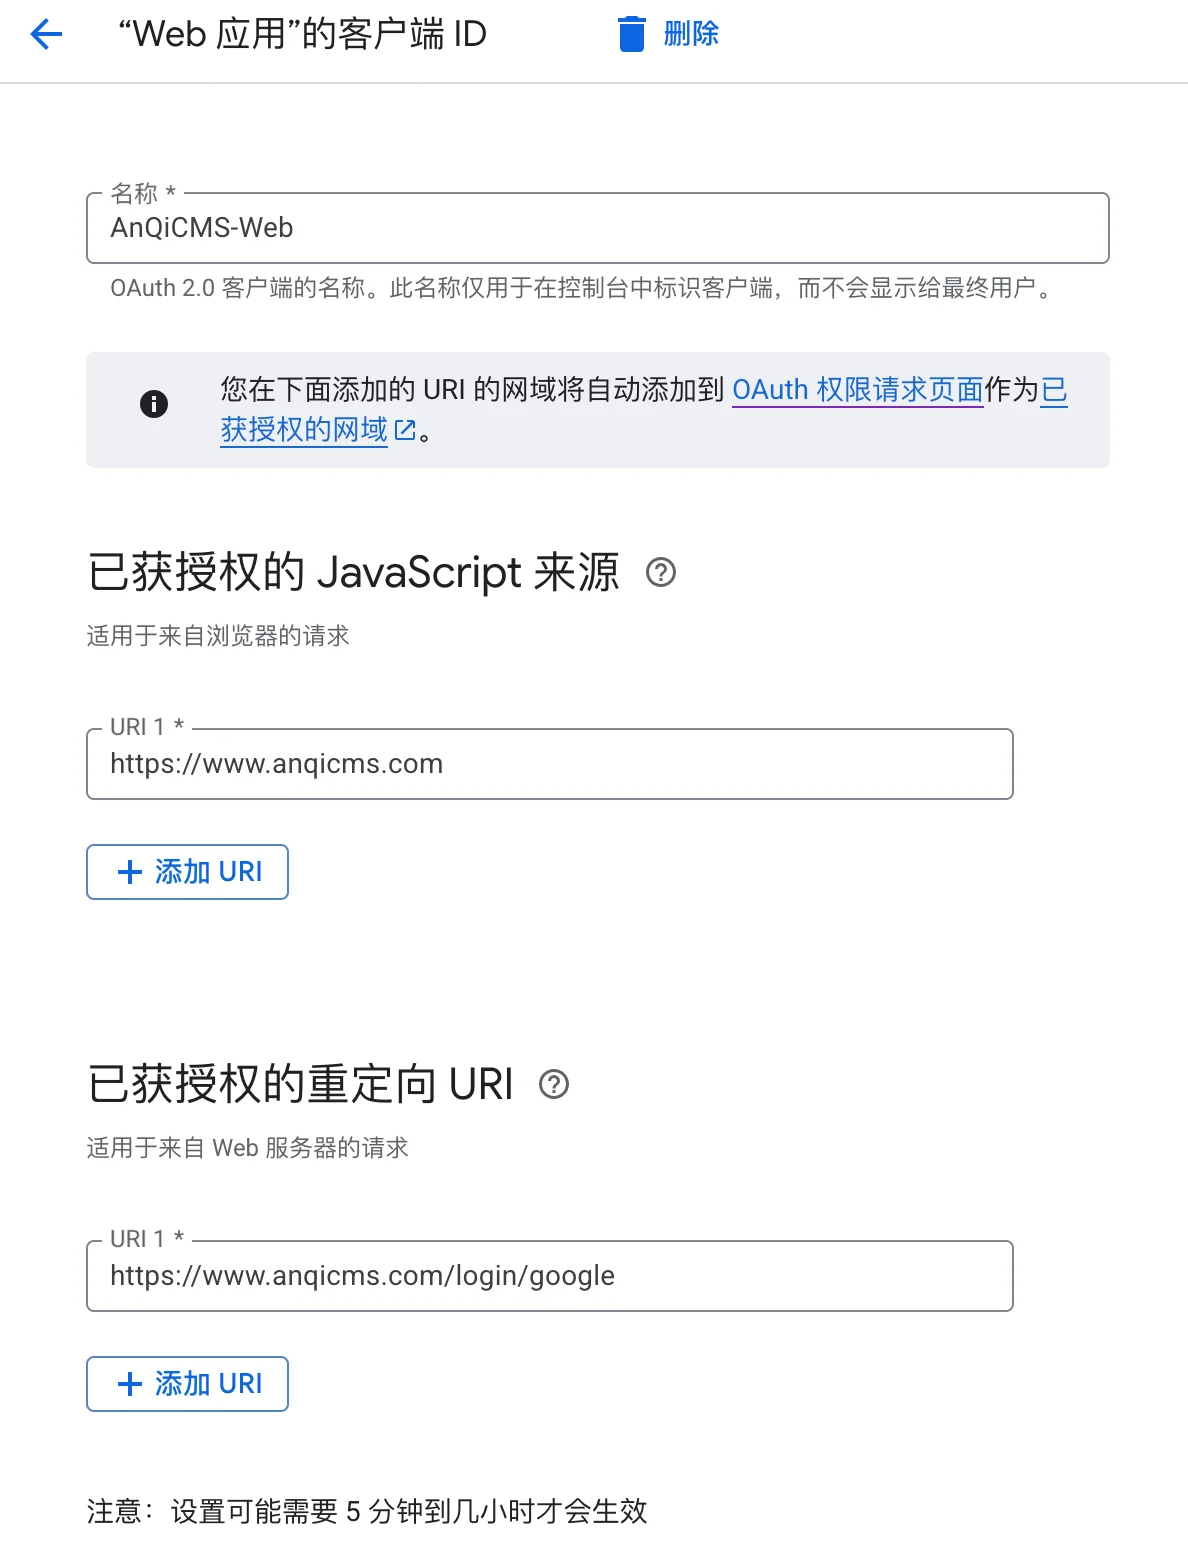 Click the Create button to complete the creation.
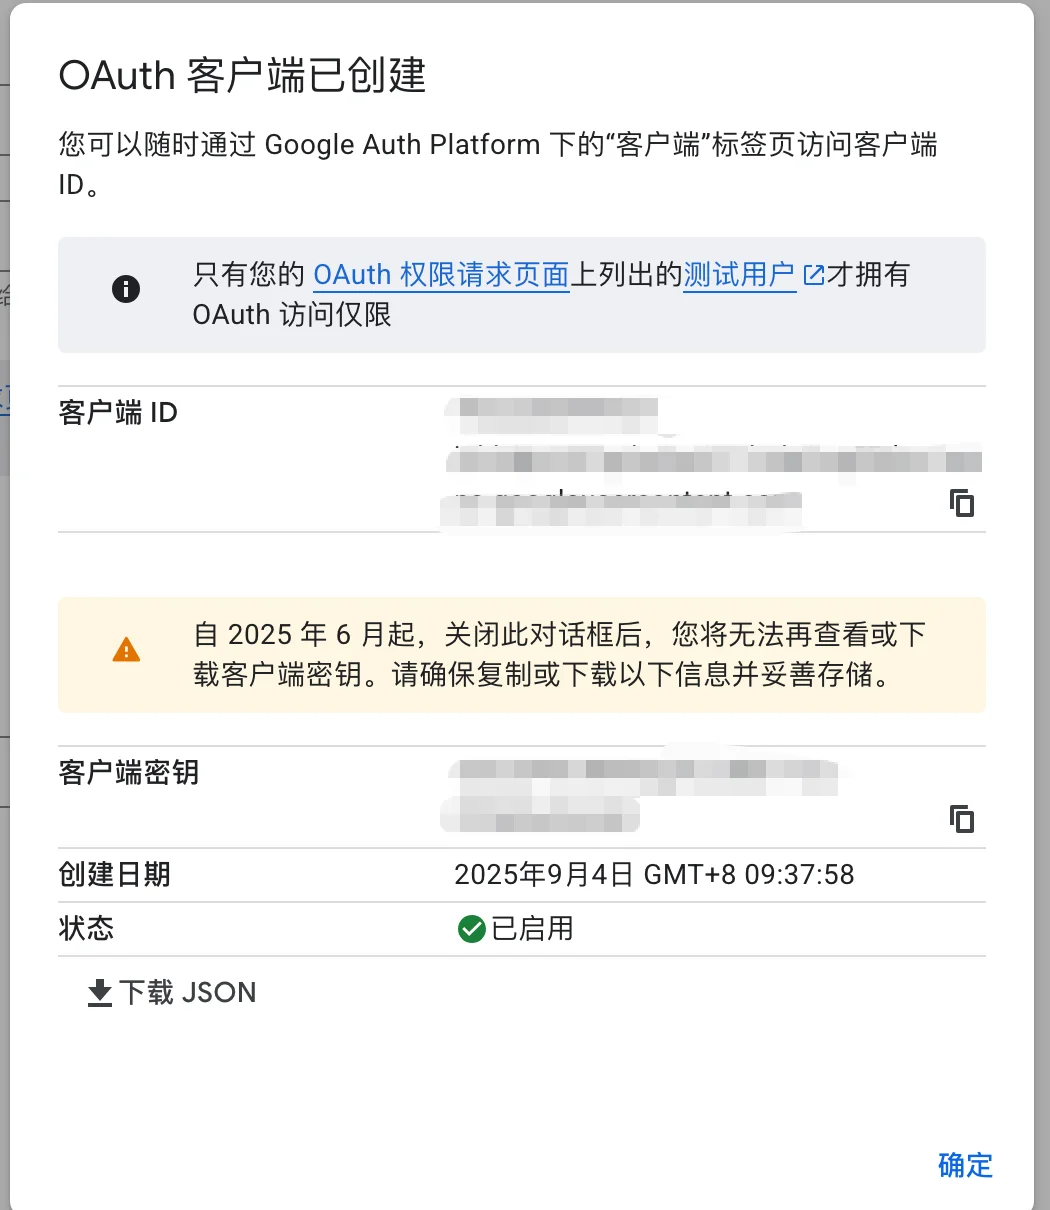
After creation, a window will pop up, the client ID and client key information on it need to be kept safely, it will be used later, and you can also click the download JSON button to save it directly to your local machine for future use.
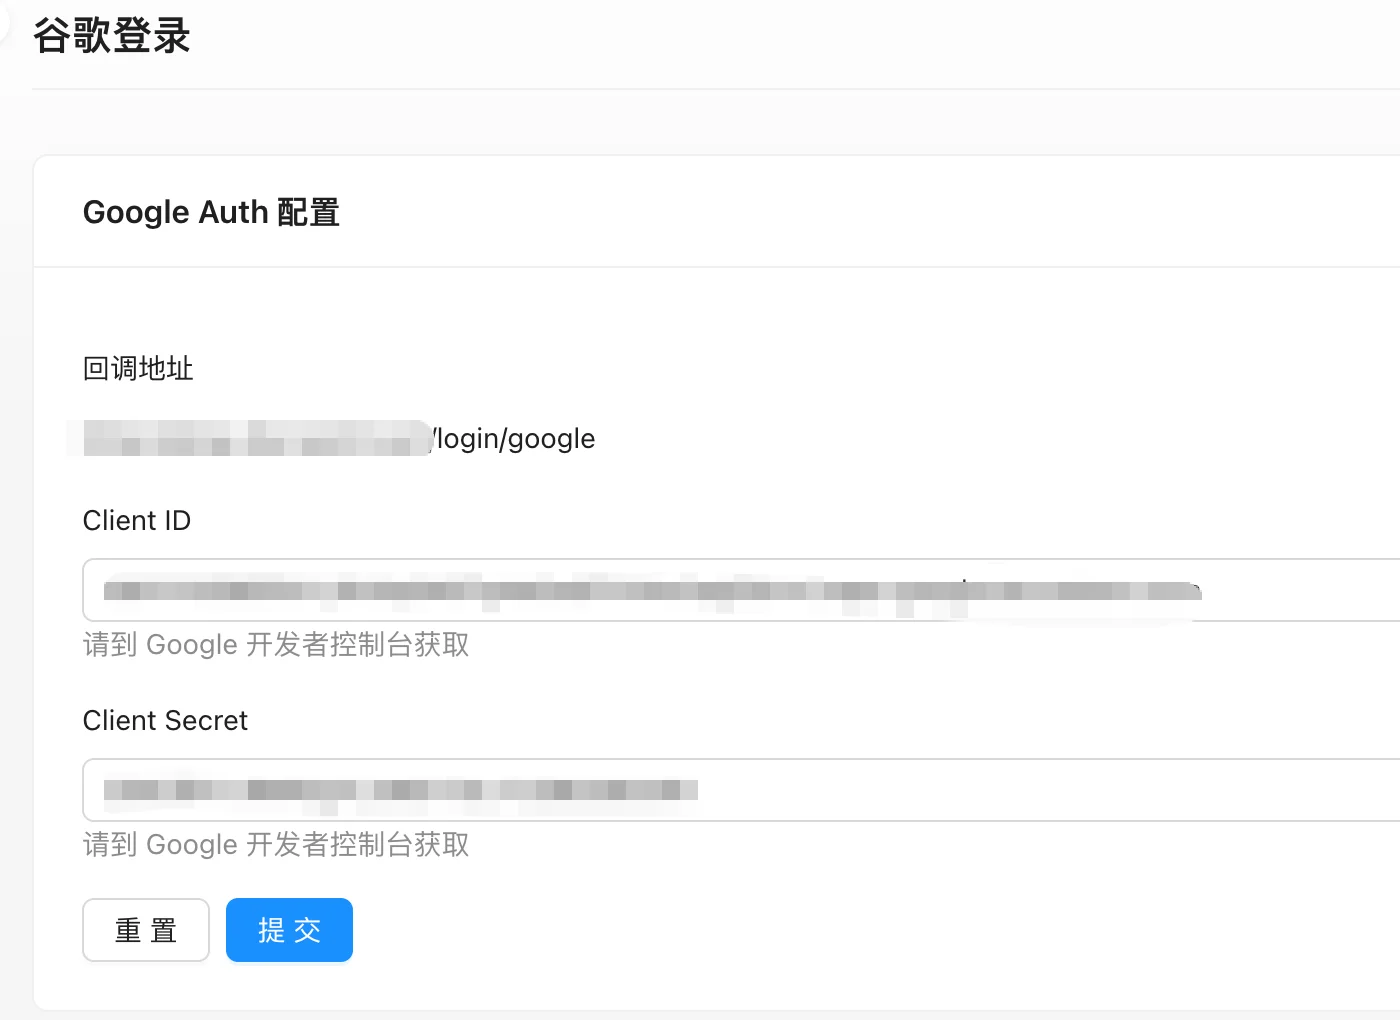
Log in to the Anqi CMS backend, go to the function menu, find the Google Login feature, fill in the Auth client ID and client secret information saved just now, and submit.
Place a Google login button at a suitable position on the front end (such as the login page), and trigger js, request after clicking the login button/api/google/urlObtained Google login redirection link, redirected, waiting for callback to complete.
Example JS as follows:
$('#login-google-btn').click(function() {
  $.get("/api/google/url").then(res => {
        if (res.data) {
            sessionStorage.setItem('state', res.data.state);
            window.location.href = res.data.url;
        }
    }, 'json');
});
// 检查路由中有 code 参数,则请求后端检查
if (window.location.href.indexOf('code') > -1) {
    // 获取 参数 code
    var urlParams = new URLSearchParams(window.location.search);
    var code = urlParams.get('code');
    var state = urlParams.get('state');
    $.ajax({
        type: 'POST',
        url: '/api/login',
        data: JSON.stringify({
            platform:"google",
            "state": state,
            "code": code,
        }),
        contentType: "application/json",
        dataType: 'json',
        success: function (res) {
            console.log(res)
        }
    })
}

The AnQi CMS multi-site default (Go project) site migration tutorial Default (Go project) site migration Log in to the AnQi CMS backend, find the Backup and Restore feature in the Function Management, and create a new backup record.This is to back up the database data into a file.
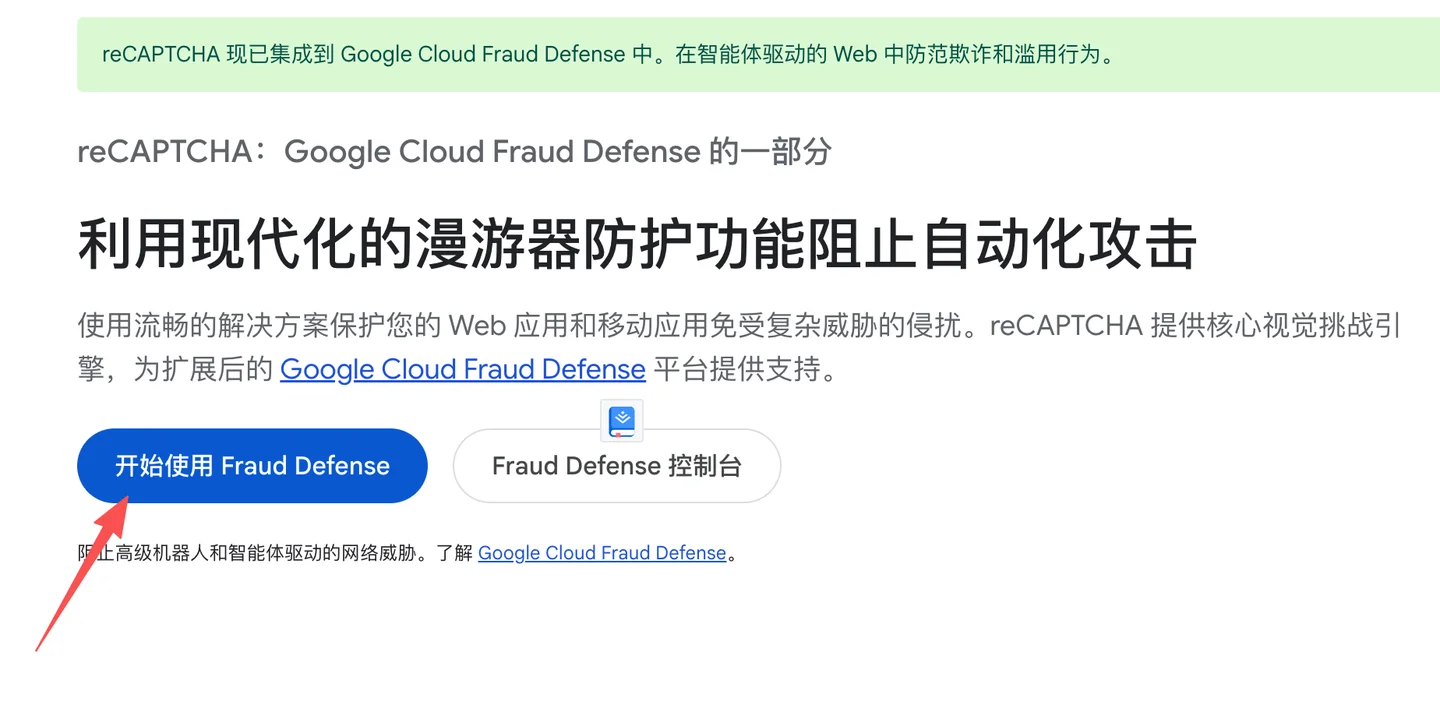
reCAPTCHA is a powerful robot-blocking tool that protects websites from network spam, abuse, and fraudulent activities. It determines whether an action is performed by a human or a robot by analyzing user behavior and other factors.If suspicious activity is detected, reCAPTCHA may take measures to prevent unauthorized access, such as displaying a verification challenge or completely blocking interaction.This helps to ensure that the website remains protected while minimizing interference with legitimate users. The following are three key features: Adaptive Risk Assessment: Analyzing various factors, assessing the risk of the user being a robot, and adjusting the response accordingly Advanced Robot Detection: Using advanced technology to distinguish between humans and robots to ensure accurate identification Continuous Learning
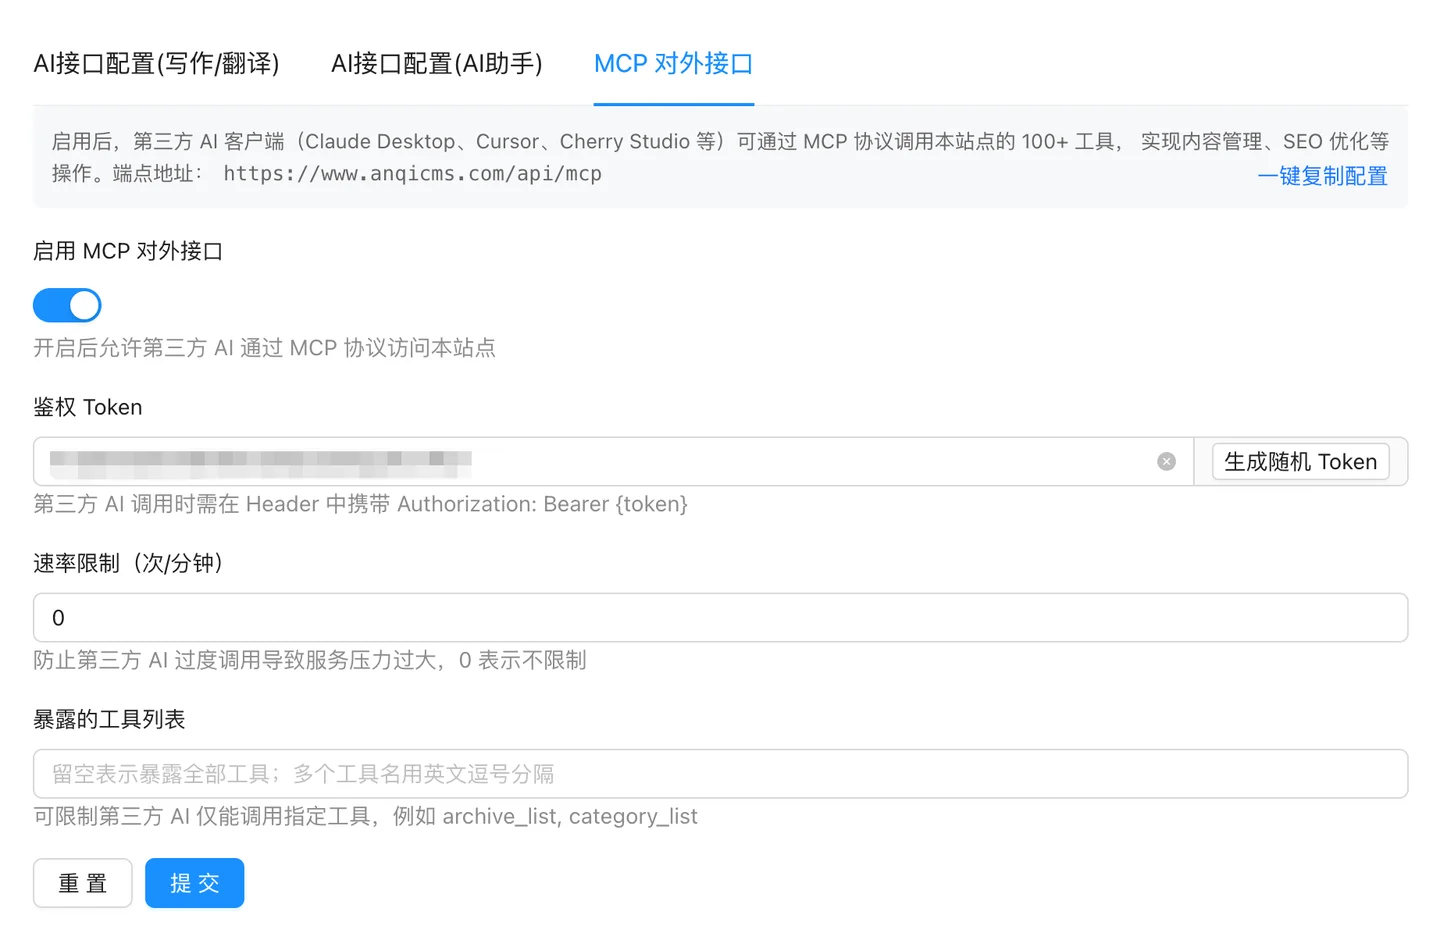
Many systems require additional plugins and independent services to install MCP capabilities, while Anqicms has chosen a more radical approach: integrating the MCP Server directly into the system kernel.After upgrading to a version that supports MCP, there is no need for any additional deployment, the website itself is a standard MCP server. Imagine such a scenario: in the morning, open the AI assistant and say one”}Please help me organize last month's access data into a daily report and list the 10 articles with the lowest click-through rate under the 'SEO' category.After a few seconds, the result is in front of you--and behind this, you haven't opened the website background from start to finish. This is not an illusion; this is exactly what Anqi CMS is.
