AnQi CMS multi-site migration tutorial
Feature Introduction

AnQi CMS multi-site migration tutorial

The AnQi CMS multi-site default (Go project) site migration tutorial Default (Go project) site migration Log in to the AnQi CMS backend, find the Backup and Restore feature in the Function Management, and create a new backup record.This is to back up the database data into a file.

Feature Introduction

AnQi CMS Multi-site Default (Go Project) Site Migration Tutorial

Default (Go Project) Site Migration Out

  1. Log in to the Anqi CMS backend, find it in the Function ManagementBackup and restorefunction, and add a new backup record. This is to back up the data in the database to a file.
  2. Return to the Baota panel and findwebsite, switch toGO projectFind the site to be migrated, click on the corresponding root directory, navigate through the file management page, switch to the parent directory, find the site directory in the corresponding directory, and click the compress button on the right to compress the site into a compressed file.
  3. Download the corresponding compressed file to your local machine, then upload it to the Baota panel below the directory on the new server./www/wwwrootand complete the extraction.

Migrate to the default (Go project) site.

  1. First, modify the config. in the newly extracted directory, modifyserverThe port, if other security CMS has already been installed on the new server, then the port here needs to be different from the others and should be directly deleted.mysqlConfiguration information.
  2. Next, come to the Baota panel to findwebsite, switch toGO projectNext, follow the general installation tutorial of Anqi CMS, select to add a GO project, and complete the installation.
  3. After installation, log in to the Anqi CMS backend, find it in the function managementBackup and restoreSelect the last backup record to restore, and the website migration is complete.

Move to another (PHP project) site

  1. You can delete all exceptcache/data/public/templateOther directories and files outside the directory. Of course, you can also not delete them.
  2. Next, come to the Baota panel to findwebsite, switch toPHP projectContinue following the method of adding multiple sites in AnQi CMS, add a site, and complete the installation of the new site.
  3. After installation, log in to the Anqi CMS backend, find it in the function managementBackup and restoreSelect the last backup record to restore, and the website migration is complete.

Tutorial on migrating other (PHP project) sites in AnQi CMS multiple sites

Other (PHP project) site migration

  1. Log in to the Anqi CMS backend, find it in the Function ManagementBackup and restorefunction, and add a new backup record. This is to back up the data in the database to a file.
  2. Return to the Baota panel and findwebsite, switch toPHP projectFind the site to be migrated, click backup, click backup site in the pop-up window, and back up the entire site directory.
  3. Download the corresponding compressed file to your local machine, then upload it to the Baota panel below the directory on the new server./www/wwwrootand complete the extraction.

Migrate to the default (Go project) site.

  1. First, on the new server, follow the normal Aqicms installation tutorial, download an installation package from the Aqicms official website, upload it to the new server, unzip it, and findwebsite, switch toGO projectSelect the option to add a GO project and complete the installation.
  2. Copy the extracted backup files to the newly installed Anqi CMS site, except for config., the other files can be directly overwritten.
  3. After copying, log in to the Anqi CMS backend, find it in the function managementBackup and restoreSelect the last backup record to restore, and the website migration is complete.

Move to another (PHP project) site

  1. Next, come to the Baota panel to findwebsite, switch toPHP projectContinue following the method of adding multiple sites in AnQi CMS, add a site, and complete the installation of the new site.
  2. After installation, log in to the Anqi CMS backend, find it in the function managementBackup and restoreSelect the last backup record to restore, and the website migration is complete.

Related functions

Teach you step by step how to develop a client software using Go (using Go + HTML)

Teach you step by step how to develop a client software using Go (using Go + HTML)

Developing desktop client software has always been one of the common tasks for programmers, and Go language is increasingly being used for developing various applications due to its simplicity, efficiency, and rich third-party libraries.Today we will combine Go language and HTML, using the open-source project Sciter's Go binding library go-sciter, to show everyone how to build a cross-platform desktop client with the least development effort.What is Sciter?

The logic of implementing automated anchor text on the website

The logic of implementing automated anchor text on the website

Anchor text, which is the text part of a hyperlink, plays a crucial role on a webpage.By clicking on the anchor text, users can conveniently navigate between web pages, thereby greatly enhancing the user experience.At the same time, anchor text also plays an indispensable role in the field of Search Engine Optimization (SEO).Search engines analyze the content of anchor text to judge the theme and relevance of the linked page, thereby affecting the page's ranking.Therefore, setting anchor text reasonably is of great importance for improving the SEO effect of a website.

Configure Google Login Tutorial for AnQiCMS

Configure Google Login Tutorial for AnQiCMS

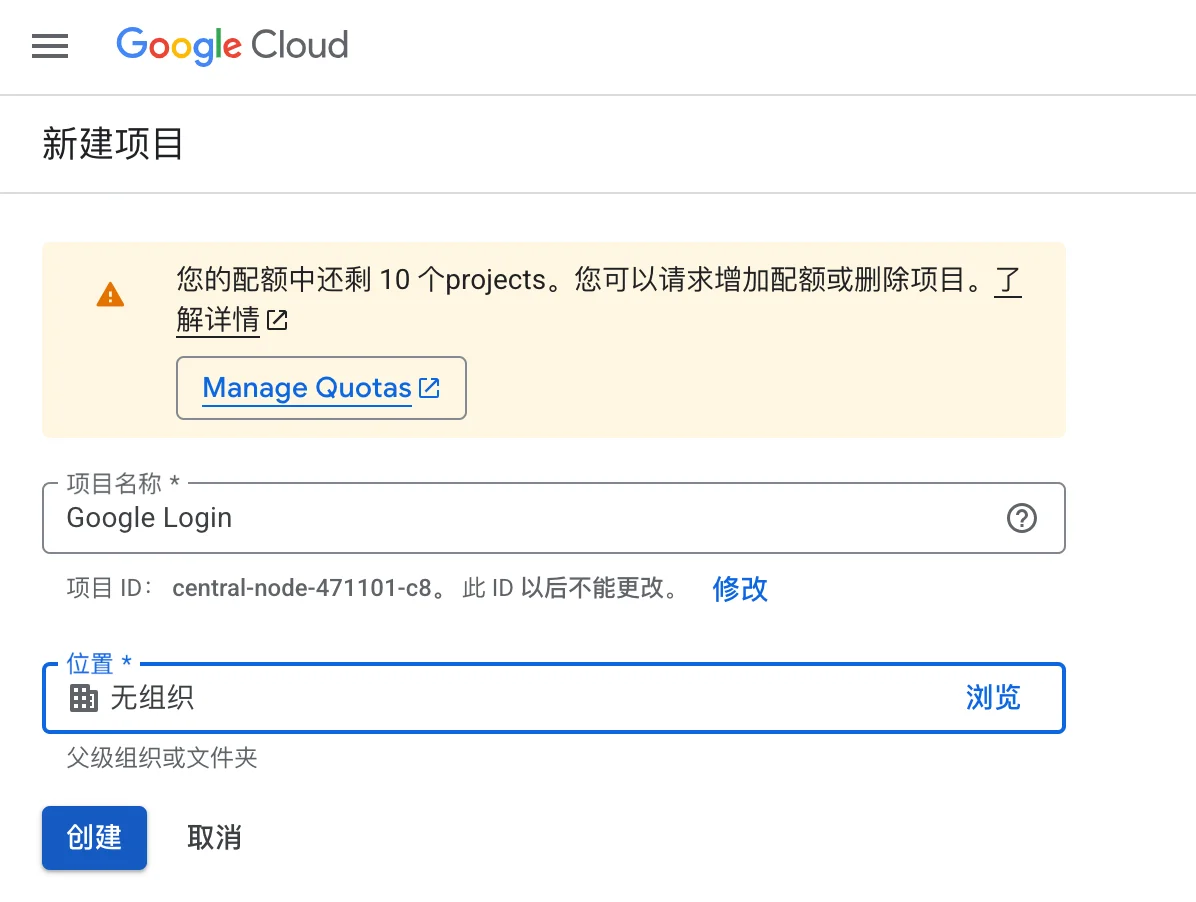
Prerequisites: You must have a Google account, visit https://console.cloud.google.com/ and log in, create a Google API project. If you already have a project, you can skip this step. Quick access address: https://console.cloud.google.com/projectcreate. Enter the project name on the interface that appears, fill in the English name, and then click the create button to complete the creation.