
The Google Indexing API is a URL submission interface provided by Google.It allows website administrators to notify search engines when adding, deleting, or modifying certain website elements, pages, or content.Adding a URL in this manner can quickly inform Google, prompting Google to crawl the page and quickly index new elements - this can increase your website traffic and improve search results ranking.
That's why it's really worth the extra effort.
- Ranking faster (especially important for time-sensitive content)
- Increase your chance of ranking among competitors
- Keep your search results up-to-date to attract higher quality user traffic
Use this method to ensure that your website is indexed and has the opportunity to rank before theirs, giving you a step ahead in the competition, which is very important for time-sensitive and competitive content.
The threshold for using Google Indexing API was once high, but now you just need to follow the steps below, and you will find it easy to use the Google Indexing API features, and you can accelerate the improvement of your website ranking!So, there's no time to lose - let's get straight into the setup steps!
Precondition: You must have a Google account and have control over Google Search Console.
Create Google Indexing API project
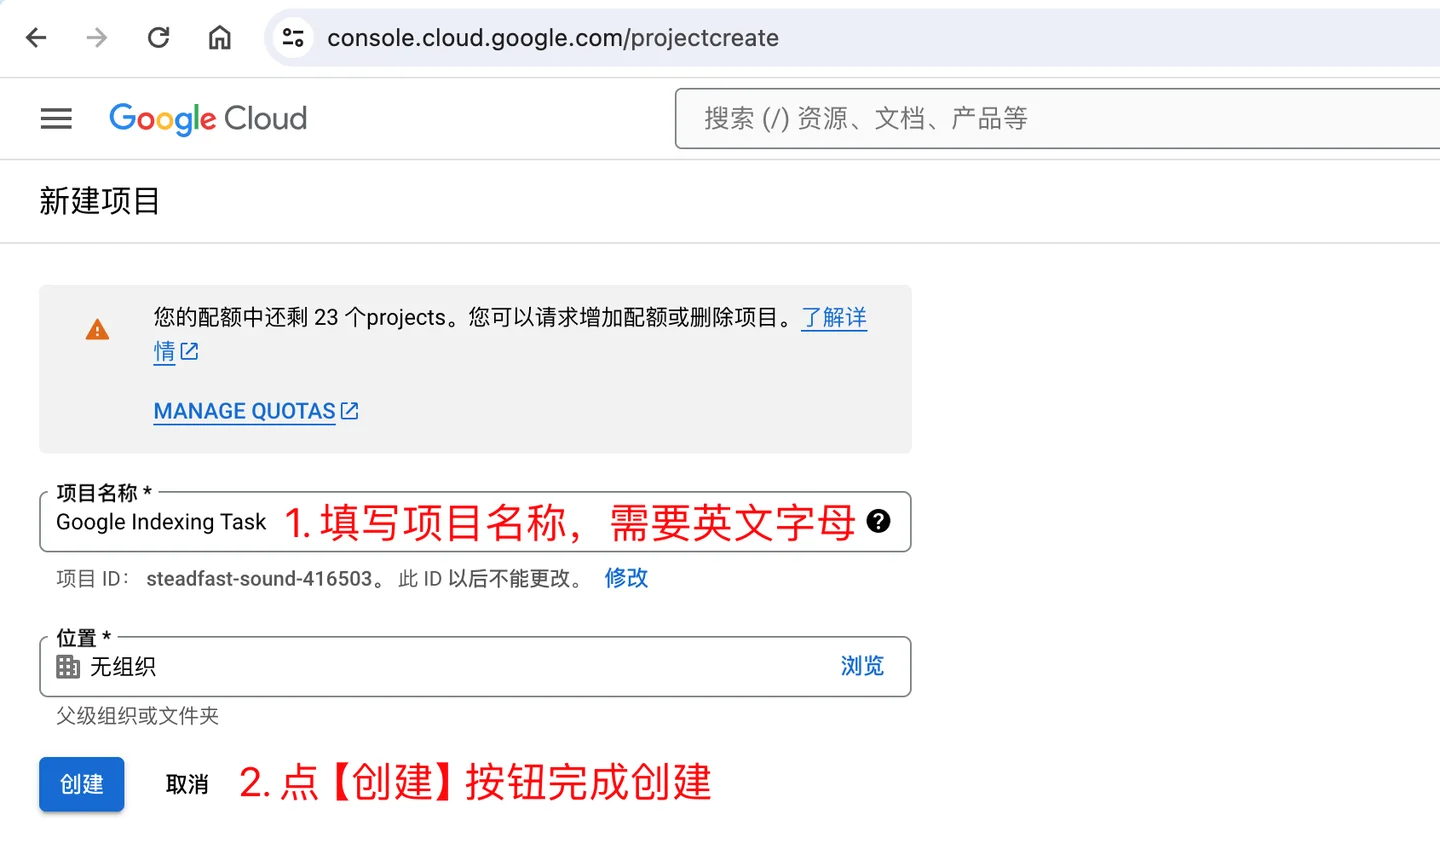
Quick access address:https://console.cloud.google.com/projectcreate
Enter the project name on the interface that appears, fill in the English name, and then click the Create button to complete the creation.
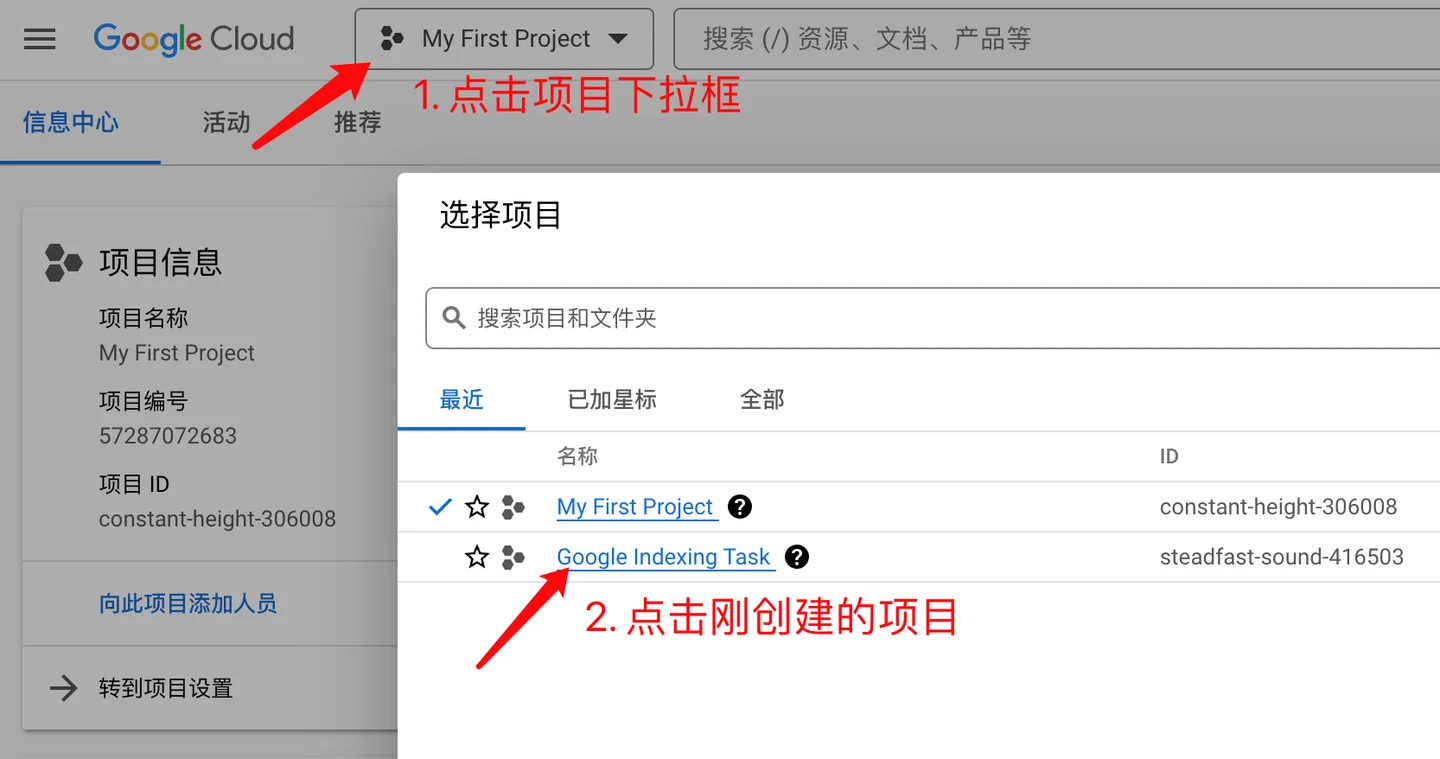
After creating, you will be directed to the project page. If you have multiple projects, it may not display the newly created project. You will need to click the top project name dropdown to select the newly created project.
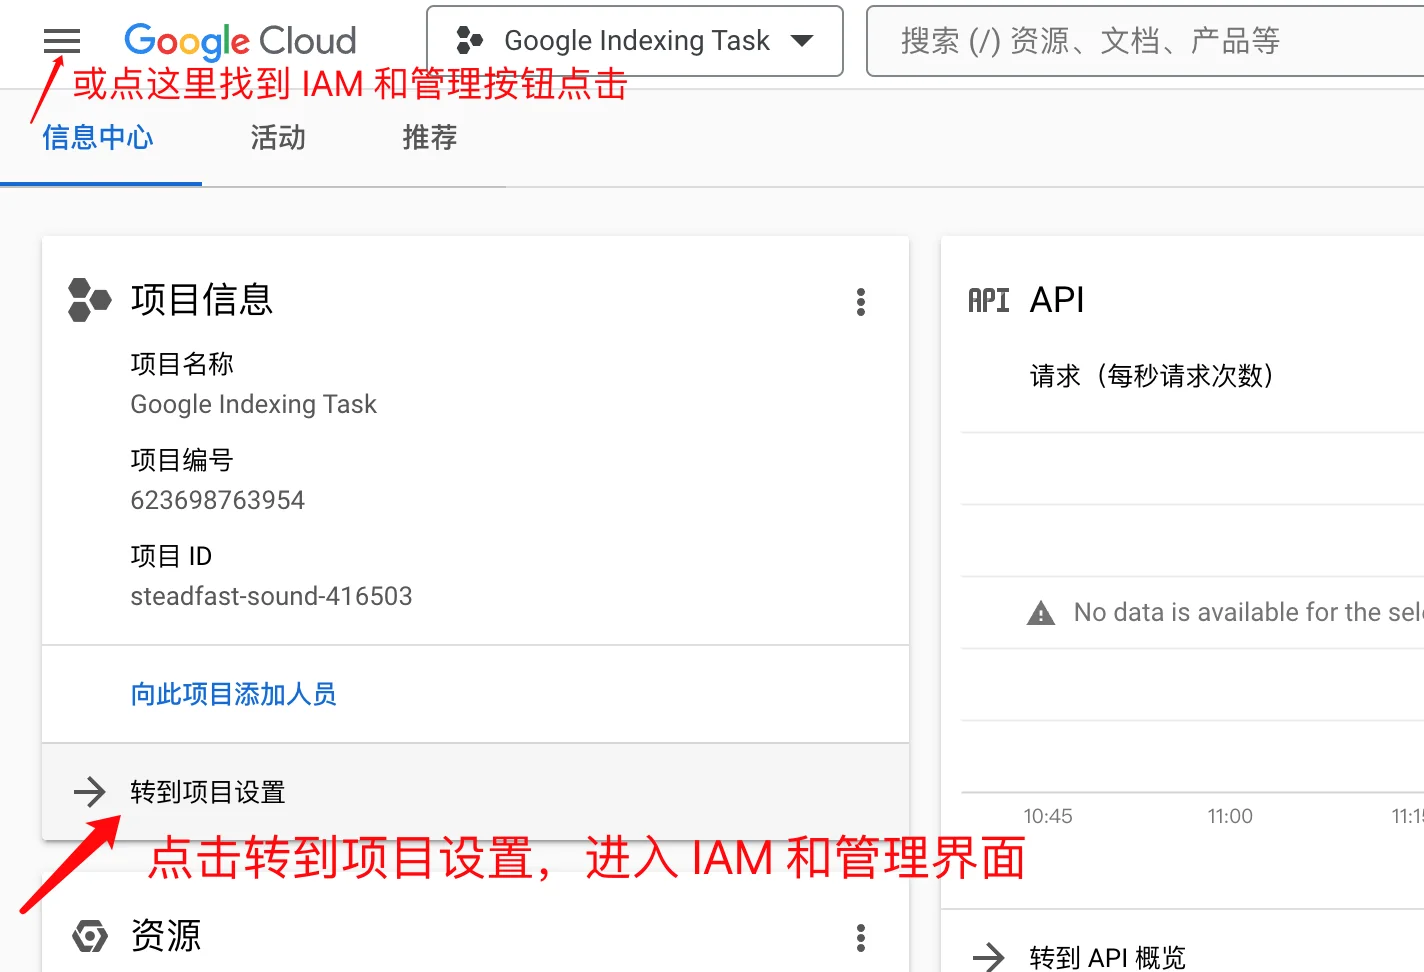
After selecting the project created for the Google Indexing API, you will be taken to the following page, where you can enter IAM and management by clicking on the [Go to Project Settings] link.You can also expand the left menu by clicking the button at the upper left corner of the page, and then click [IAM and Management].
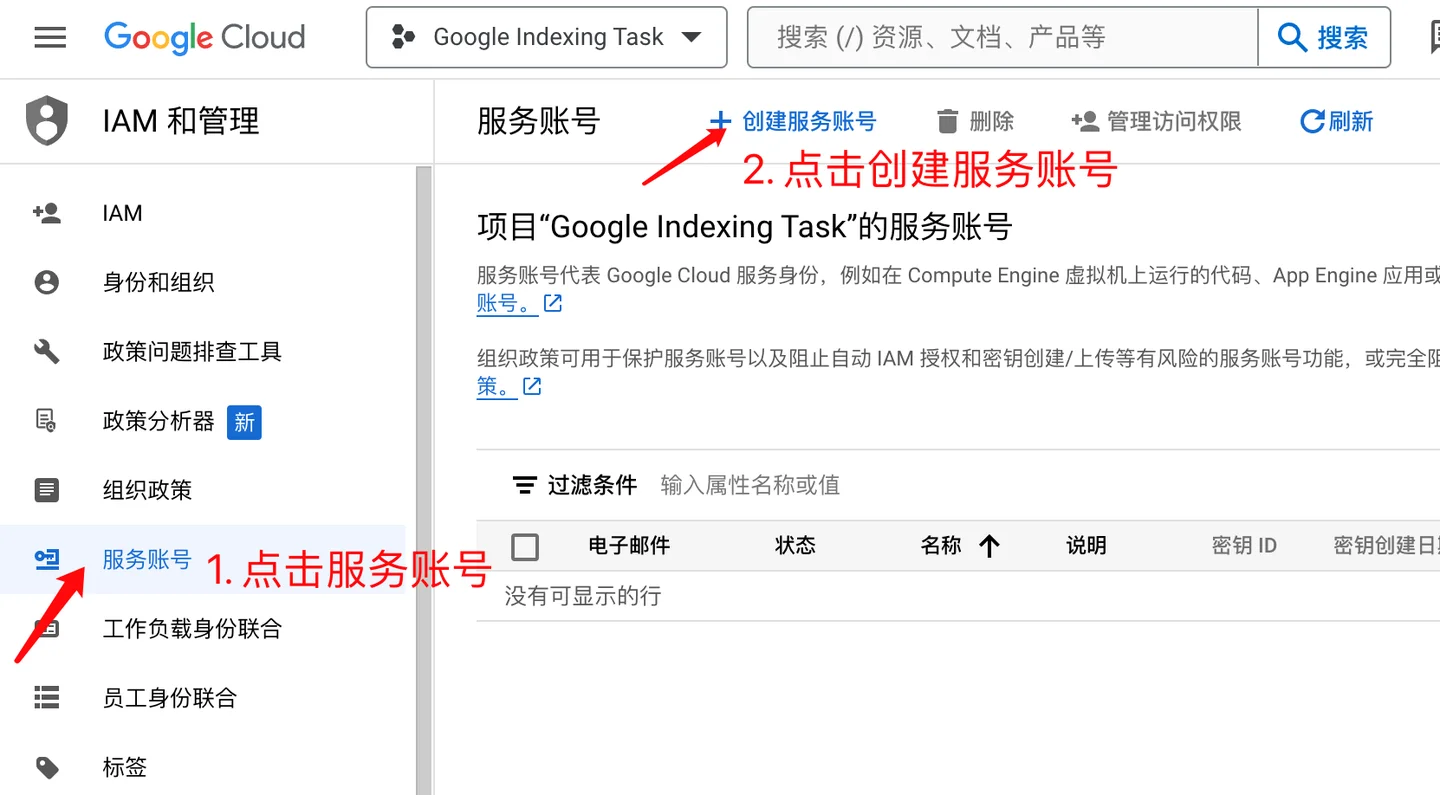
In this interface, click the [Service Account] menu, go to the Service Account interface, and then click the [Create Service Account] button.
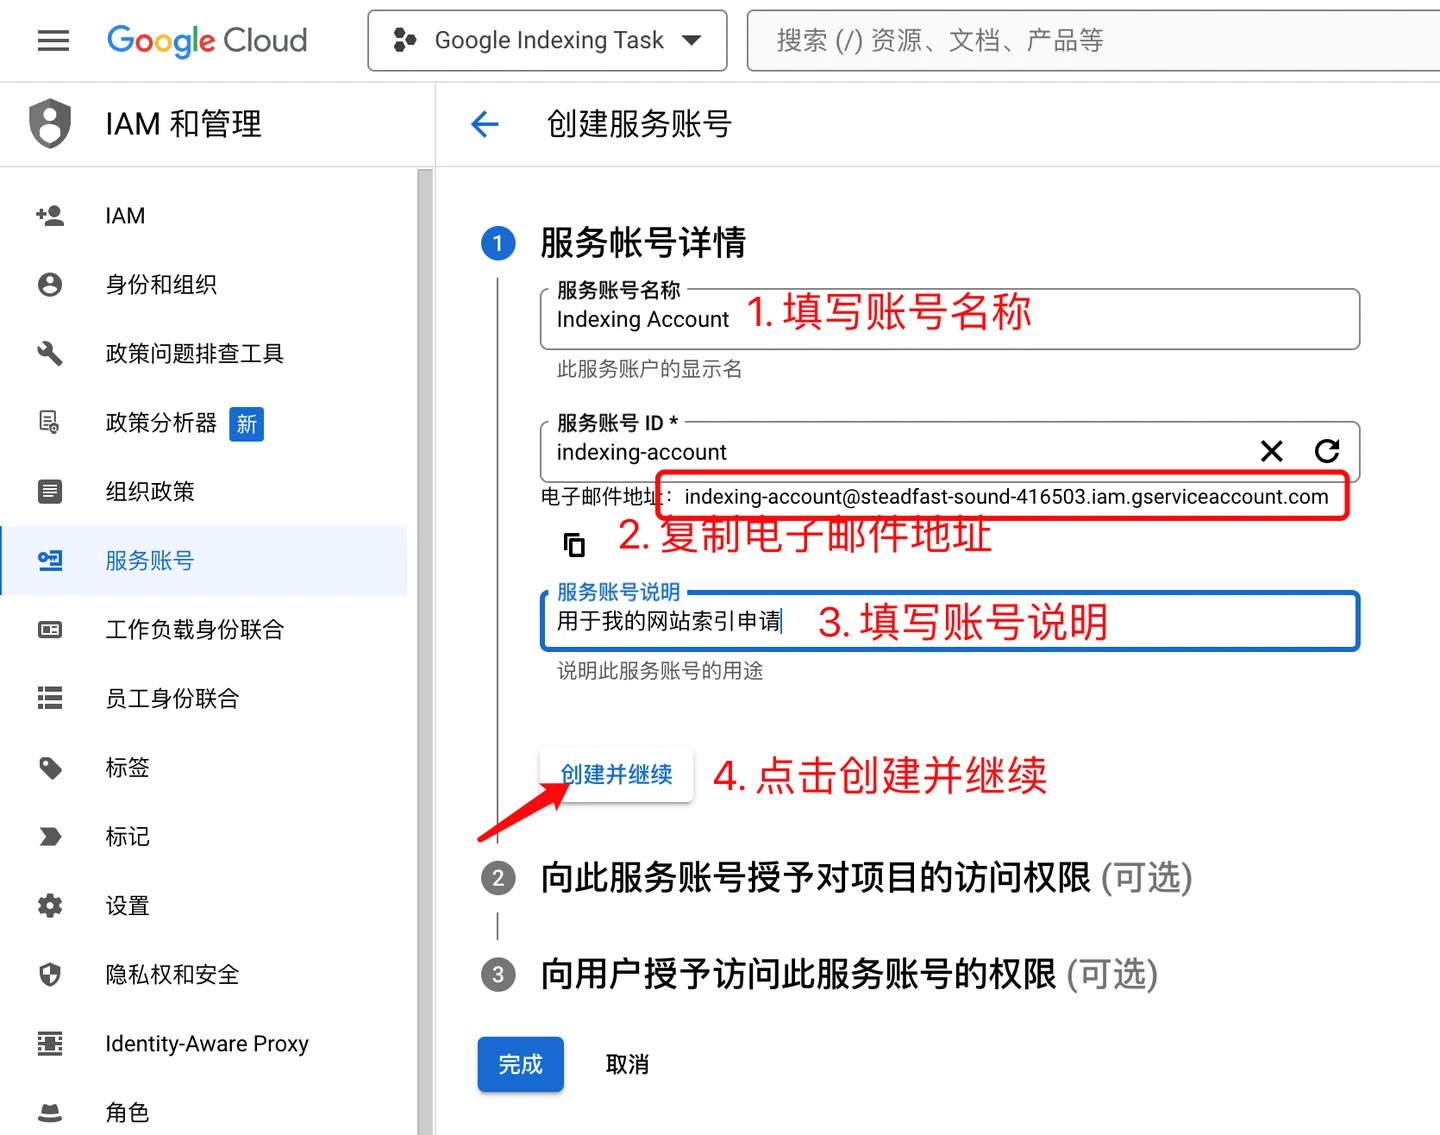
In the service account creation interface, enter the service account name and fill in the service account description.
Copy the email address, as you will need it later.
Then click the [Create and Continue] button to complete the account creation.
Next, in the next step, complete the process of granting access to this service account for the project.
You need to change the role to "Owner".
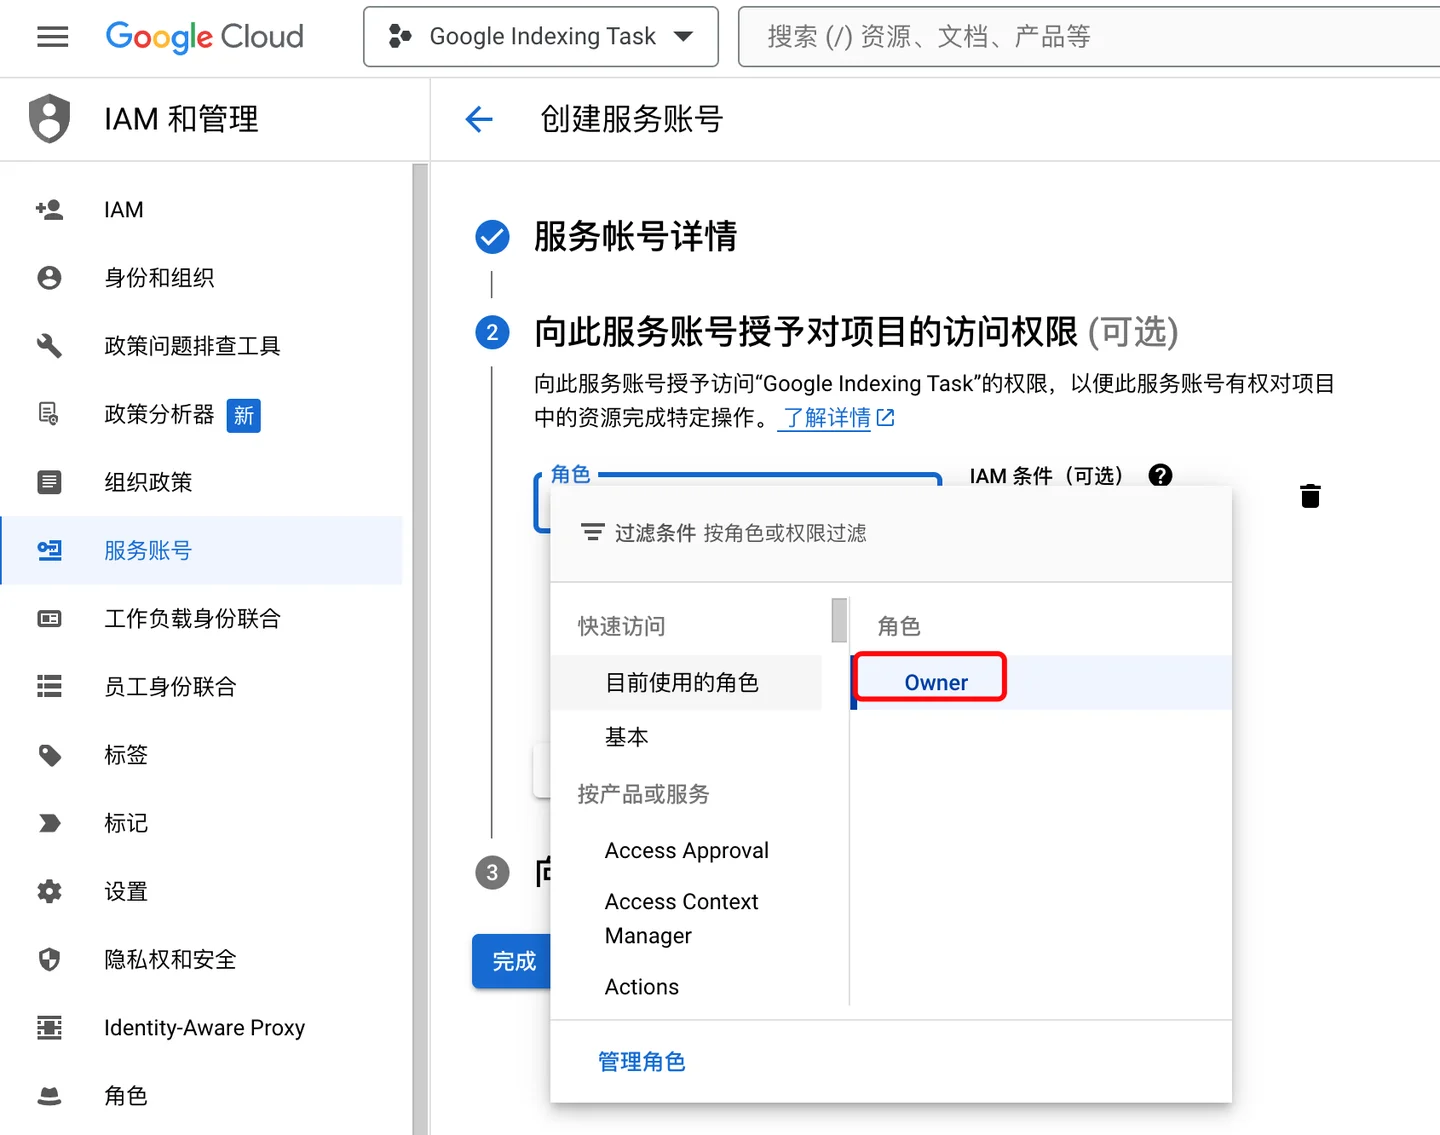
As shown above, after setting the role to Owner, be sure to click 【Continue】to save the changes.Step 3 “Granting the user access to this service account” does not need to be taken care of, just click 【Finish】to complete the creation of the account.
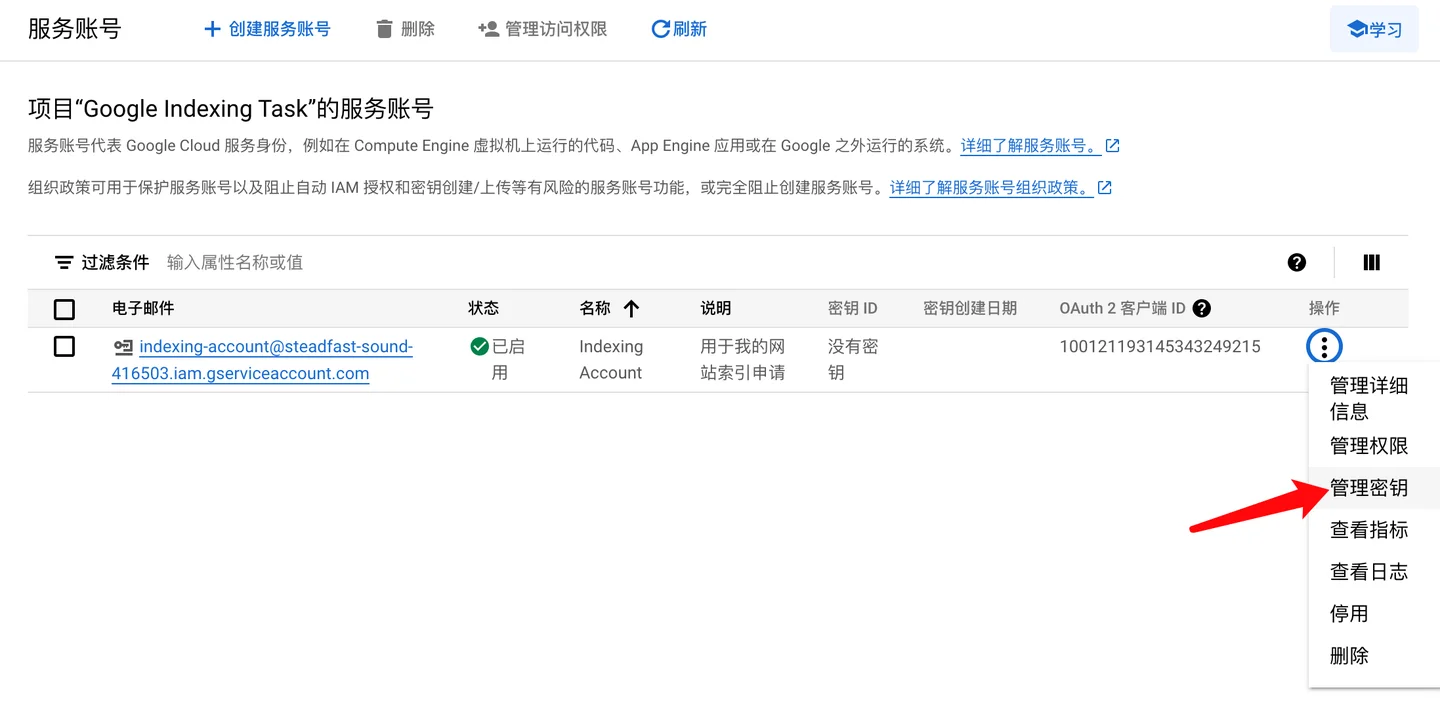
Then, go to the account management interface, where you can download the file containing your API key. Here, simply click on the three vertical dots in the "Operation" column, then select "Manage Keys", as shown below:
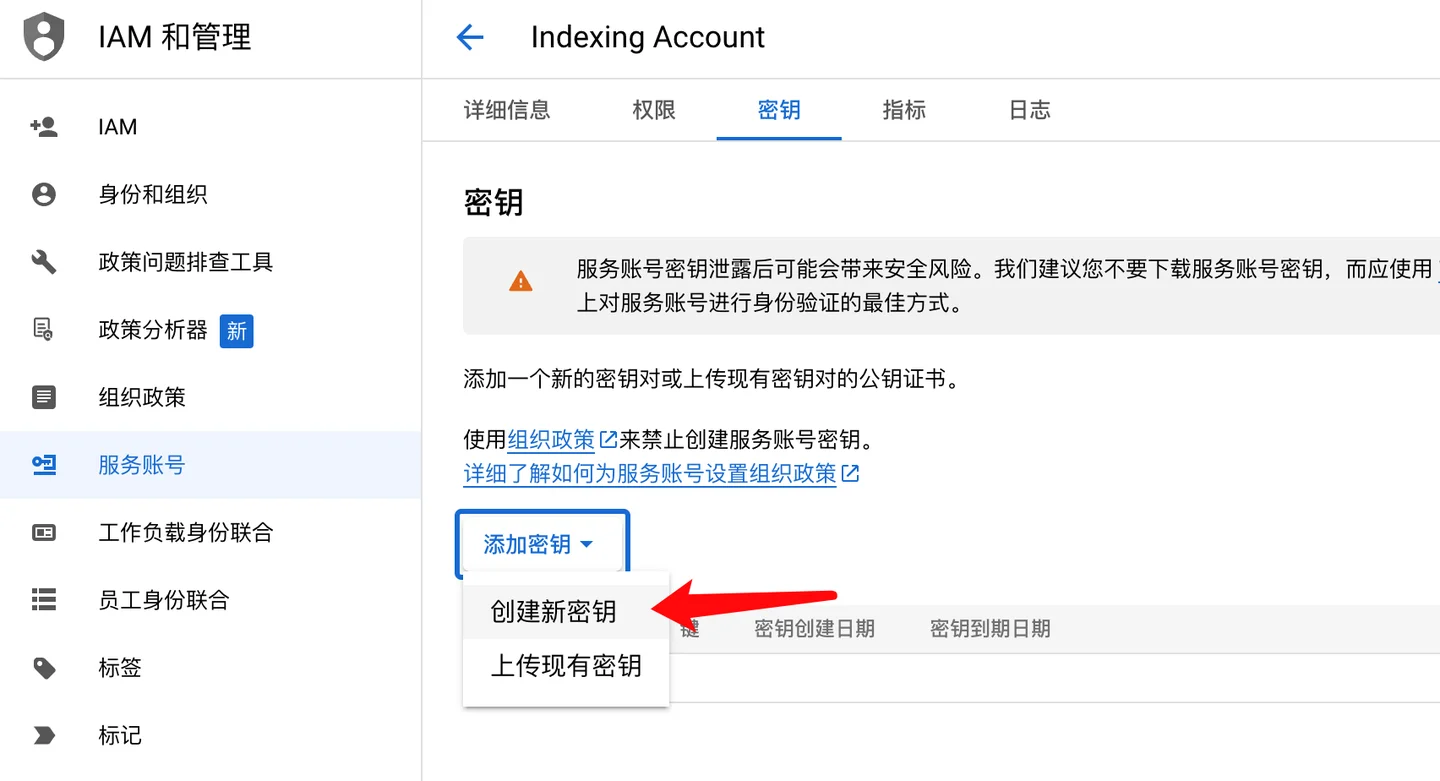
After entering the page below, click on [Add Key], then select the [Create New Key] option as shown:
When a prompt appears in the popup, select the default JSON format and then click [Create]:
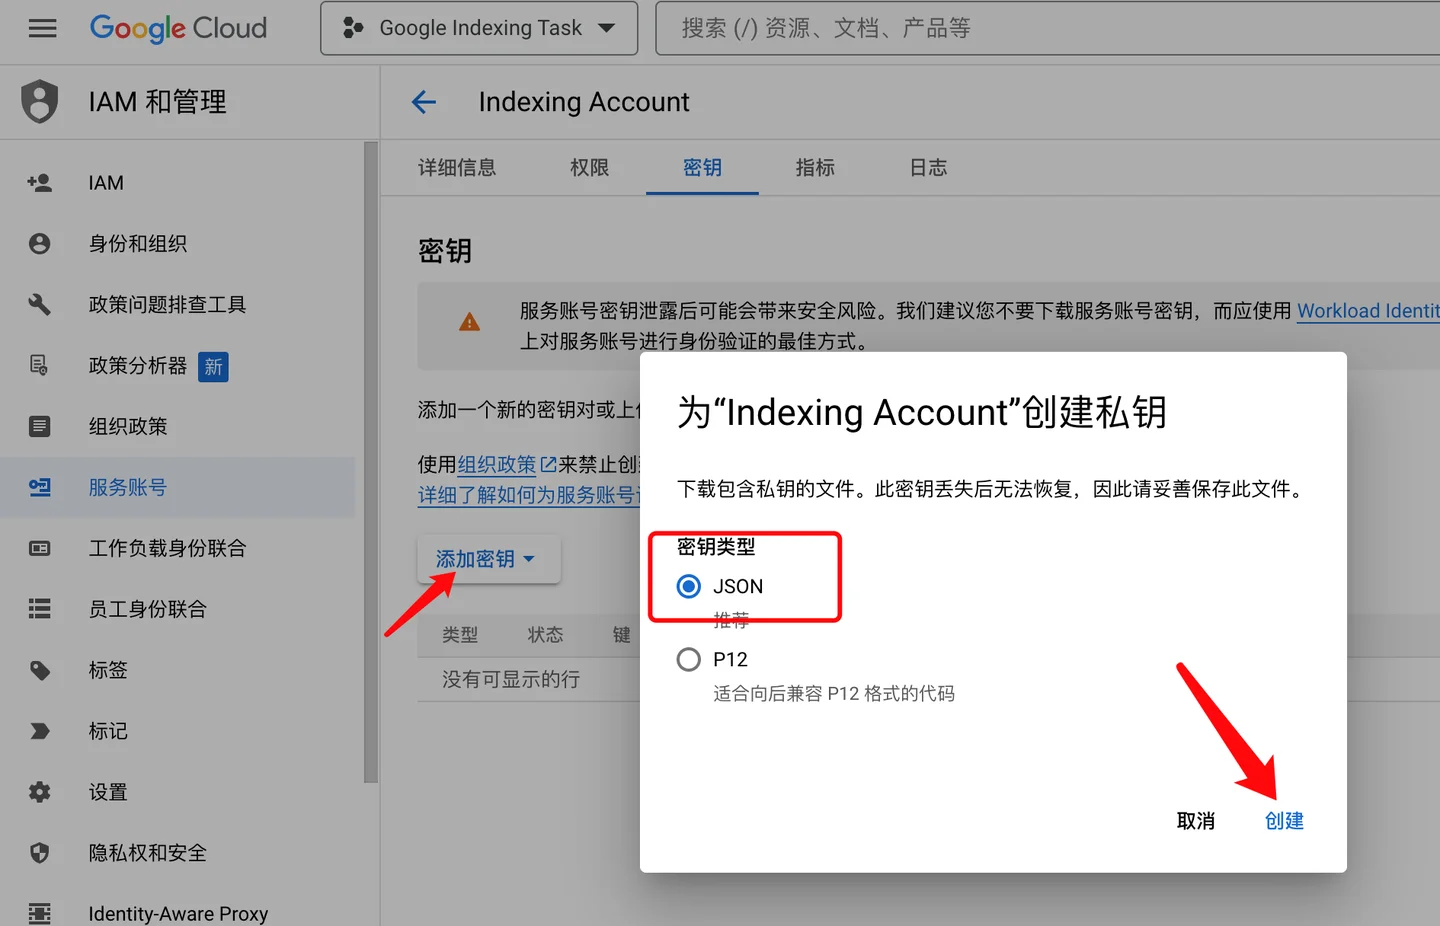
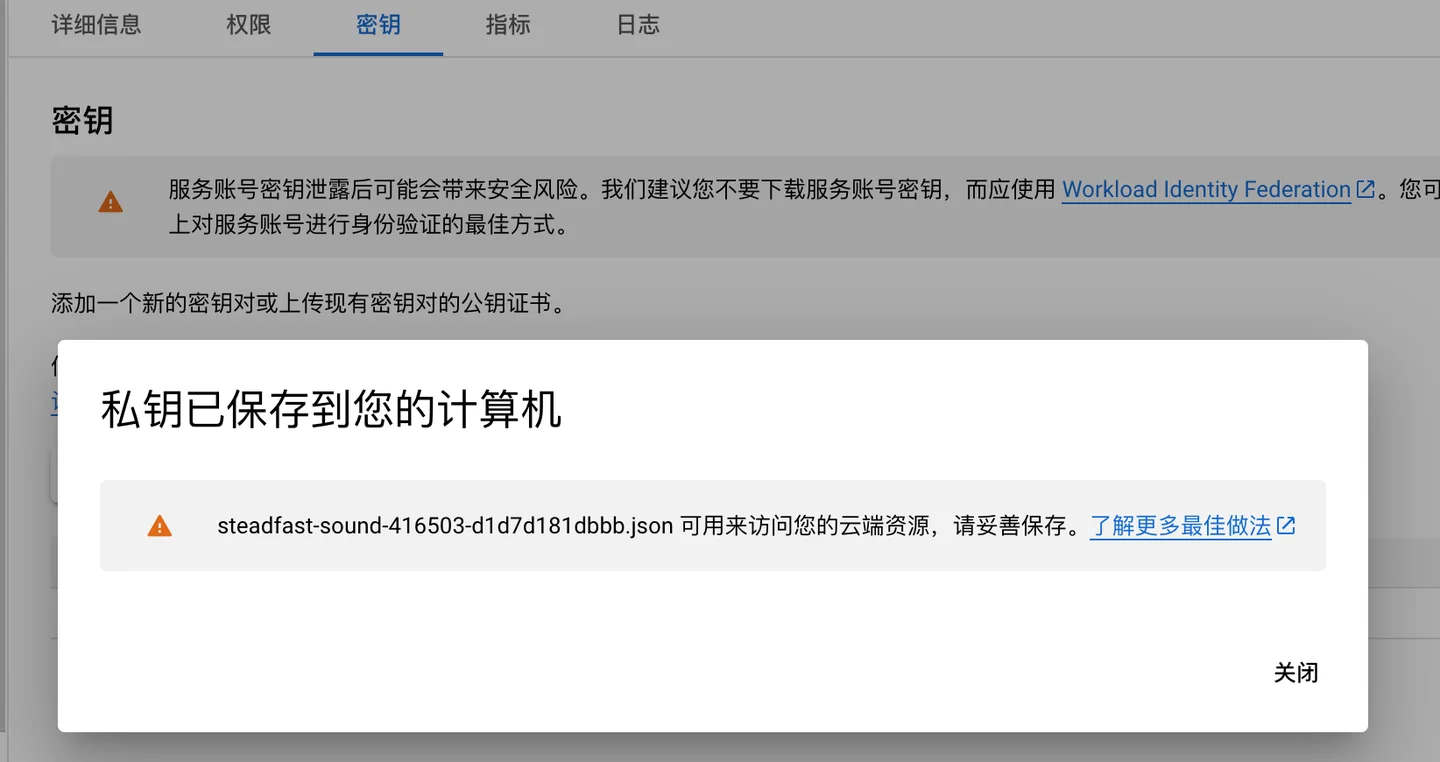
Click "Create" and the . file will be automatically downloaded to your local computer, which means you have successfully created an API key and can proceed to the next step.
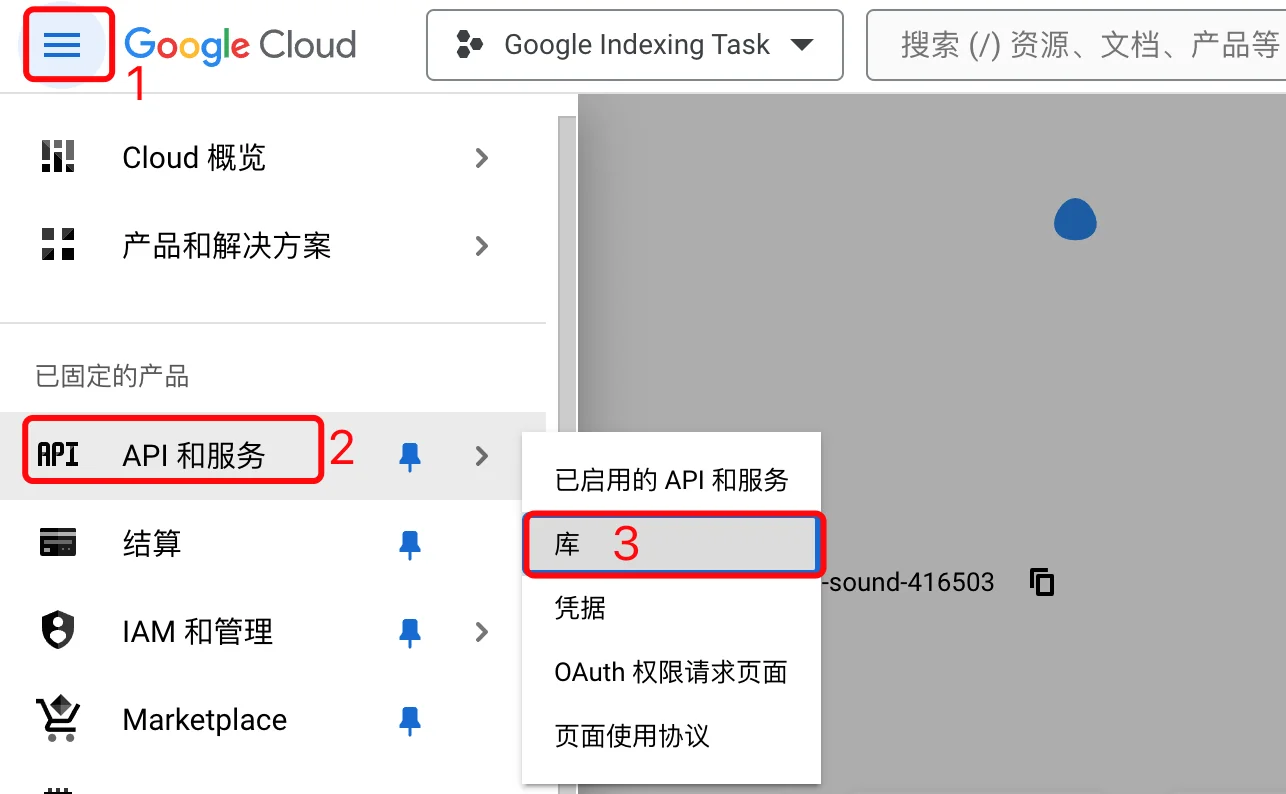
Enable API and services
On the Google Indexing API project page, click the menu in the upper left corner of the page, expand the left menu, and then click [API and Services], then click [Libraries], and you will come to the API library page.
Search for indexing api in the search box, then select Web Search Indexing API:
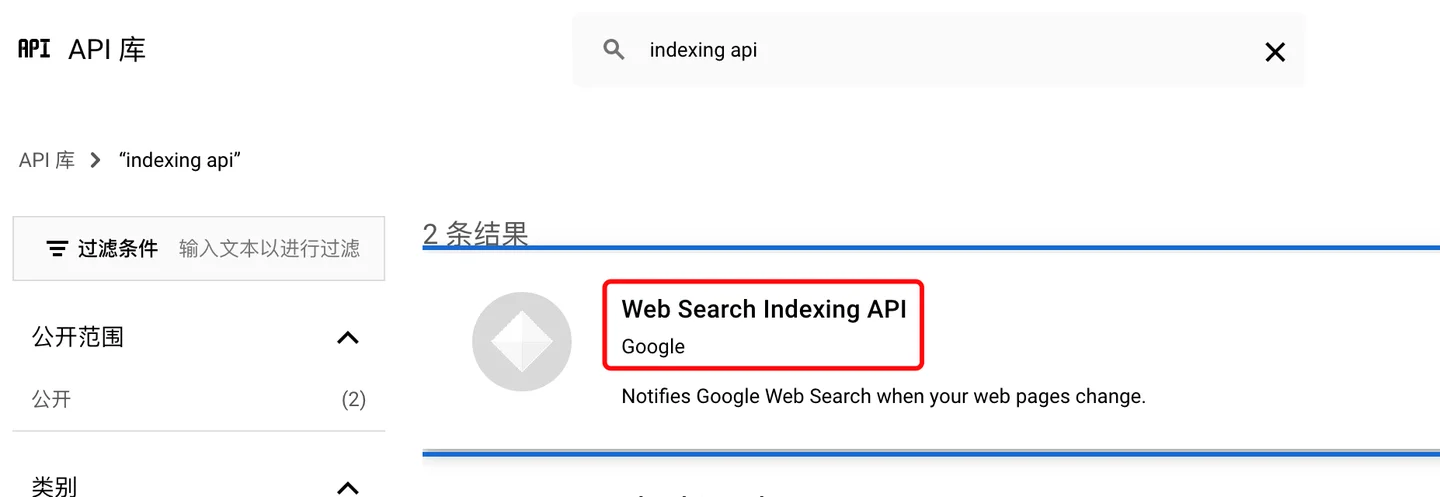
In the product details, click the enable button to complete the enable operation.

From now on, you can use the Google Indexing API.
Add your service account as an owner of your Google Search Console resource
As the initial prompt indicates, you need to register and verify your website using Google Search Console (if you have not done so already), which is very simple, and no further explanation is needed.
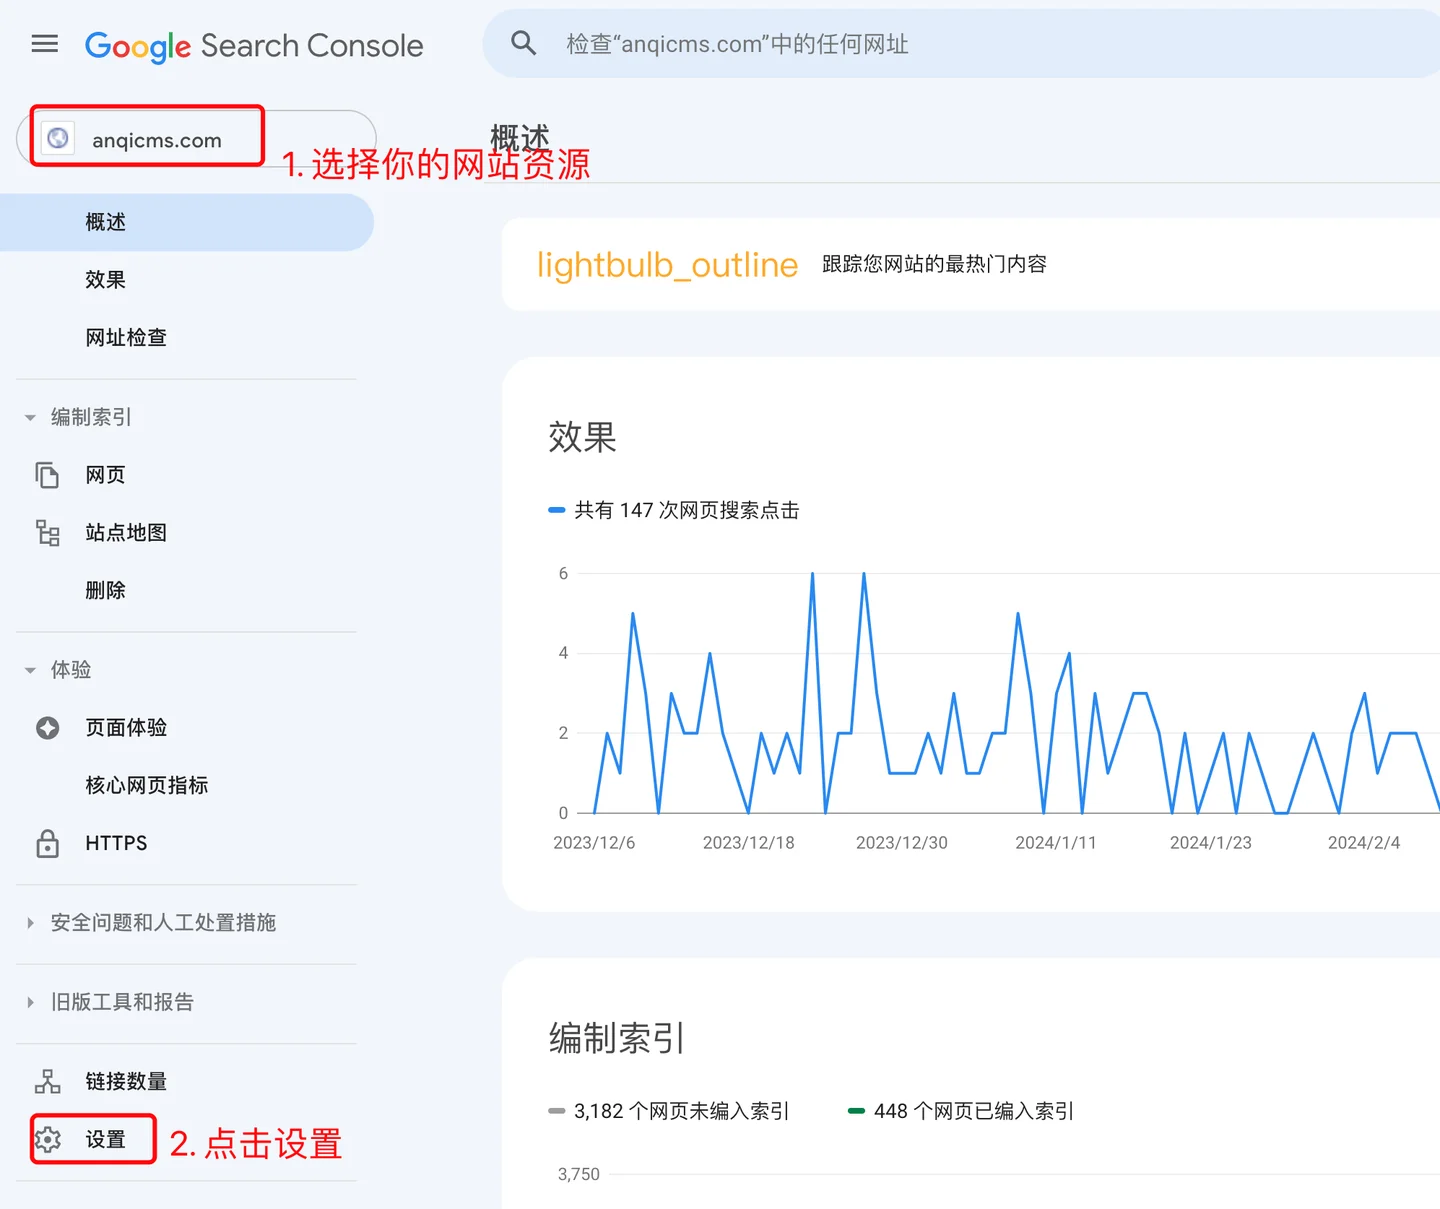
Open Google Search Console, address: [text](https://search.google.com/search-consoleSelect your resource on the left (if prompted), then click the settings near the bottom:
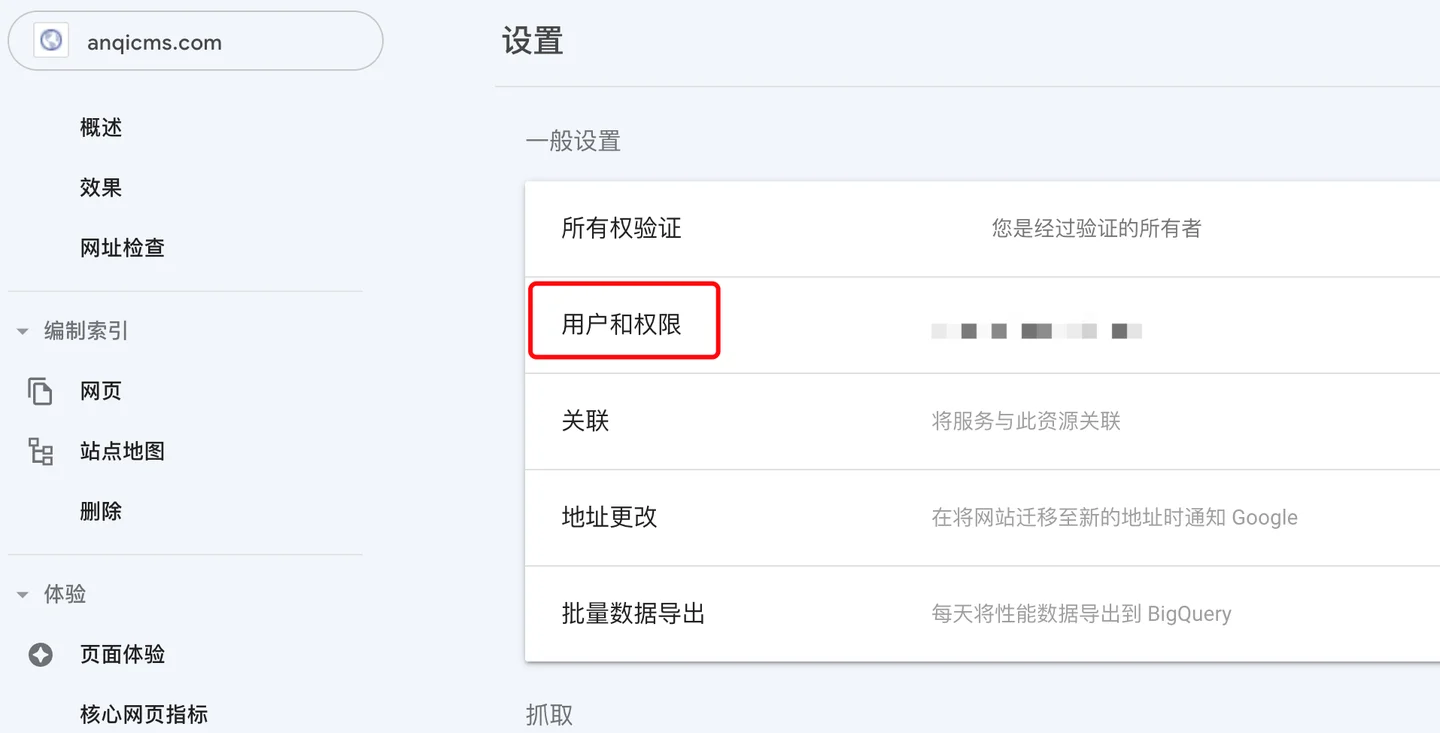
Click on Users and Permissions:
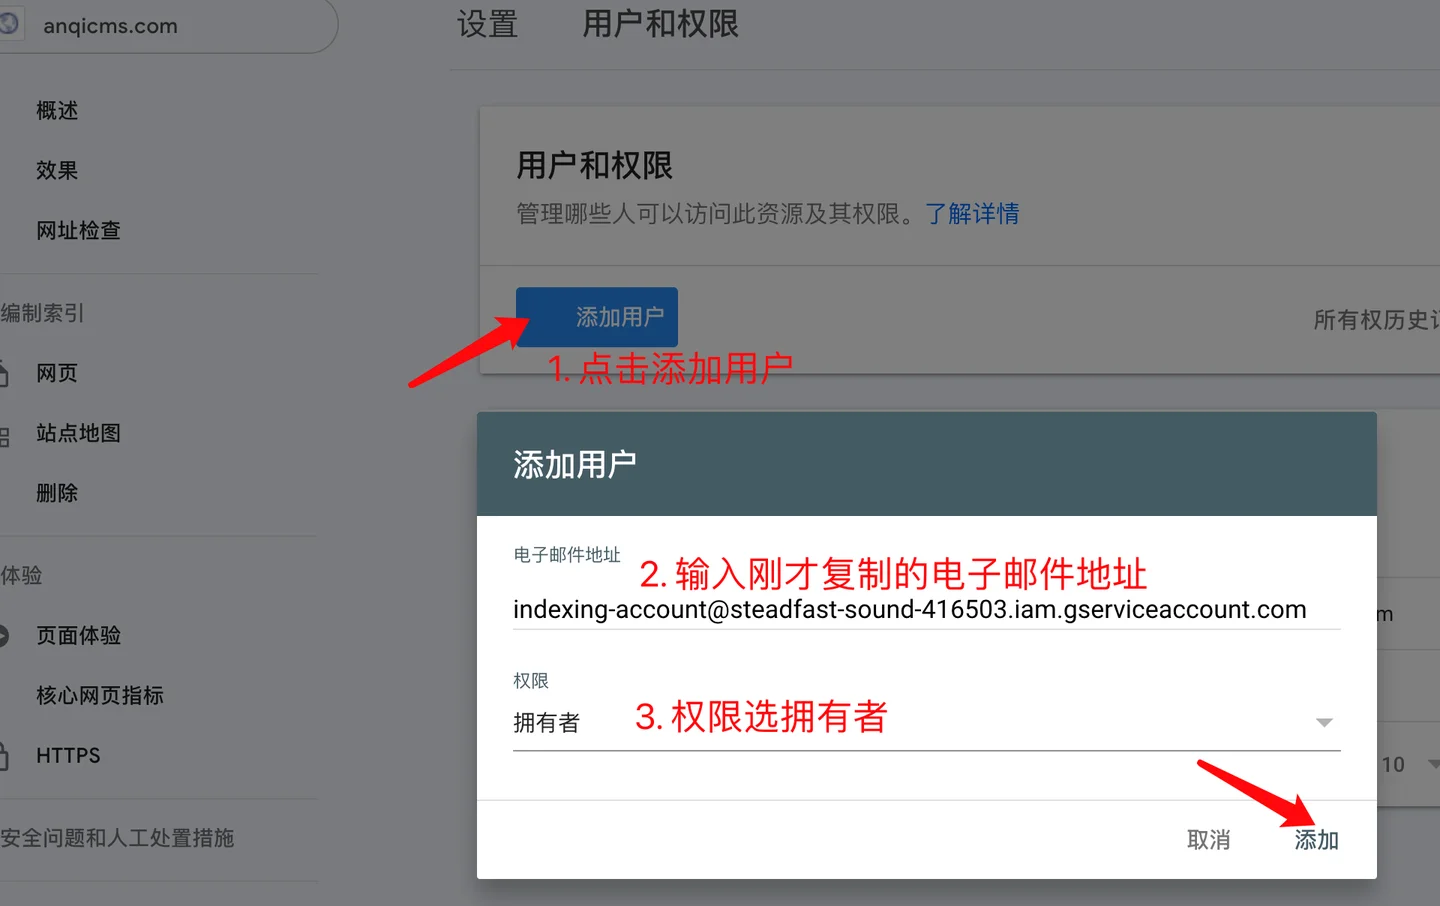
Click the [Add User] button at the top right, enter the email address you just copied in the pop-up dialog box, and select Owner for permissions.
You should now see the service account listed as the new owner.
You can use a single project, service account, and JSON API key across multiple sites, just make sure to add the service account as the owner of all sites in Search Console.
Important reminder: If you want to use the JSON API Key you applied earlier on different websites, you must repeat the operation of adding the service account as an owner in the corresponding Search Console for each website.
Download and use Google Push Assistant
For software licensing, please contact WeChat: wangzhenglei83 Phone number: 13613852792
Run googleindex.exe, you need to set up Proxy IP before using the push task.

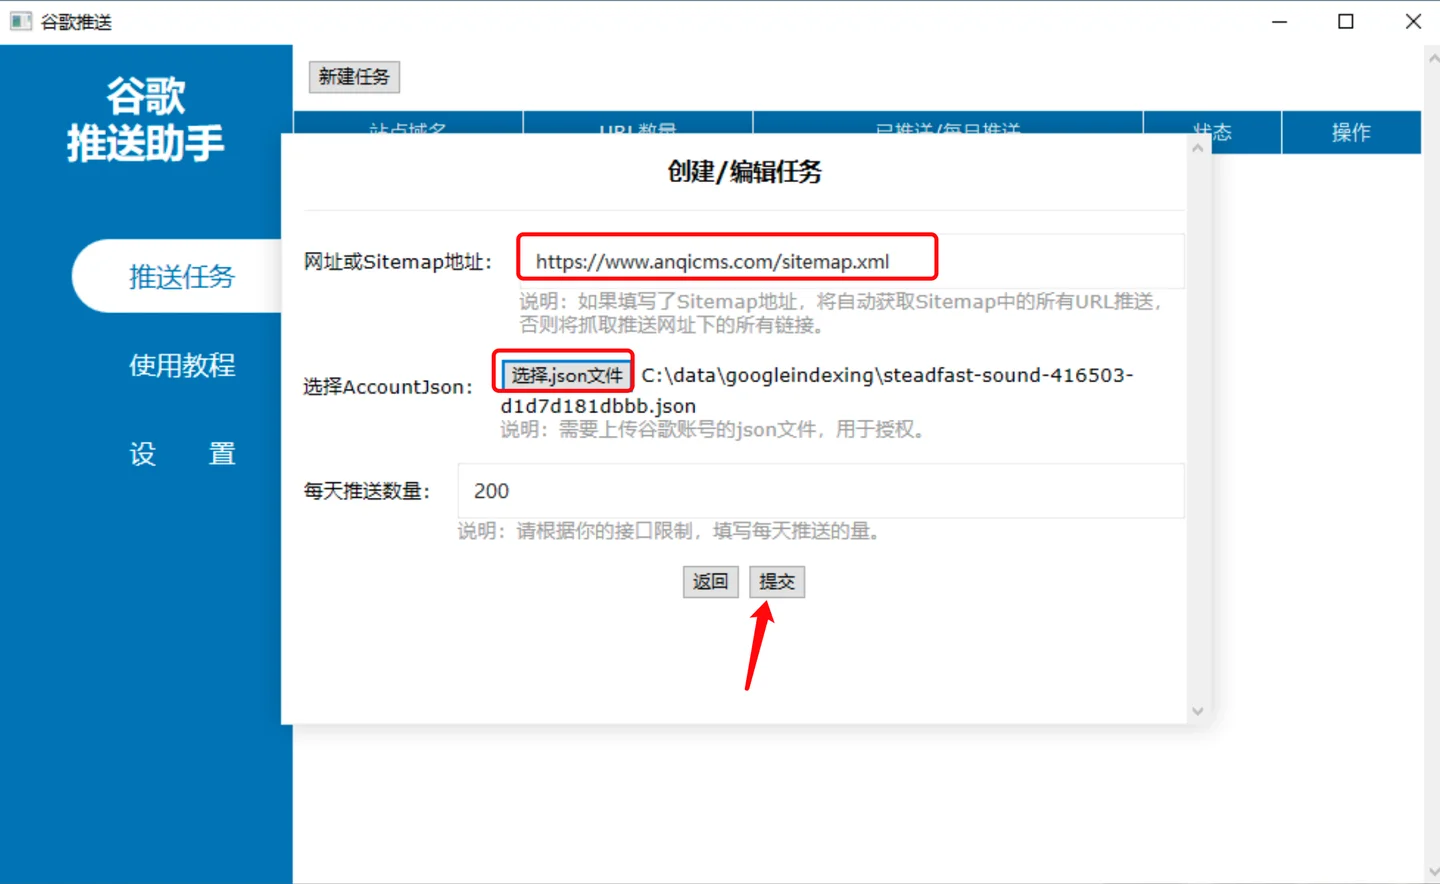
Click on the Push Task, create a new task, fill in the Sitemap address in the pop-up window, if the website does not have a Sitemap, fill in the website address as well, it will automatically generate a Sitemap, but it is best to fill in the Sitemap address.Select AccountJson, this JSON is the one just downloaded.Enter the number of daily push notifications, this number has a certain quota limit, fill in according to the actual limit.The default is 200.
This task has been added, and you can now view the push results in the results.